Official OpenVPN Connect client program

OpenVPN Connect for Windows

This is the official OpenVPN Connect client software for Windows developed and maintained by OpenVPN Inc. This is the recommended client program for the OpenVPN Access Server. The latest version of OpenVPN for Windows is available here.

If you have an OpenVPN Access Server, it is recommended to download the OpenVPN Connect client software directly from your own Access Server, as it will then come preconfigured for use. The version available here does not come preconfigured, but you can import a connection configuration into it. It can also be used to update an existing installation and retain settings.

Download OpenVPN Connect v3

sha256 signature: 3372a2872bf5609b2fd6eca832090aeb91aa1507276f39839789d7851a657636

For Windows 7, 8, 10, and 11.

Note: Windows 7 and 8 are not officially supported anymore.

A 32 bits version is also available:
Download OpenVPN Connect v3 for 32 bits

sha256 signature: fb4efcca3894b13aa7e786e08206c0e1e26c25c538dce9db49e9e609d7d5db1a


Previous generation OpenVPN Connect V2 is available here:

Download OpenVPN Connect v2.7.1

sha256 signature: f65dd0ea784dd63632be64f89b1f83d51c199fd7319888883780cb9e975c325a

For Windows 7, 8, and 10.

The Interface

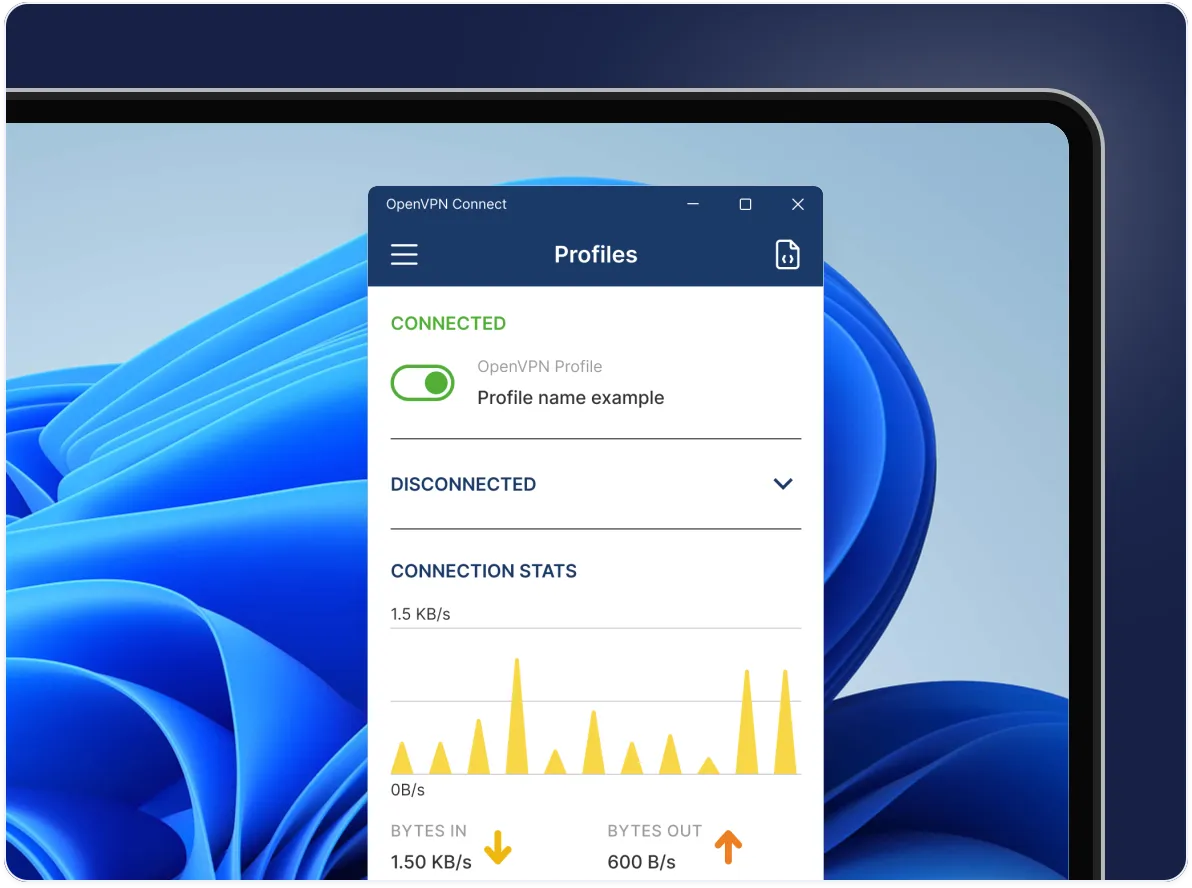
Our latest line of OpenVPN for Windows (OpenVPN Connect) software available for the major platforms features a new and improved user interface, making the experience of installing and using the OpenVPN for Windows software a snap. With an easy to use import feature you can import profiles straight from your OpenVPN Access Server or just import a saved profile from disk.

Frequently Asked Questions

Yes, you may continue to use both v2 and v3 on the same connect device and import the profiles desired into each. If you like, you can run either one or both.

No, the client cannot connect to multiple servers at once. It does support multiple connection profiles, giving you the option to switch easily from one server to the next, but you can only be connected to one at a time. This is by design, to prevent unexpected traffic paths when connecting to multiple VPN servers at the same time. If you are a system administrator and you require a complex setup where multiple connections are active at the same time, there is the option to use the open source community OpenVPN client software available from our website.

The OpenVPN client v1 was called “OpenVPN Desktop Client” and is no longer available. It is also not safe to use this anymore as it hasn’t been maintained for many years. It was replaced with the OpenVPN client v2. The OpenVPN client v2 is called “OpenVPN Connect Client” and has been in use for many years. It is still available from our website. You can download it from the direct link new the top of this page. The OpenVPN client v3 is called “OpenVPN Connect” and is the latest generation of our software. You can download it with the link above. It is also offered in the OpenVPN Access Server client web interface itself.

This is the official OpenVPN Connect software for Windows workstation platforms developed and maintained by OpenVPN Inc. This is the recommended client program for the OpenVPN Access Server. The latest versions are available on our website. If you have an OpenVPN Access Server, you can download the OpenVPN Connect client software directly from your own Access Server, and it will then come pre-configured for use. The version available here contains no configuration to make a connection, although it can be used to update an existing installation and retain settings.

  1. Download the MSI file
  2. Open and start the setup wizard.
  3. Give permissions to install on your Windows OS.
  4. Complete the OpenVPN Connect Setup Wizard.
  5. The OpenVPN logo displays in your tray (bottom right) with DISCONNECTED status.
  6. Click on the icon to start the Onboarding Tour.
  7. Review how to import a profile from a server by entering the Access Server Hostname and credentials or uploading a profile from your computer.
  8. Agree to the data collection use and retention policies after reviewing them.
  9. Import a profile, either from the server or from file.

  1. Navigate to your OpenVPN Access Server client web interface.
  2. Login with your credentials.
  3. Select ‘OpenVPN Connect for Windows’.
  4. Wait until the download completes, and then open it (specifics vary depending on your browser).
  5. Click Run to start the installation process.
  6. Click Yes to approve the privilege escalation request.
  7. Wait until the installation process completes.
  8. In the system tray, the OpenVPN Connect Client is now ready for use.

  1. From the OpenVPN Connect UI, choose “Import from Server”.
  2. Enter your Access Server Hostname, Title, Port (optional), and your credentials--username and password.
  3. Click Add.
  4. If you choose to Import autologin profile, it is less secure, but you won’t need to re-enter credentials.

  1. Choose “Import from File”.
  2. Drag and drop a .OVPN file or click on Browse to navigate to the location on your computer.
  3. The message displays that the profile is successfully imported and displays the hostname and the title. You can change the title if desired.
  4. Click on Add to complete the import.

Layer 2 bridging (TAP) is no longer supported. Switch over to TUN Mode to resolve this issue.

OpenVPN Access Server starts with a self-signed certificate. With this, you will receive warnings from your web browser about the site not being secure as well as a certificate error when importing a profile with the Connect Client. You can simply override the warnings or add an exception for your web browser. To resolve this, you can set up a DNS host name that resolves to the public address of your Access Server and install a valid SSL certificate that corresponds to that DNS host name. Going forward, you would use that hostname to access your server instead of the IP address. This is also the recommended method as validated SSL certificates can only ever function with a valid public DNS hostname.

Your Access Server Hostname is the address at which your Access Server can be reached. For example it could be https://vpn.yourcompany.com/. If a DNS hostname is not set up, it is also possible to specify the IP address where your Access Server. For example: https://55.193.55.55 Your credentials are your username and password. You may need to get that information from your Access Server administrator if you don’t know it.

Title is the name for the profile. It is automatically defined as the username with the hostname or IP address(example: user1@hostname). It differentiates between multiple profiles. You can define it manually as well. The title can be anything you want just so you can see which profile is which.

Choosing this option allows you to import an autologin profile with the address and credentials for your Access Server, then simply start the connection with the tap of a button. You would not need to re-enter credentials each time you connect. The autoprofile itself contains an embedded secure certificate that identifies and authorizes your connection automatically. It is an optional setting on the OpenVPN Access Server that the administrator of the server can choose to make available to you. If you find you cannot import the autologin profile, your administrator may not have allowed autologin through user permissions.

During investigation of a vulnerability called VORACLE, it was found that using compression to make the data that goes through the VPN tunnel smaller, and thus faster, has an adverse effect on security. To learn more about this see our security notification on our website regarding the VORACLE attack vulnerability. In order to protect our customers, we are disabling compression by default. Some servers of the open source variety can be configured in such a way that the client must do compression, or else the client may not connect successfully. In such a case, you should get the server updated to disable compression. But we understand that this is not always possible, and you may need to be able to connect to such a server. In that event you can go into the settings and re-enable compression.

  • OpenVPN Connect v3 supports Windows 7, Windows 8, Windows 10, and Windows 11.
  • OpenVPN Connect v2 supports Windows Vista, Windows 7, Windows 8, and Windows 10.
  • For Windows XP, you’ll need to get an open source client from the Open Source Community.

How to get OpenVPN Connect from your OpenVPN Access Server: