Tutorial: Secure All Internet Traffic by Configuring a Private Network as an Internet Gateway
This tutorial shows a means of securing your internet traffic by tunneling all traffic from your users to CloudConnexa and then using a private network as the exit point for the internet traffic.
Overview
Follow the steps in this guide to learn how to set up secure internet access for your users with an egress network that acts as an internet gateway.
In this document, we examine a WPC setup to meet the needs of a fictitious company. A startup has headquarters located in California, USA. They have virtual Sales offices in some of the major cities in America. Their sales force is often at customer sites or traveling to customer sites. They access the Internet from hotels, cafes, airports, and other public Internet sites. The sales team relies on SaaS tools like Gsuite and Salesforce.
Owen is in charge of IT and Networking for this company. Owen is cognizant of the security risks that come with the use of public hotspots to access the Internet and is looking for a WPC solution that the sales team can use for secure access to the Internet. He does not want to manage, install and maintain WPC servers but wants to ensure that the company has control over the interconnection to the Internet so that additional protections (for example, the use of CASB) can be added later.
Owen is aware that a few of the many benefits of using CloudConnexa are DNS security and control over the Internet access route and signs up to use CloudConnexa.
Owen completes the signup process as shown here. During the signup process, Owen selects technop.openvpn.com as the web domain for the User portal. This domain uniquely identifies the WPC that will be set up by Owen and is used by Connect Client applications (WPC Client software) to identify the WPC that it needs to connect to.
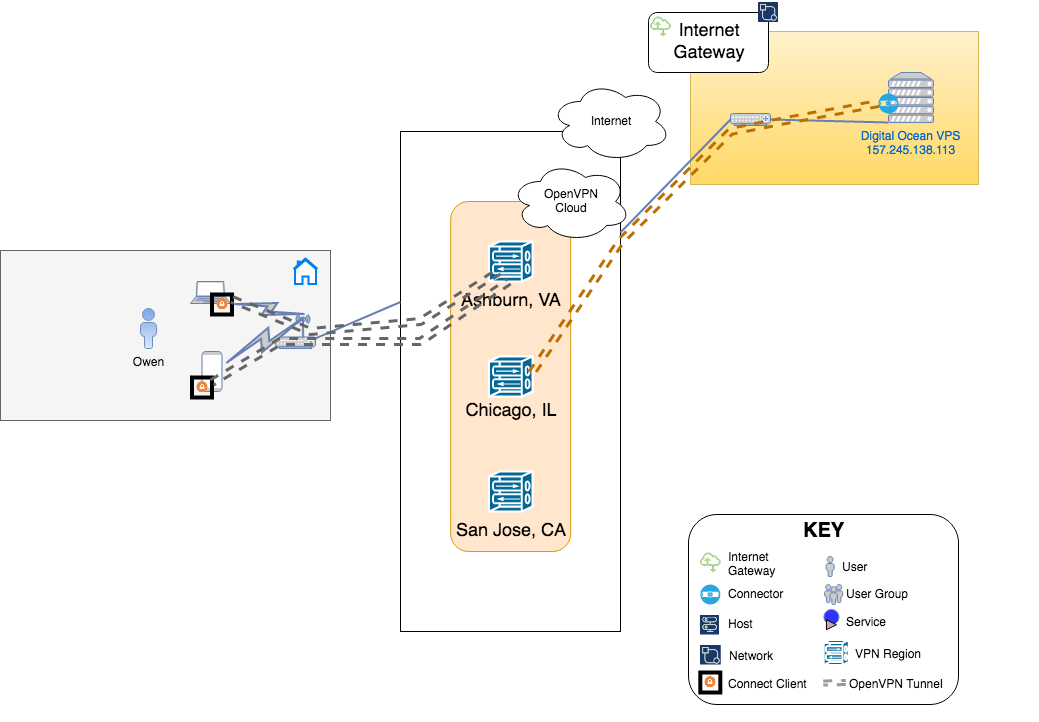
Illustration of WPC
Setup
Owen followed the steps shown below to set up his WPC to accept traffic to the Internet and route it to the Internet via a Network configured as Internet Gateway:
Configured a Network to act as Internet Gateway. As this Network’s sole purpose is to act as an internet gateway, Subnets for the Network was not added and Internet Gateway was turned ON. See, How to add a Network and Adding Internet Gateway
Next, Owen decided to run a server to install the Connector and act as the Internet Gateway with a public IP address of
157.245.138.113. See, Connecting Networks to CloudConnexa Using Connectors on how to install Connectors and the corresponding settings to enable routing. We recommend using Linux operating system.After the Network came online, Owen changed the Internet Access setting for User Groups to Split-Tunnel OFF. See, Changing User Group’s Internet Access
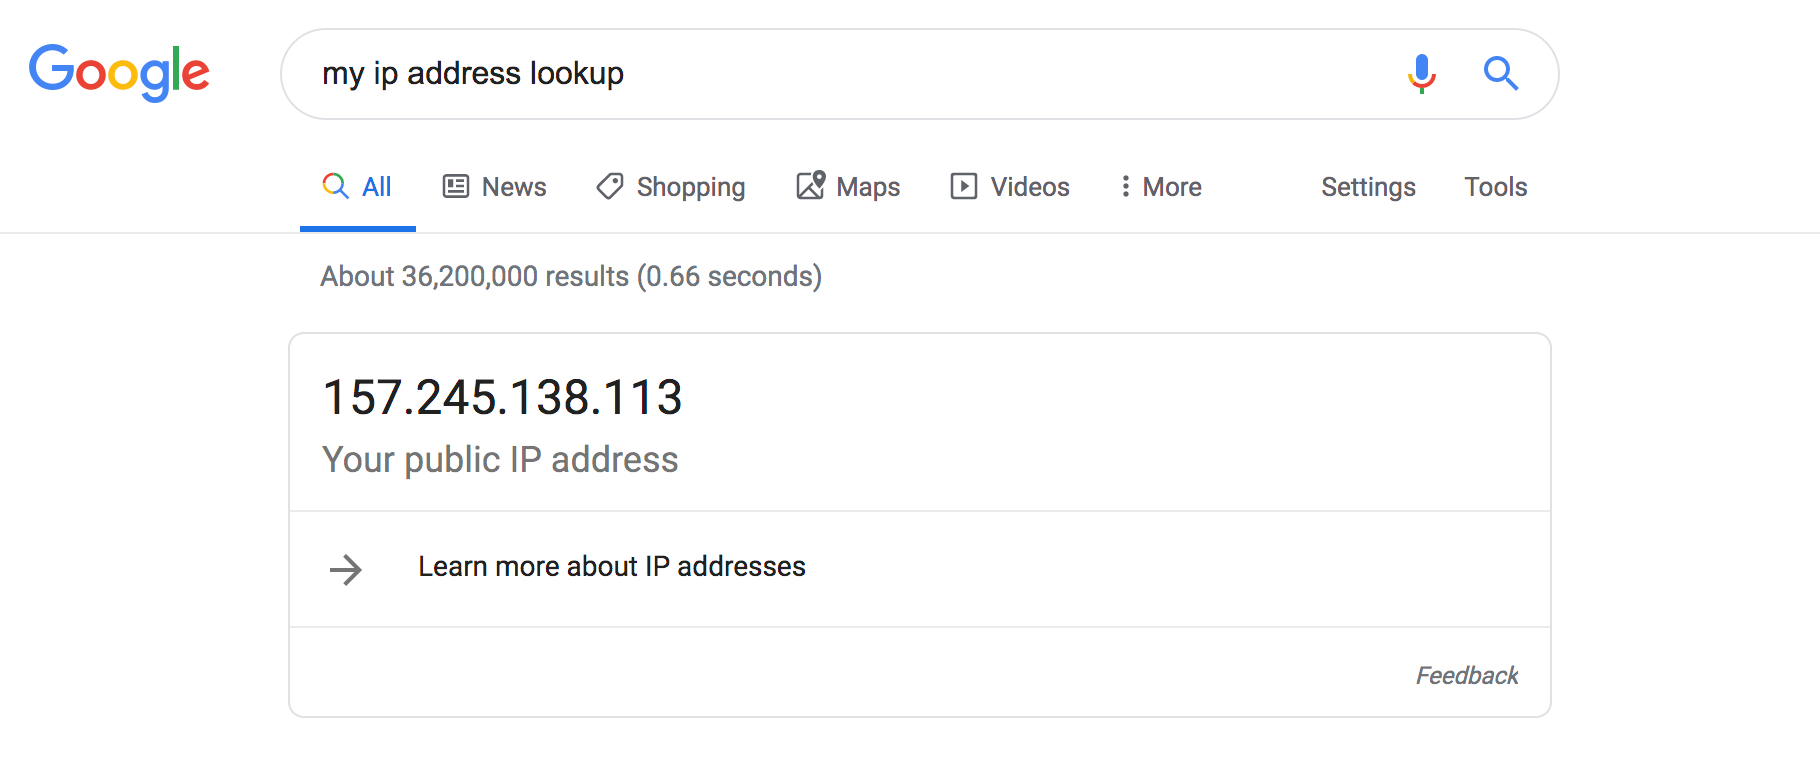
Owen connected to CloudConnexa (see, Connecting to CloudConnexa). On connection, Owen checked that the public IP address of his Device running the Connect Client and connected to CloudConnexa showed up to be the same as the public IP address of the Connector instance proving that the setup is working as configured.
Confident that the setup is correct, Owen proceeded to add employees as Users using their email addresses. See, Adding a User
Tutorial: Block All Internet Traffic Except To Trusted Internet Destinations
Tutorial: Learn About the Levels of Security Afforded by the Use of Various Internet Access Options
Tutorial: Protect Your Users From Malware and Other Cyber Threats
Tutorial: Secure All Internet Traffic by Configuring a Private Network as an Internet Gateway
Tutorial: Use Multiple Geographically Distributed Internet Gateways to Improve Internet Performance
Tutorial: Steer Traffic To Specific Internet Destinations Through CloudConnexa