Tutorial: Use CloudConnexa for Remote Access to a Private Application
This tutorial shows the steps to use your application server as a Host and use CloudConnexa to access the application without connecting your entire private network to CloudConnexa.
Overview
In this document, we examine a WPC set up to meet the needs of a fictitious company. A startup has headquarters located in California, USA. They have virtual Sales offices in some of the major cities in America. Their sales force is often at customer sites or traveling to customer sites. They access the Internet from hotels, cafes, airports, and other public Internet sites. The sales team relies on SaaS tools like Gsuite and Salesforce.
Owen is in charge of IT and Networking for this company. Owen is cognizant of the security risks that come with the use of public hotspots to access the Internet and is looking for a WPC solution that the sales team can use for secure access to the Internet. He does not want to manage, install and maintain WPC servers but wants to ensure that the company has control over the interconnect to the Internet so that additional protections (for example, use of CASB) can be added later.
Owen is aware that a few of the many benefits of using CloudConnexa are DNS security and control over the Internet access route and signs up to use CloudConnexa.
Owen completes the signup process as shown here. During the signup process, Owen selects technop.openvpn.com as the web domain for the User portal. This domain uniquely identifies the WPC that will be set up by Owen and is used by Connect Client applications (WPC Client software) to identify the WPC that it needs to connect to.
Owen’s company has been using CloudConnexa for some time now. Owen gets an urgent request to make files and reports stored on a Windows computer available to the Sales team ASAP. It will be too time-consuming and costly to upload these files to Google Drive. Owen decides to leverage the CloudConnexa and provide secure access to these files by making the computer a CloudConnexa Host by installing the Connector app on it and running a simple web server on that computer.
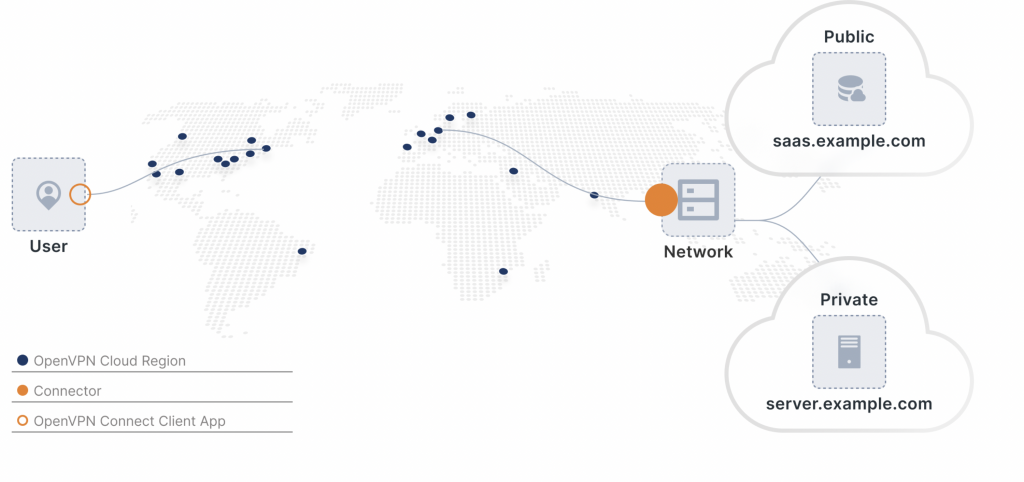
Illustration of WPC
Add a Host to the WPC
Note
Connectors for Hosts are available for Windows, macOS, and Linux. In this example, Windows Connector is installed.
Owen took the following steps to make the files available on a private Windows Server to the sales team via WPC:
Owen logged into the Admin Portal and configures a Host named ‘ReportServer’ and associated Connector. The IP address that will get assigned to the Connector is also shown. In this case, the IP address of 100.64.1.3 got assigned. This IP address remains static and is not dependent on the Region selected for the Connector. This WPC IP address can be used to reach the Host. See, Adding a Host
Owen then downloaded the Connector app for Windows and installed it on the computer containing the files. See, Installing Connector for Windows
To make the files available, Owen set up a simple web server on the computer and opened the Windows firewall to accept incoming connections as shown in Installing Connector for Windows
Owen connected to CloudConnexa cloud (see, Connecting to CloudConnexa) and opened the browser to the WPC IP address of the webserver.
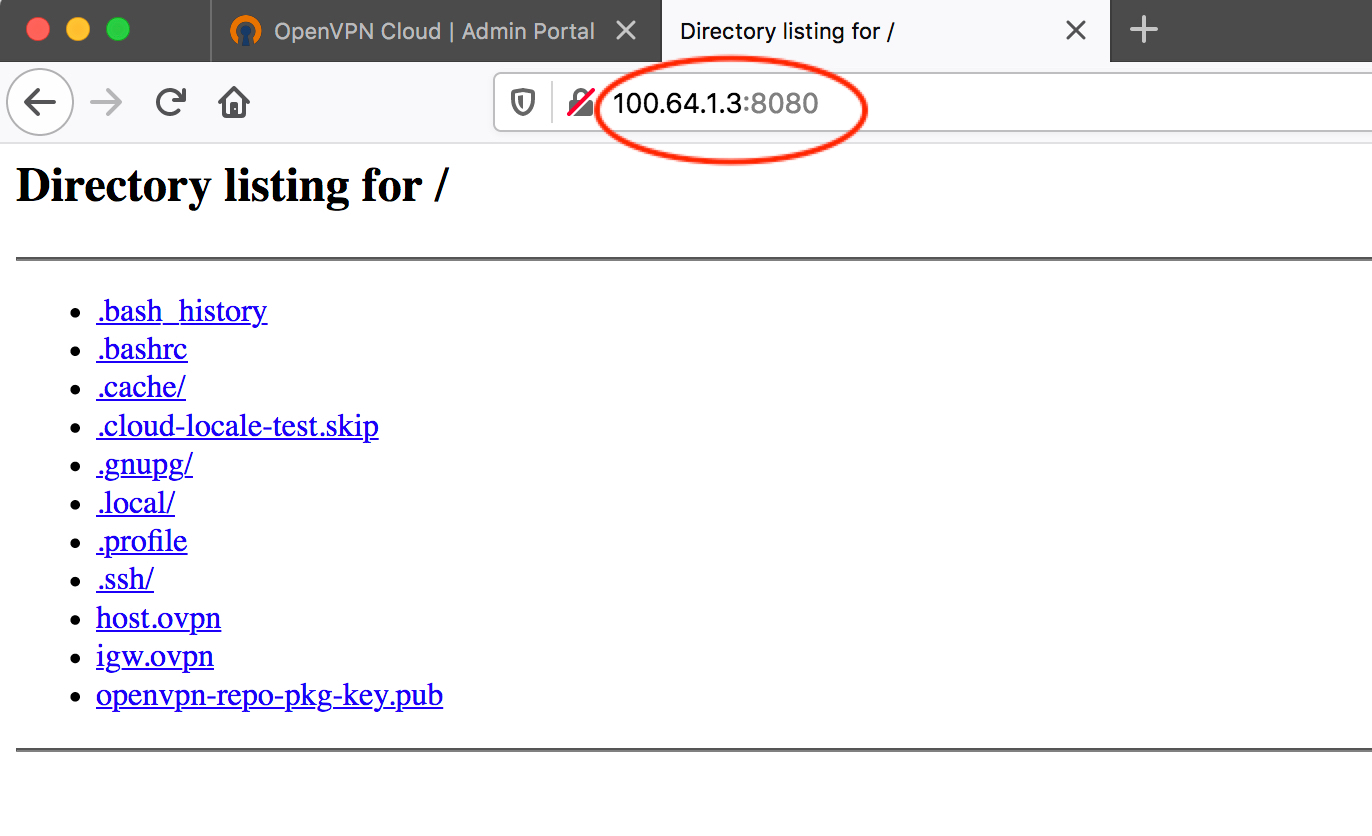
Confident that files can now be downloaded, Owen distributed the URL to his Sales team.
Tutorial: Use CloudConnexa for Secure Access to Your AWS VPC
Tutorial: Use CloudConnexa for Zero Trust Network Access (ZTNA)
Tutorial: Use CloudConnexa for Remote Access to a Private Application
Tutorial: Use CloudConnexa To Provide Remote Access to an Application With Load Balancing
Tutorial: Deploy Multiple Connectors To Increase the Performance and Availability of Remote Access
Video: Use CloudConnexa for Zero Trust Network Access to Private Applications on Your AWS VPC
Video: Use CloudConnexa to Remotely Access Your Home Network
Video: Use CloudConnexa to Connect to Your Remote Desktop Server
Video: Use CloudConnexa for Zero Trust Network Access to a Public SaaS Application
Video: No Incoming Connections To Your Network Prevents Denial of Service Attacks
Video: Application Domain-Based Routing Segments Your Network
Video: Application Domain-based Routing Allows IP Addresses to Overlap
Video: Automatic Network Segmentation Limits Lateral Movement