Tutorial: Install a Connector on Windows
This tutorial shows you how to install the OpenVPN Connect app with the bundled Connector profile on your Windows computer. The Windows computer can then be used as a Host without connecting the rest of the network to CloudConnexa or as a Network Connector making the applications on the entire network accessible.
Installing a Connector for Windows
In order to use a computer on a private Network, running Windows operating system, as a CloudConnexa Host so that CloudConnexa Users can access services running on it, follow the steps below:
Sign in to the CloudConnexa Administration portal at https://cloud.openvpn.com
Navigate to Hosts and click (+) to add a new Host.
Give the Host and Connector a name, select a Region for the Connector, and click on the checkmark icon to complete configuration.
Note
The Connector has been assigned a WPC IP Address
100.96.1.66Click on the download icon next to the Connector to show the various download options.
Click on Download Connector App for Windows option.
You can click on the Download if you want to download and install the Connector on the computer that you are working on or you can click on Copy URL button to open the URL in the browser of the target Windows computer so that the software gets downloaded directly on that computer.
Go to the Windows computer and paste the URL in the browser to start downloading the OpenVPN Connect Client and its bundled Profile. This has to be done within 15 minutes of URL generation.
Click on the downloaded installer to start the installation process.
Click on the Run button of the security warning. Note that some versions of Windows may also display a warning that the driver is not signed. Continue the installation in spite of the warning.
Click on the Next button to start the OpenVPN Connect set up Wizard.
Accept the terms in the License Agreement by clicking on the checkbox and click on the Next button.
Click on the Install button to begin the installation.
Installation progress will be shown, click on the Finish button to exit the set up Wizard.
You will see the OpenVPN Connect icon in the system tray. Launch OpenVPN Connect from your application menu.
Click on the Profile that is already present to connect to your CloudConnexa.
Optional: Windows firewall settings
If you are running any other application or service on the Host, the windows firewall needs to be configured to allow access to the service.
The example below shows how to allow access to a web server running on port 8080 by using netsh
netsh advfirewall firewall add rule name="TCP Port 8080" dir=in action=allow protocol=TCP localport=8080
For more on firewall configuration, see https://support.microsoft.com/en-us/help/947709/how-to-use-the-netsh-advfirewall-firewall-context-instead-of-the-netsh

Optional: Remote desktop connection
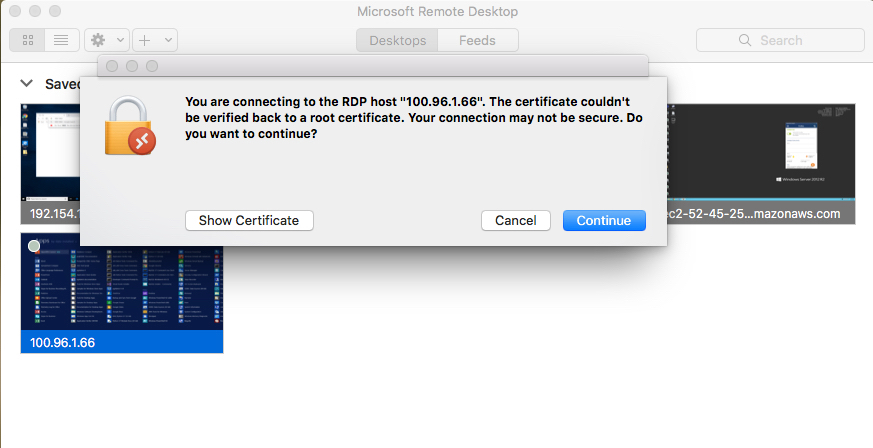
If the Windows computer you installed the Connector on is running Remote Desktop Service, you can configure an RDP connection by using the WPC IP Address of the Connector (in this example, 100.96.1.66). The screenshots below show a macOS computer, that is connected to CloudConnexa, configuring an RDP connection and connecting to the Windows Host.

Optional: If the Connector is for a Network instead of a Host
Please see Connecting Networks to CloudConnexa Using Connectors for information on actions needed to be taken outside the scope of CloudConnexa to enable proper routing of traffic between your private Networks and WPC clients