Connect to CloudConnexa
Instructions for users to connect to CloudConnexa using the OpenVPN Connect application.
To connect to CloudConnexa, you need an OpenVPN tunneling protocol-compatible client software installed on your device and a CloudConnexa Connection Profile.
OpenVPN Connect is free client software for Android, iOS, macOS, and Windows, available for download from Get OpenVPN Connect. For Linux, refer to OpenVPN 3 Linux Client.
To get the CloudConnexa Connection Profile, refer to Import CloudConnexa Connection Profile.
Your IT department can set whether you need to authenticate every time you connect, only when a specific time has elapsed after your past authentication, or not authenticate at all.
Your IT team can enable two-factor authentication while connecting or setting up CloudConnexa to use your corporate Single Sign On (SSO) system. We have covered all the various scenarios here.
Follow these steps to connect using OpenVPN Connect:
Launch OpenVPN Connect.
Toggle the OpenVPN Profile that you want to connect.
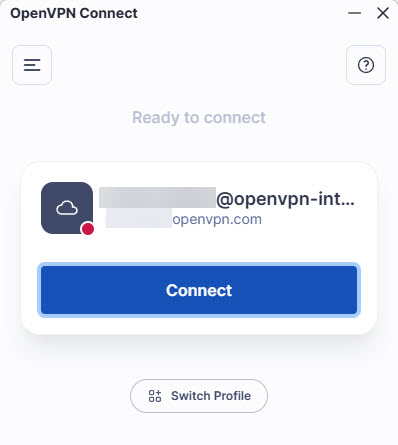
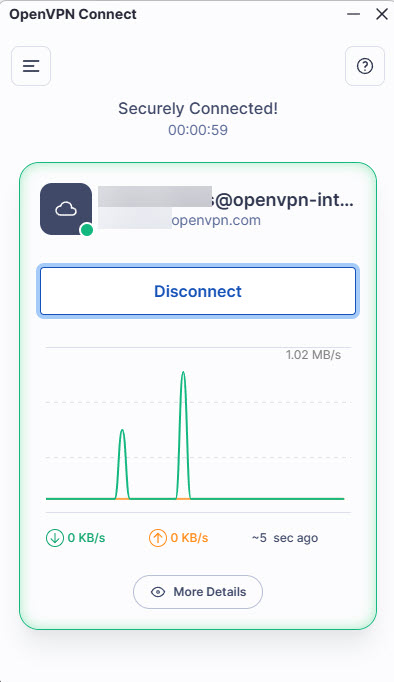
The OpenVPN tunnel is connected, and you will see the Connected screen.
Follow the steps below to authenticate before connecting:
Launch OpenVPN Connect.
Toggle the OpenVPN Profile that you want to connect.
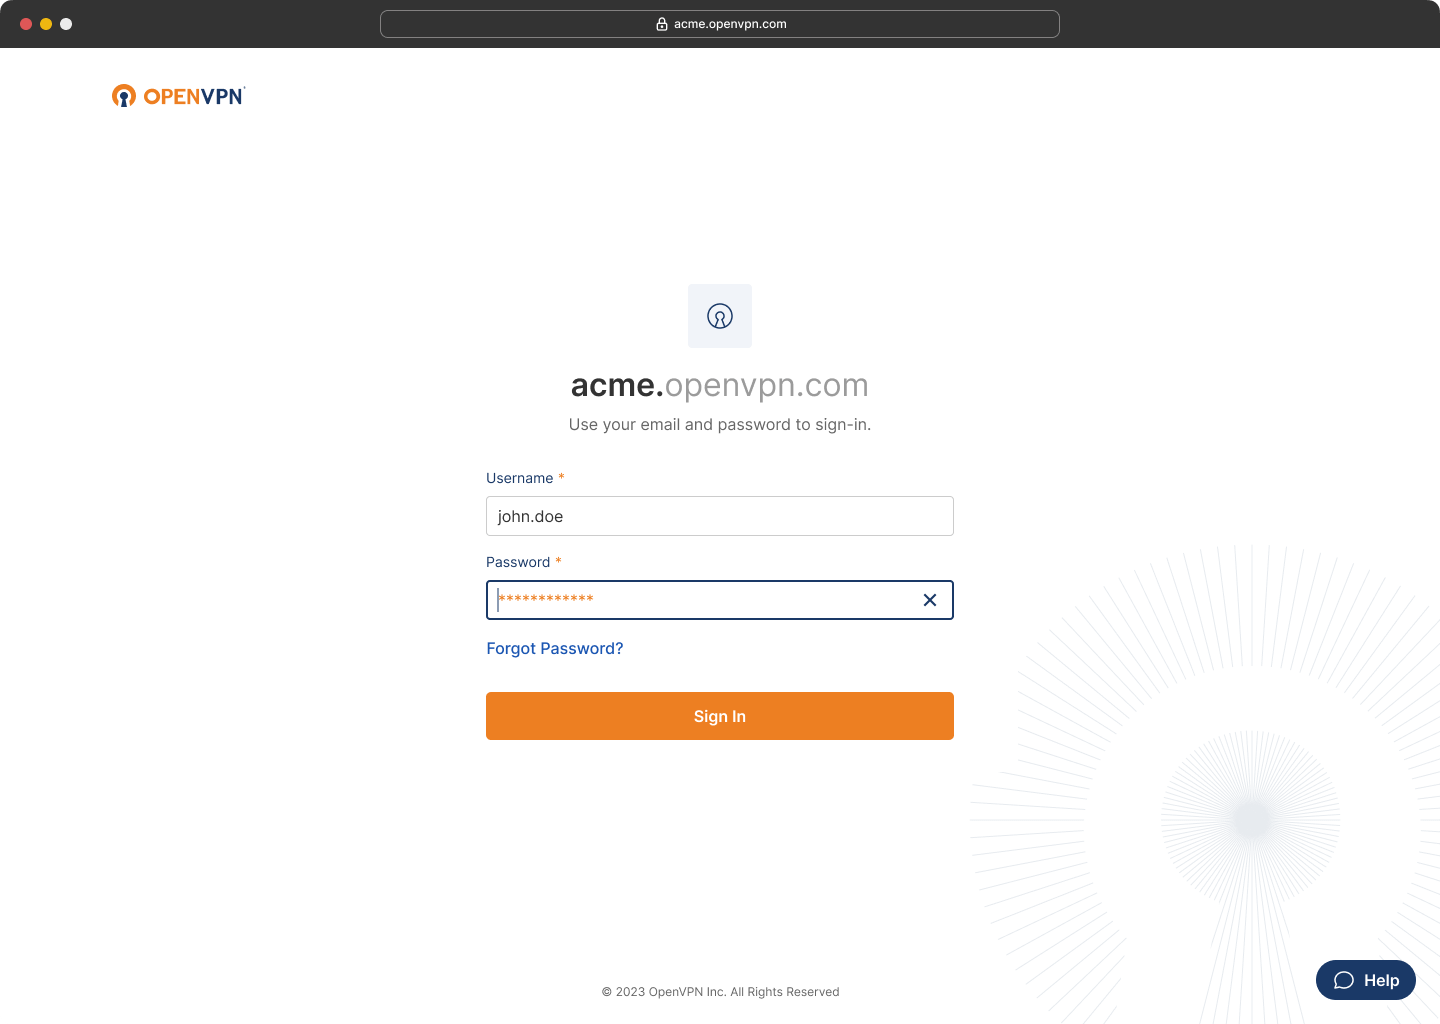
Your default web browser will open with the authentication screen, and the Connect application will display a prompt.
Enter your Username and Password and click Sign In.
Note
If your authentication is still valid, authentication will be skipped, and you will proceed from Step 5.
Note
If your password was reset and a temporary password sent, enter your username and temporary password and click Sign In. You will be asked to set a new password on the next page. Refer to Authenticating with a temporary password.
You may be prompted to enter a 2FA code using an Authenticator application. Enter the code and click Confirm. Refer to Authenticating with 2FA.
Note
If your 2FA code was reset, you may need to configure your Authenticator application and authenticate with the 2FA code. Refer to Configuring Authenticator App for 2FA
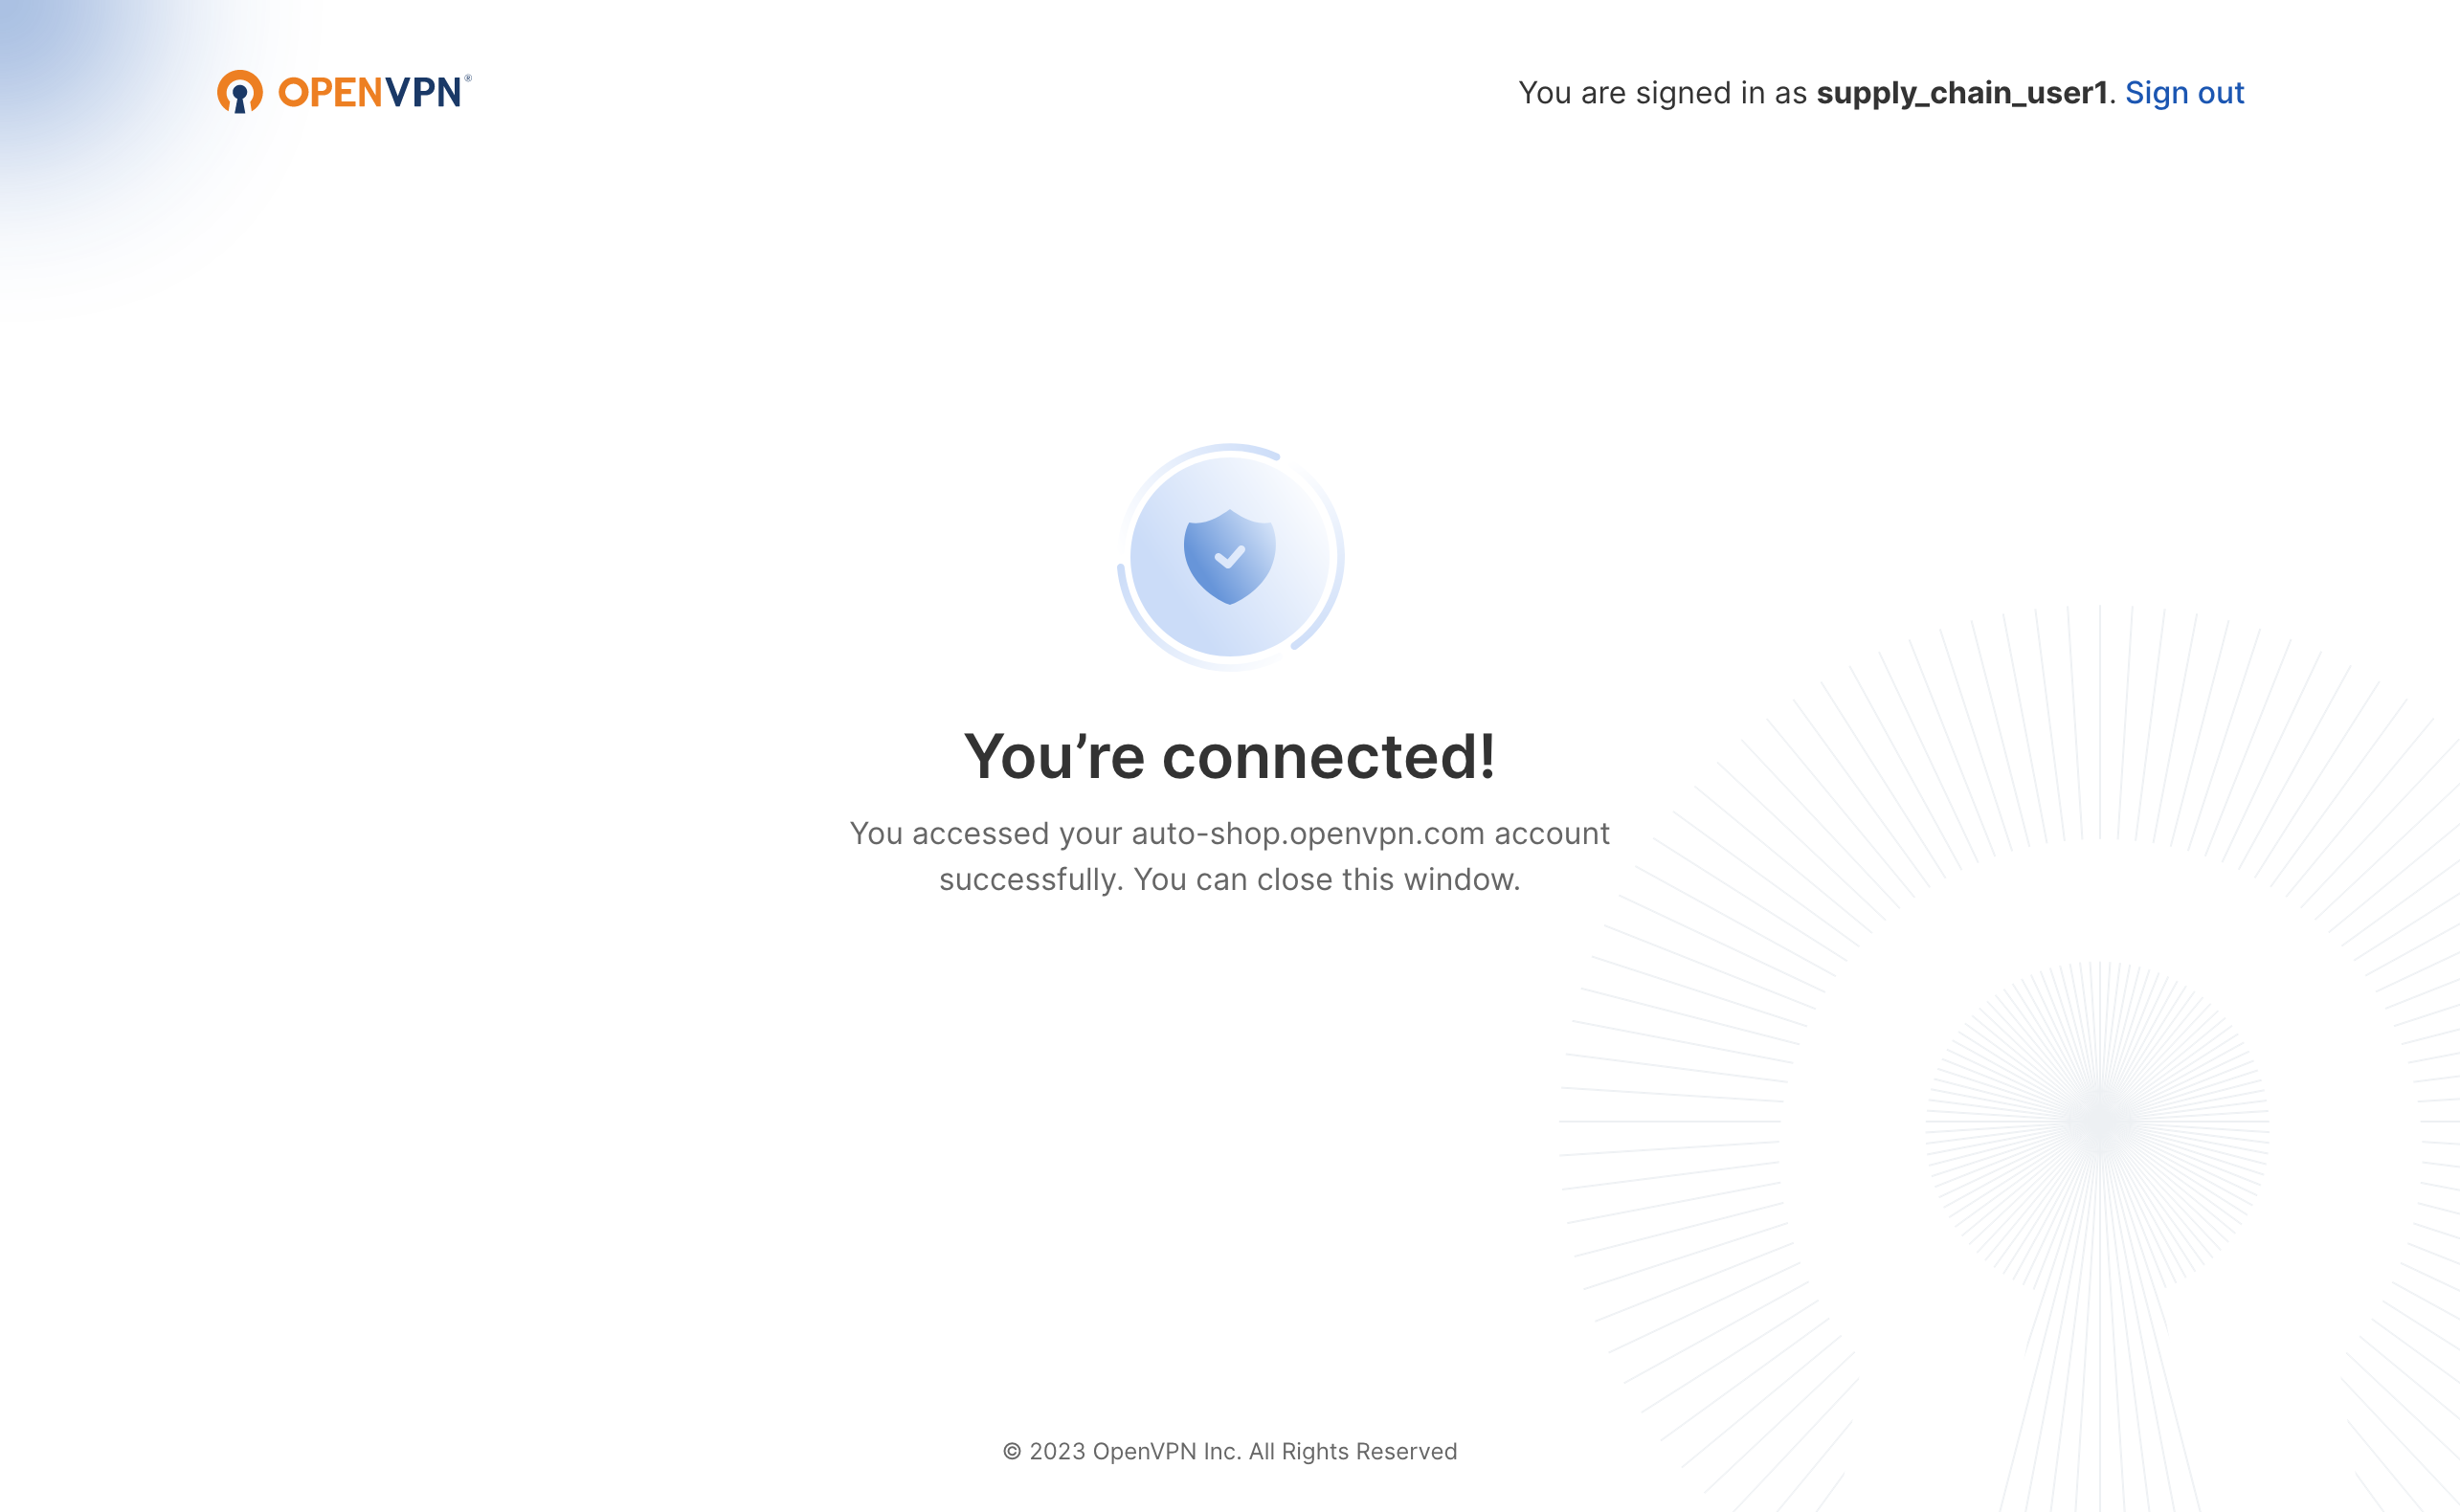
After successful authentication, you will see You're connected! in the web browser.
OpenVPN Connect will display the Connected screen.
Follow the steps below to authenticate before connecting:
Launch OpenVPN Connect.
Toggle the OpenVPN Profile that you want to connect.
The Connect application will display a prompt.
Your default web browser will open with the familiar SSO authentication screen. Authenticate as you usually do with any other SSO-enabled corporate web application.
Note
If your authentication is still valid, authentication will be skipped.
After successful authentication, you will see You're connected! in the web browser.
OpenVPN Connect will display the Connected screen.