
Tutorial: Get Started with Access Server
Overview
This tutorial helps you get Access Server running from start to finish. It doesn't repeat installation instructions. Instead, it guides you to the right deployment guide for your environment, walks you through initial configuration after installation, and points you to the next steps that matter most for your setup.
Access Server is a self-hosted business VPN solution. You install it on your own infrastructure — Linux, cloud, virtual machine, or container — and manage it through the Admin Web UI.
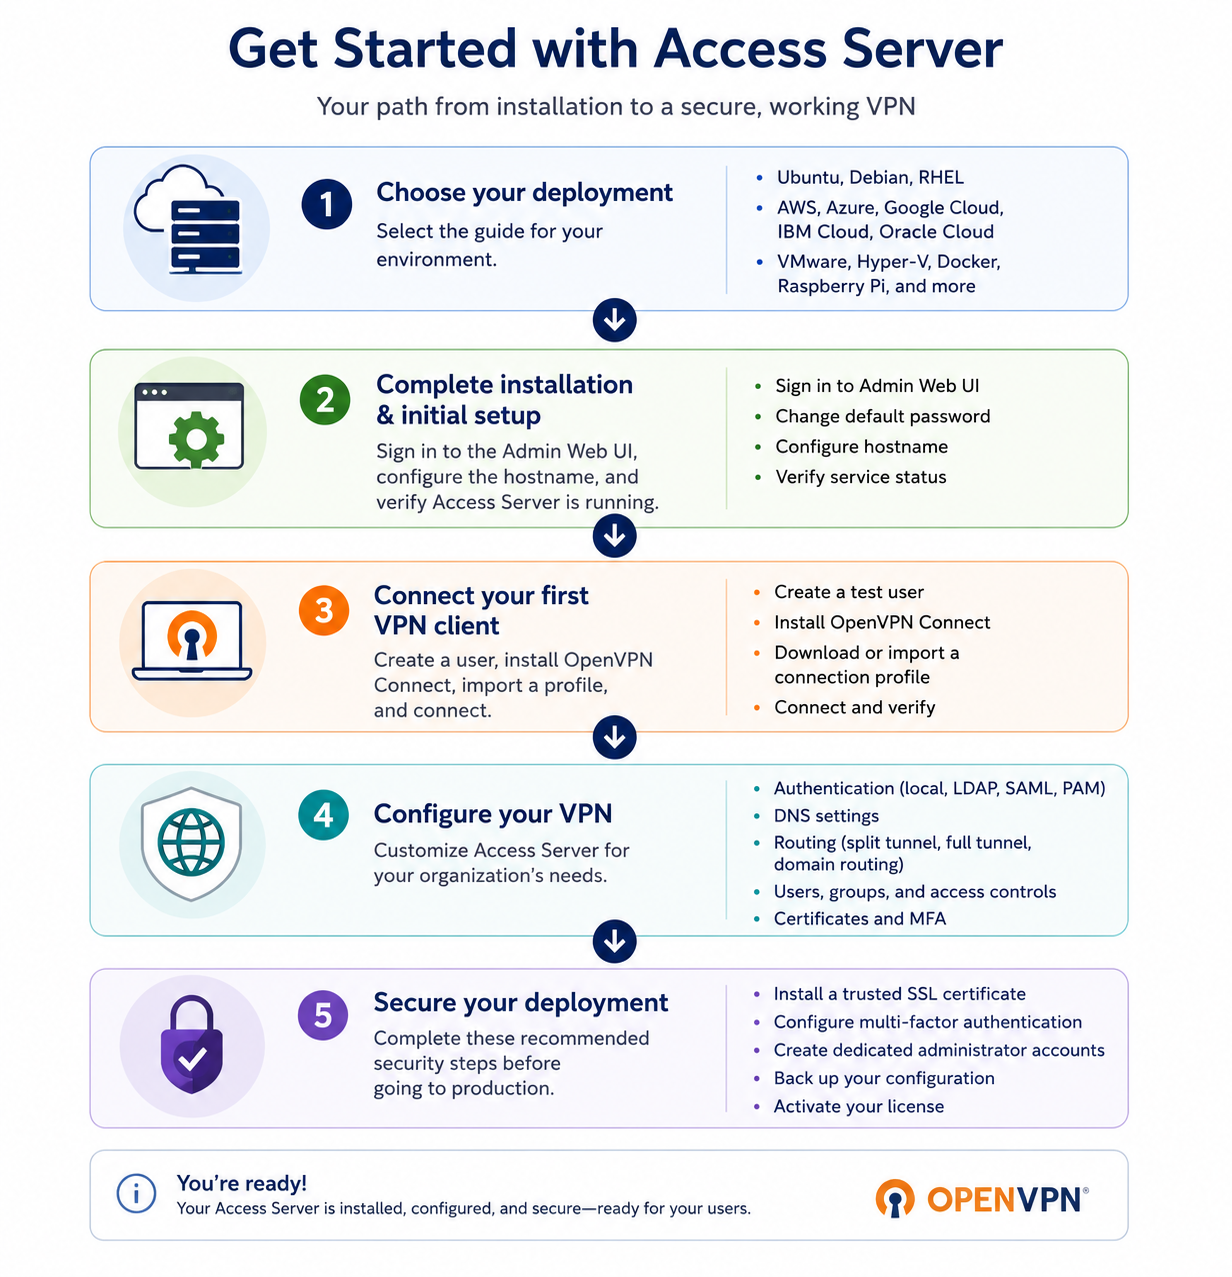
Step 1: Choose your deployment method
Use the table below to go directly to the right guide for your environment:
I want to deploy on... | Use this guide |
|---|---|
Ubuntu (recommended for most users) | |
Debian | |
Red Hat Enterprise Linux, Rocky Linux, or AlmaLinux | |
AWS (bring your own license) | |
AWS (pay as you go) | |
Azure (bring your own license) | |
Azure (pay as you go) | |
Google Cloud | |
IBM Cloud | |
Oracle Cloud | |
DigitalOcean | |
Vultr | |
VMware ESXi | |
Microsoft Hyper-V | |
Docker | |
Raspberry Pi | |
Access Server Link |
Complete the installation for your chosen platform, then return here for Step 2.
Step 2: Complete the initial setup
After installation, use the Admin Web UI to complete the initial Access Server setup.
The exact first-run sequence depends on your deployment method. Some cloud deployments can preconfigure administrative credentials, licensing, or a browser-trusted certificate during deployment.
1. Sign in to the Admin Web UI
Your installation or deployment output provides the Admin Web UI URL and initial administrative credentials. For a command-line installation, the output may look similar to:
Initial Configuration Complete!

You can now continue configuring OpenVPN Access Server by
directing your Web browser to this URL:
OpenVPN Access Server URL:

During normal operation, OpenVPN AS can be accessed via these URLs:
Admin UI: https://192.0.2.10:943/admin/
Client UI: https://192.0.2.10:943/
To login please use the "openvpn" account with "FKadk2254" password.

See the Release Notes for this release at:
   https://openvpn.net/vpn-server-resources/release-notes/
Open a browser.
Navigate to the Admin Web UI URL provided during installation. For example:
https://198.51.100.130:943/admin.If a certificate warning displays, continue to the site.
Enter the administrative username and password provided during installaion.
Review and accept the End User License Agreement to proceed to the Admin Web UI.
Activate Access Server, if required
Some new BYOL deployments require activation before you can access the rest of the Admin Web UI.
If Activate your Access Server displays:
Open the Access Server Hub in another browser tab or window.
Create a free subscription for your deployment.
Copy the new activation key.
Return to the Admin Web UI and enter the activation key.
Select Activate.
Your available VPN connections update based on the activated subscription, and you can continue with setup.
This mandatory activation step appears only on deployments that require activation.
3. Complete the Onboarding Wizard
On a fresh Access Server 3.2.2 or newer installation, the Onboarding Wizard can display during the first-run experience.
Select whether VPN clients should have:
Internet access through Access Server.
Access to private resources behind Access Server.
Both, if appropriate for your deployment.
If access to private resources is enabled, review the network CIDRs that Access Server detected.
Verify that the detected networks match the resources VPN users should access.
Keep only the networks that VPN users should be allowed to access.
Select Continue.
Review the OpenVPN Connect download offered by the wizard.
The wizard displays the download appropriate for the operating system of the device you're currently using.
Select Download.
Install OpenVPN Connect.
Return to the onboarding wizard.
Select Continue.
The wizard displays a prompt while it waits for a VPN connection.
Launch OpenVPN Connect on your device.
Connect using the profile included.
Confirm that the VPN connection succeeds.
Return to the Admin Web UI.
Select Finish Wizard.
After completing the wizard, the Admin Web UI opens and presents a short product tour covering:
The Client Web UI
Users
Access Controls
Authentication
Activation
4. Change the default password
Change the default openvpn admin password immediately after signing in for the first time:
5. Configure the hostname
For VPN clients to connect from outside the network, Access Server needs to know its public hostname or IP address. We recommend setting up a public domain name:
6. Verify Access Server is running
Confirm the service is running from the console:
systemctl status openvpnas --no-pagerLook for
Active: active (running)in the output.
Confirm the service is running via the
saclitool:sacli statusConfirm the output includes
"api": "on"in theservice_statusblock. That indicates Access Server is fully initialized and ready to accept connections.
Step 3: Connect your first VPN client
With Access Server configured, connect a device to verify everything is working before adding more users or configuring advanced settings.
1. Create a user
Create a user to test connection status:
2. Install OpenVPN Connect
OpenVPN Connect is the official VPN client for Access Server. Install it on the developer or end-user device:
3. (If needed) Download a connection profile
A connection profile (.ovpn file) contains everything the client needs to connect to your server. Users can download their profile directly from the Client Web UI at https://YOUR-IP:943.
For other distribution methods, see Connection Profiles.
4. Connect
Once the profile is imported into OpenVPN Connect, select it and authenticate to establish the VPN connection. See more:
Step 4: Configure your VPN
With a working connection confirmed, configure Access Server for your organization's requirements. Use the section links below to navigate to the relevant tutorials:
What you want to configure | Where to go |
|---|---|
Authentication (local, LDAP, SAML, PAM) | |
DNS settings | |
Routing (split tunnel, full tunnel, domain routing) | |
Users and user management | |
Access Controls | |
VPN certificates and PKI | |
Multi-factor authentication (MFA) |
Step 5: Secure your deployment
Before going to production, complete these recommended security steps:
1. Install an SSL certificate
Replace the self-signed certificate with a trusted SSL certificate so clients and admins don't see browser warnings:
2. Configure MFA
Add multi-factor authentication to protect admin and user accounts:
3. Create dedicated administrator accounts
Avoid using the default openvpn account for day-to-day administration. Create named admin accounts and secure the root user:
4. Back up your configuration
Take a configuration backup before making further changes or before any upgrade:
5. Activate your license
Access Server includes two free connections. To support more connections, activate a subscription license: