Tutorial: Implementing a Challenge/Response Authentication in Access Server
Enhance Access Server's authentication security with dynamic or static challenge/response protocols.
Overview
Access Server supports challenge/response authentication, which adds an extra layer of security to certificates or credentials. This feature is typically used for multi-factor authentication (MFA) or custom authentication solutions.
While Access Server includes built-in TOTP MFA functionality for a simple MFA solution, custom solutions such as hardware token authentication or challenge questions can be implemented via a post-authentication (post-auth) script.
Challenge/response example script: https://packages.openvpn.net/as/scripts/pascrs.py.
An installed Access Server.
Console access and the ability to get root access.
Familiarity with writing Python scripts for use as post-auth scripts in Access Server.
Dynamic challenge/response protocol
In the dynamic protocol, the VPN client isn't initially aware of the challenge requirement. Instead, the challenge is presented after the user submits their login credentials or certificate. This is typically used when the challenge changes for each session, such as a time-based one-time password (TOTP) or a hardware token.
Process Overview:
The user attempts to authenticate with their certificate or credentials.
The server issues a challenge, temporarily failing the authentication.
The client prompts the user to answer the challenge.
The user submits the challenge response.
The server validates the response and completes the authentication process if the response is correct.
This dynamic approach is useful when you want flexible challenge text per session and when you want to implement the challenge after VPN clients have already installed connection profiles.
Important
For command-line clients on platforms like Linux, you may need to add the auth-retry-interact directive to have the client properly prompt the user for the challenge response.
Static challenge-response protocol
In the static protocol, the VPN client already knows about the challenge requirement because the static challenge is embedded in the connection profile. This method is more efficient but only suitable for VPN sessions, not web-based ones.
Process Overview:
The client already knows the challenge via the connection profile.
The client displays the challenge to the user.
The user submits their response along with their login credentials.
The server processes both the login credentials and the challenge response in one transaction.
If the response is correct, the client is authenticated.
The static protocol is ideal when the challenge text is constant for all login sessions. However, if static challenge support is unavailable for a session (such as in web authentication), the system should fall back to dynamic challenge mode.
Steps to enable the dynamic protocol:
Create a VPN user.
Download a new connection profile from either the Admin Web UI or the Client Web UI:
Use a post-authentication script to implement a dynamic challenge/response. Here's a basic outline of how the script will function:
import time
from pyovpn.plugin import *

# Specifies the challenge text.  The AS will place this string
# in client profiles so that clients can prompt the user for
# a response.
STATIC_CHALLENGE = "What is the current year (YYYY)?"

# Should user's response be echoed?
STATIC_CHALLENGE_ECHO = True

def post_auth_cr(authcred, attributes, authret, info, crstate):

    # Don't do challenge/response on sessions or autologin clients.
    if info.get('auth_method') in ('session', 'autologin'):
        return authret

    # was response provided? -- we support responses issued for both static and dynamic challenges
    year = authcred.get('static_response') # response to Static Challenge provided along with username/password
    if not year:
        year = crstate.response()          # response to dynamic challenge

    if year:
        # received response
        crstate.expire()
        try:
            if int(year) == time.gmtime().tm_year: # verify the result
                authret['status'] = SUCCEED
                authret['reason'] = "Year is correct"
            else:
                authret['status'] = FAIL
                authret['reason'] = "Year is incorrect"
        except ValueError:
            authret['status'] = FAIL
            authret['reason'] = "Response fail -- Year must be an integer"

        # allow end user to see actual error text
        authret['client_reason'] = authret['reason']

    elif crstate.get('challenge'):
        # received an empty or null response after challenge issued
        crstate.expire() # make sure to expire crstate at the end of the challenge/response transaction
        authret['status'] = FAIL
        authret['reason'] = "Year was not provided"

        # allow end user to see actual error text
        authret['client_reason'] = authret['reason']

    else:
        # initial auth request without static response; issue challenge
        crstate['challenge'] = True # save state indicating challenge has been issued
        crstate.challenge_post_auth(authret, STATIC_CHALLENGE, echo=STATIC_CHALLENGE_ECHO)
    return authret
Transfer your post-auth script to your Access Server.
Install it on Access Server (connected to the console and get root privileges):
cd /usr/local/openvpn_as/scripts/
./sacli --key "auth.module.post_auth_script" --value_file="path_to_your_script.py"1 ConfigPut
./sacli start
Replace
path_to_your_script.pywith your post-auth script file name and location.Launch OpenVPN Connect.
Click or tap the profile toggle to connect.
Enter your password at the prompt.
The VPN connection starts on the server side.
After successful user authentication, Access Server issues a challenge like this:
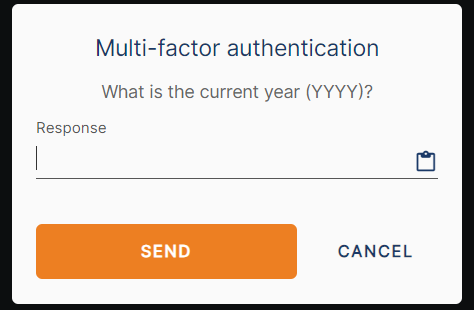
After entering the correct response, click SEND.
The VPN connects.
For a static protocol, Access Server automatically adds a static-challenge directive in the connection profile.
Create a VPN user.
Use a post-auth script to implement a static challenge/response. Here's a basic outline of how the script will function:
import time
from pyovpn.plugin import *

# Specifies the challenge text.  The AS will place this string
# in client profiles so that clients can prompt the user for
# a response.
STATIC_CHALLENGE = "What is the current year (YYYY)?"

# Should user's response be echoed?
STATIC_CHALLENGE_ECHO = True

def post_auth_cr(authcred, attributes, authret, info, crstate):

    # Don't do challenge/response on sessions or autologin clients.
    if info.get('auth_method') in ('session', 'autologin'):
        return authret

    # was response provided? -- we support responses issued for both static and dynamic challenges
    year = authcred.get('static_response') # response to Static Challenge provided along with username/password
    if not year:
        year = crstate.response()          # response to dynamic challenge

    if year:
        # received response
        crstate.expire()
        try:
            if int(year) == time.gmtime().tm_year: # verify the result
                authret['status'] = SUCCEED
                authret['reason'] = "Year is correct"
            else:
                authret['status'] = FAIL
                authret['reason'] = "Year is incorrect"
        except ValueError:
            authret['status'] = FAIL
            authret['reason'] = "Response fail -- Year must be an integer"

        # allow end user to see actual error text
        authret['client_reason'] = authret['reason']

    elif crstate.get('challenge'):
        # received an empty or null response after challenge issued
        crstate.expire() # make sure to expire crstate at the end of the challenge/response transaction
        authret['status'] = FAIL
        authret['reason'] = "Year was not provided"

        # allow end user to see actual error text
        authret['client_reason'] = authret['reason']

    else:
        # initial auth request without static response; issue challenge
        crstate['challenge'] = True # save state indicating challenge has been issued
        crstate.challenge_post_auth(authret, STATIC_CHALLENGE, echo=STATIC_CHALLENGE_ECHO)
    return authret
Transfer your post-auth script to your Access Server.
Install it on Access Server (connected to the console and get root privileges):
cd /usr/local/openvpn_as/scripts/
./sacli --key "auth.module.post_auth_script" --value_file="path_to_your_script.py"1 ConfigPut
./sacli start
Replace
path_to_your_script.pywith your post-auth script file name and location.Download a new connection profile from either the Admin Web UI or the Client Web UI:
Launch OpenVPN Connect.
Click or tap the profile toggle to connect.
Enter your password at the prompt.
The VPN connection won't start and waits for the challenge response.
You'll be prompted to enter the challenge immediately without initiating the VPN connection, as the challenge is already included in the connection profile (ovpn file):
static-challenge "What is the current year (YYYY)?" 1
The VPN connects if both user authentication and the challenge response are correct.