CloudConnexa User Portal
Information about CloudConnexa User Portal and everything you can do using it.
As a CloudConnexa User, you can access the User Portal to carry out the functions documented here. Do you need to access the User Portal? You may never need to use the User Portal because all the essential functions can be done from the OpenVPN Connect application.
Note
While all the possible actions that can be taken from the User Portal are described here, there may be specific actions you cannot carry out because of restrictions placed by your IT department.
The tutorial below shows the user portal of Cloud ID auto-shop.openvpn.com. It offers all the actions that can be carried out after login. Not all of these actions may apply to you based on restrictions placed by your IT department.
To sign in to the User Portal, follow these steps:
Launch your web browser and enter the Cloud ID in the location field of the browser's navigation bar. For example, https://[company-name].openvpn.com.
Note
The Cloud ID would be in an email from CloudConnexa, or your IT department should provide it.
A sign-in screen asking for a username and password will be shown.
Note
You may see your familiar SSO login screen, depending on how your IT department has configured CloudConnexa. If you do, follow your normal login process like any other corporate website and skip the following steps.
Enter your username and password and click Sign In.
Note
If this is your first time signing in, enter your username and temporary password and click Sign In. You will be asked to set a new password on the next page. Refer to Authenticating with a temporary password.
You may be prompted to enter a 2FA code using an Authenticator application. Enter the code and click Confirm. Refer to Authenticating with 2FA.
Note
If this is your first time signing in, set your Authenticator application and authenticate with the 2FA code. Refer to Configuring Authenticator App for 2FA
Note
An option to set up a Passkey may be provided to you after login.
The Get Connected portal page is the first page you will see after login. You can also navigate to the page using the left navigation menu.
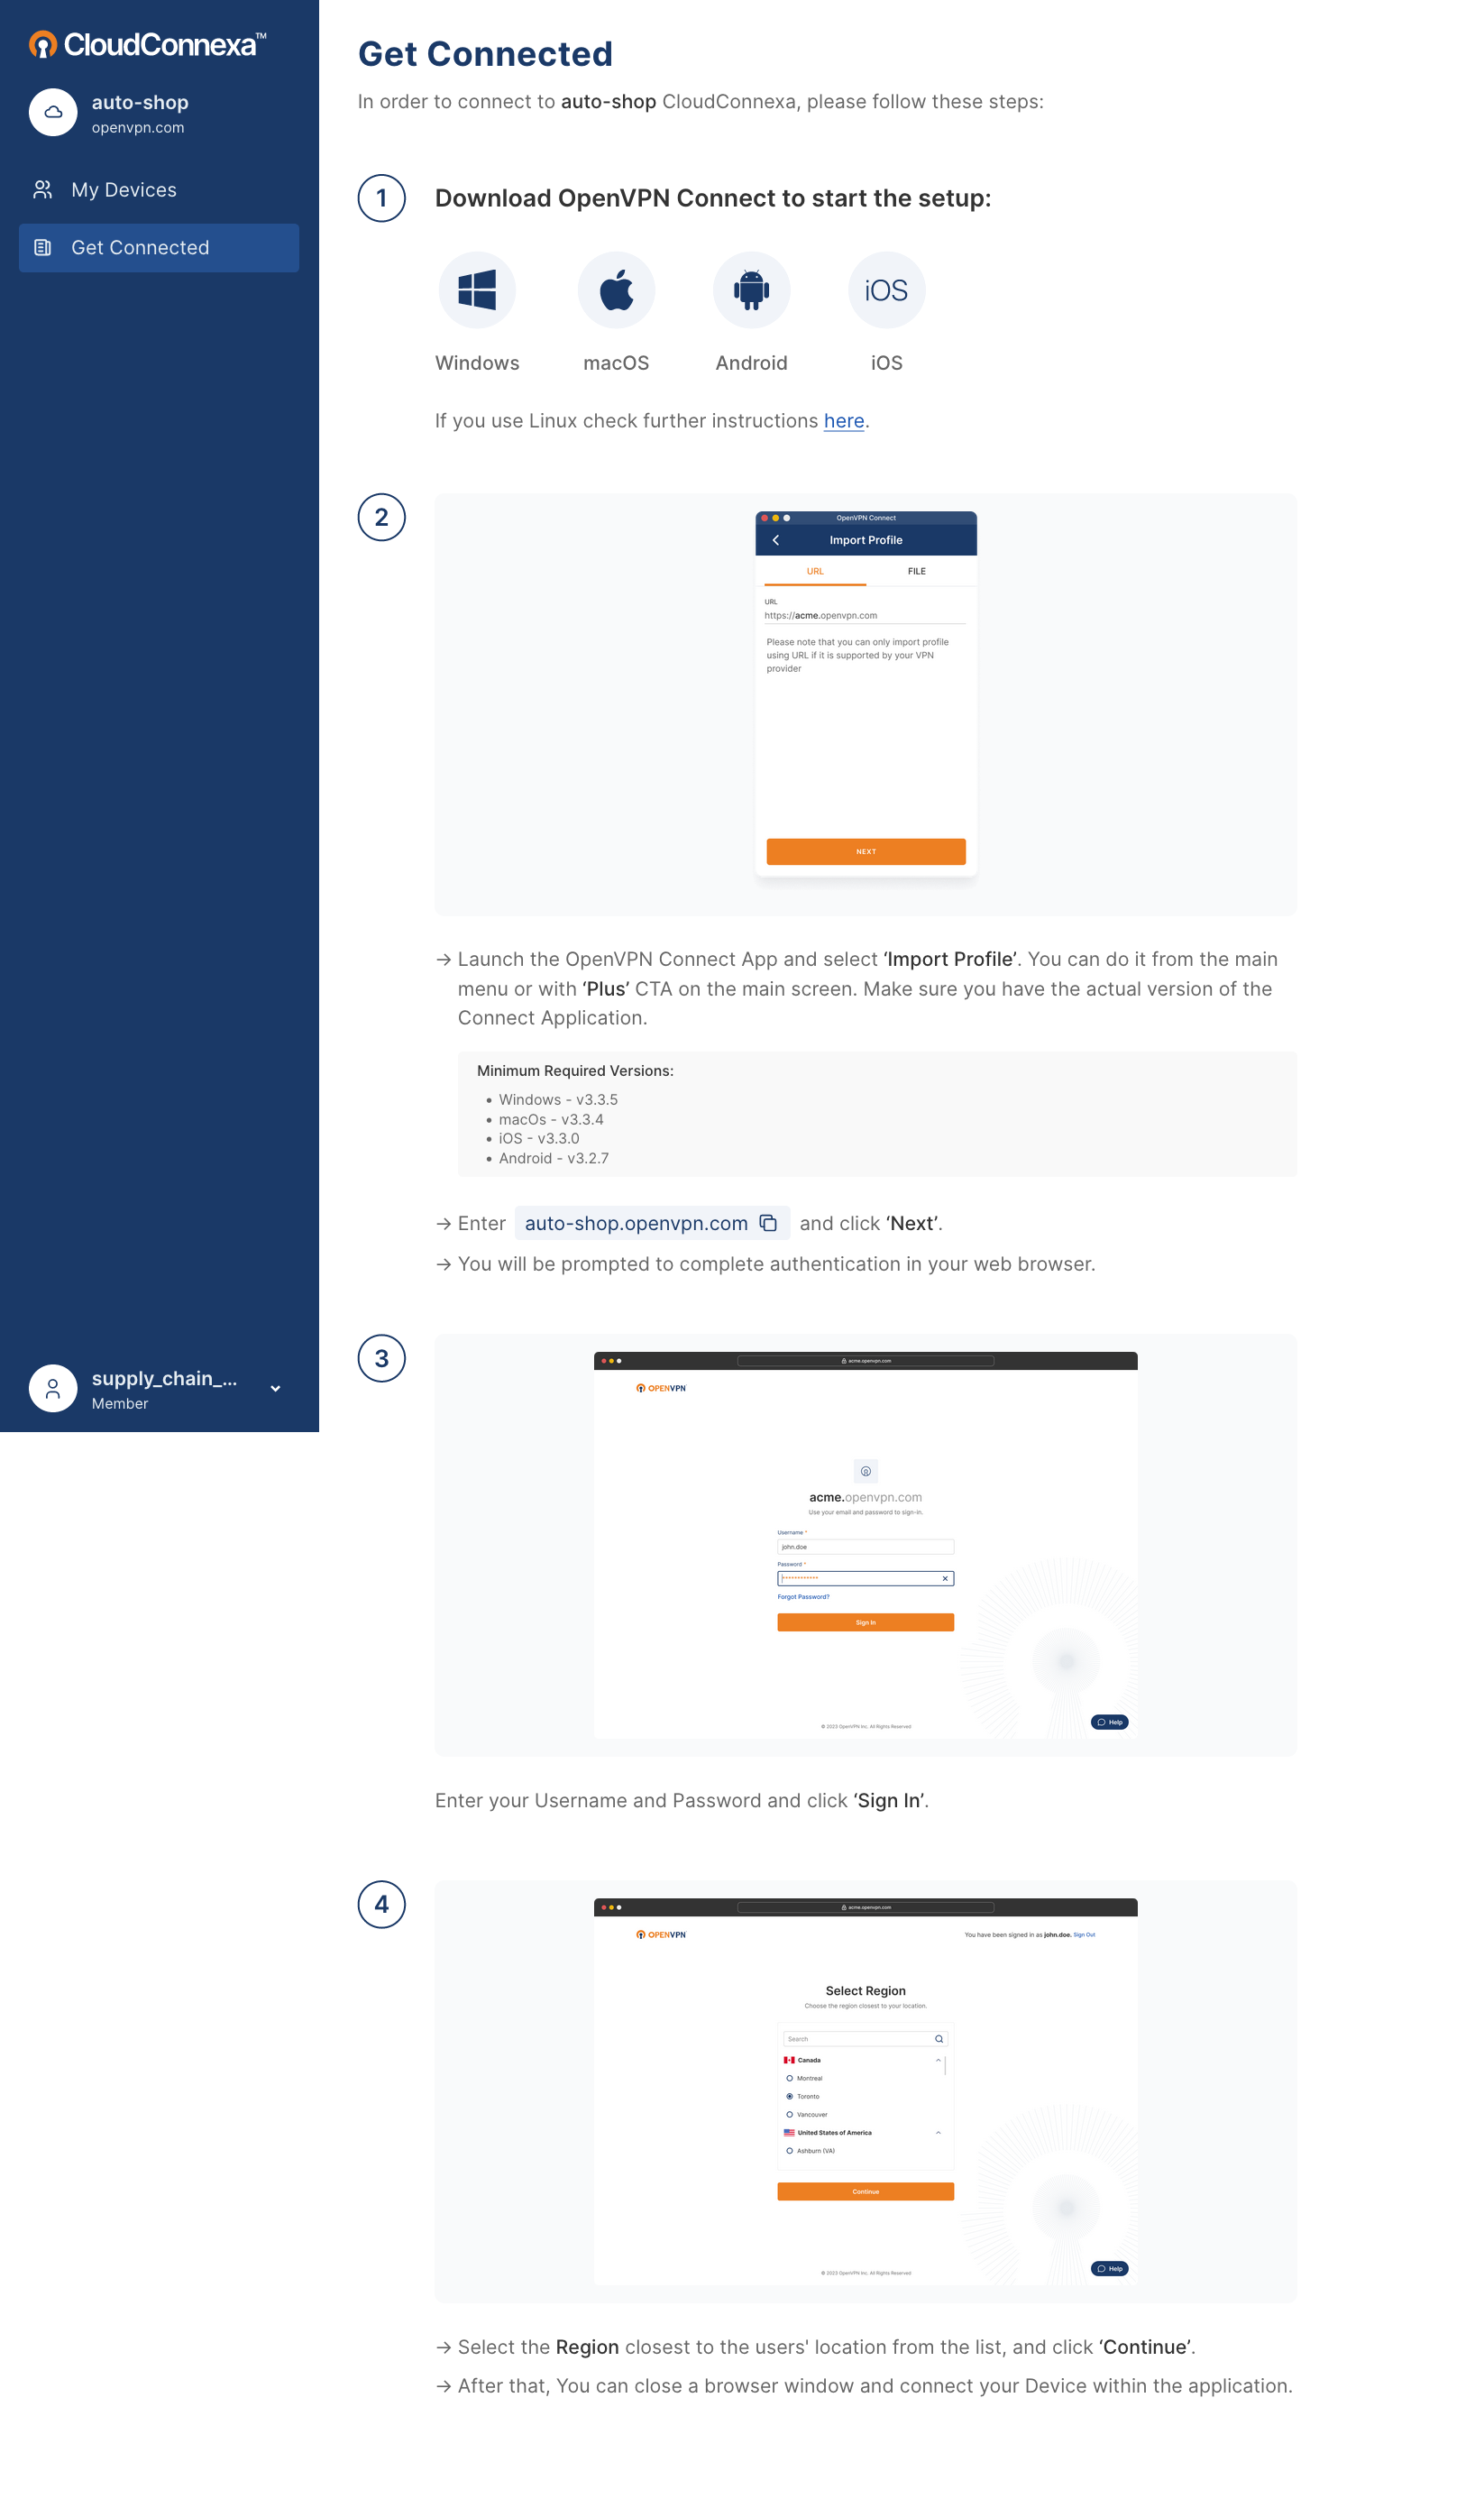
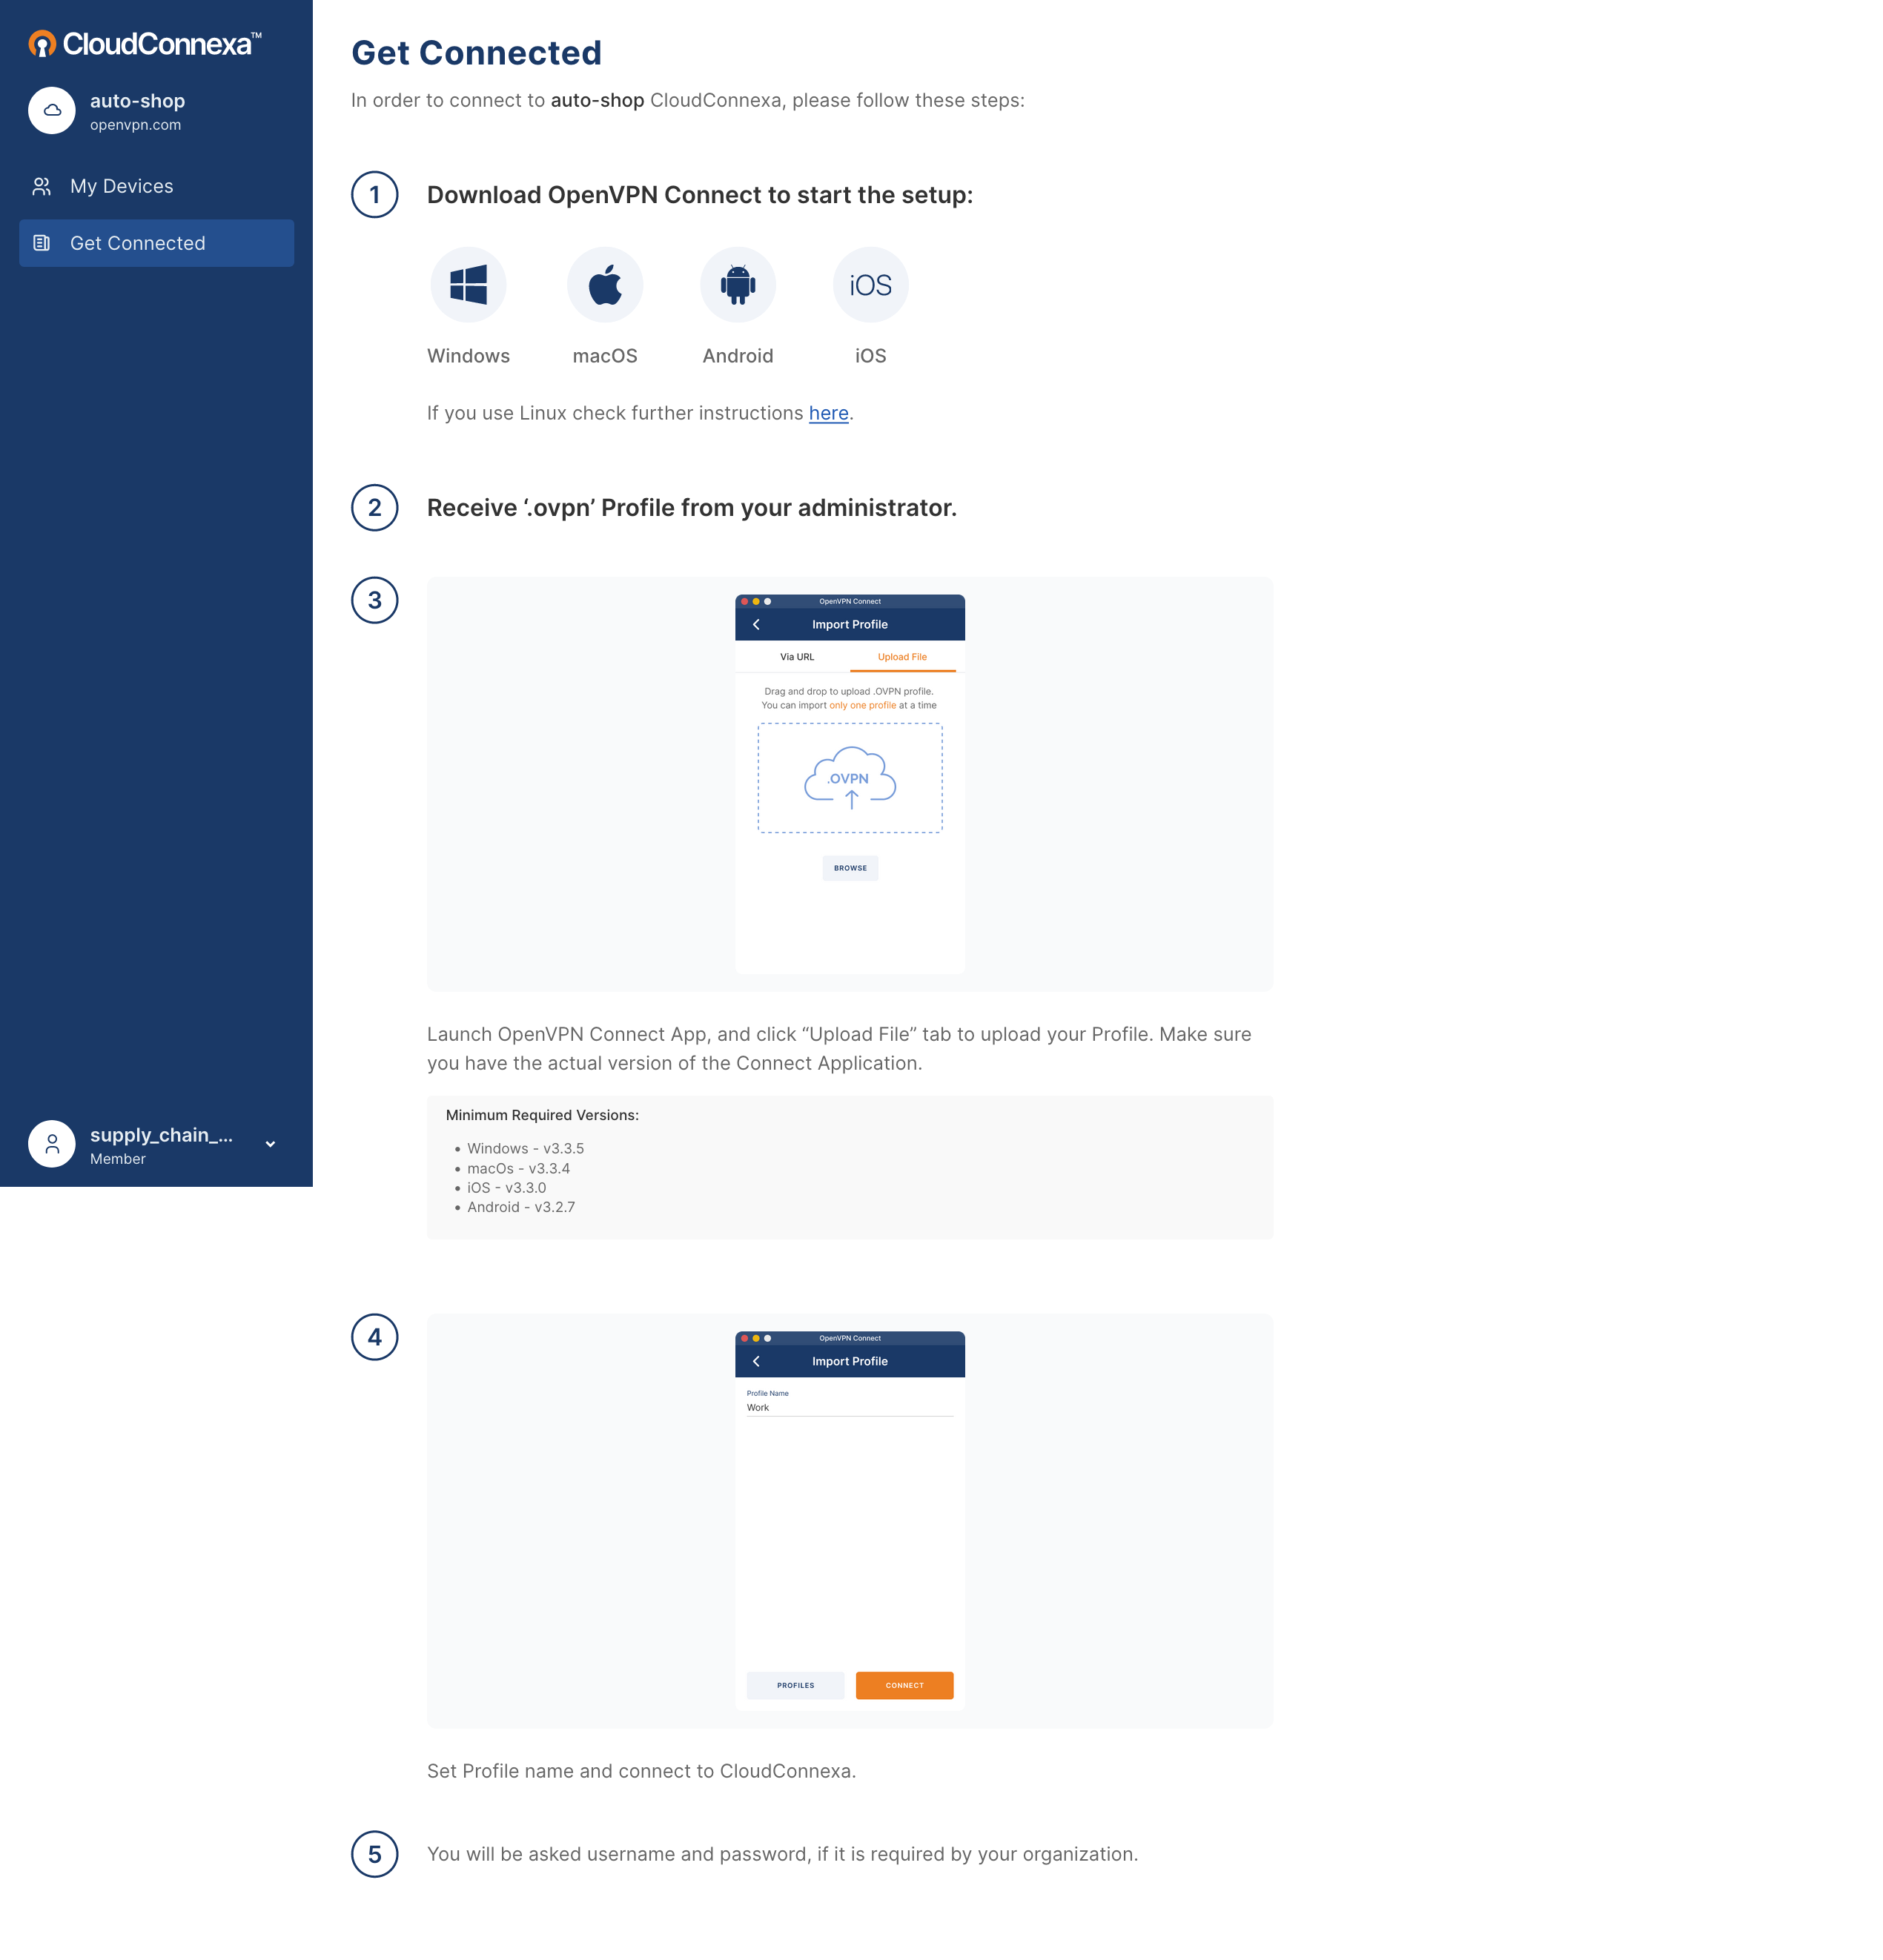
This page provides links to download the OpenVPN Connect application for various operating systems. It also provides instructions on how to obtain your Connection Profile.
Note
The instructions for obtaining your Connection Profile will depend on restrictions placed by your IT department. Refer to the two screenshots below:
Figure 1, “Screenshot: Importing of Connection Profiles allowed”
Figure 2, “Screenshot: Importing of Connection Profiles restricted”
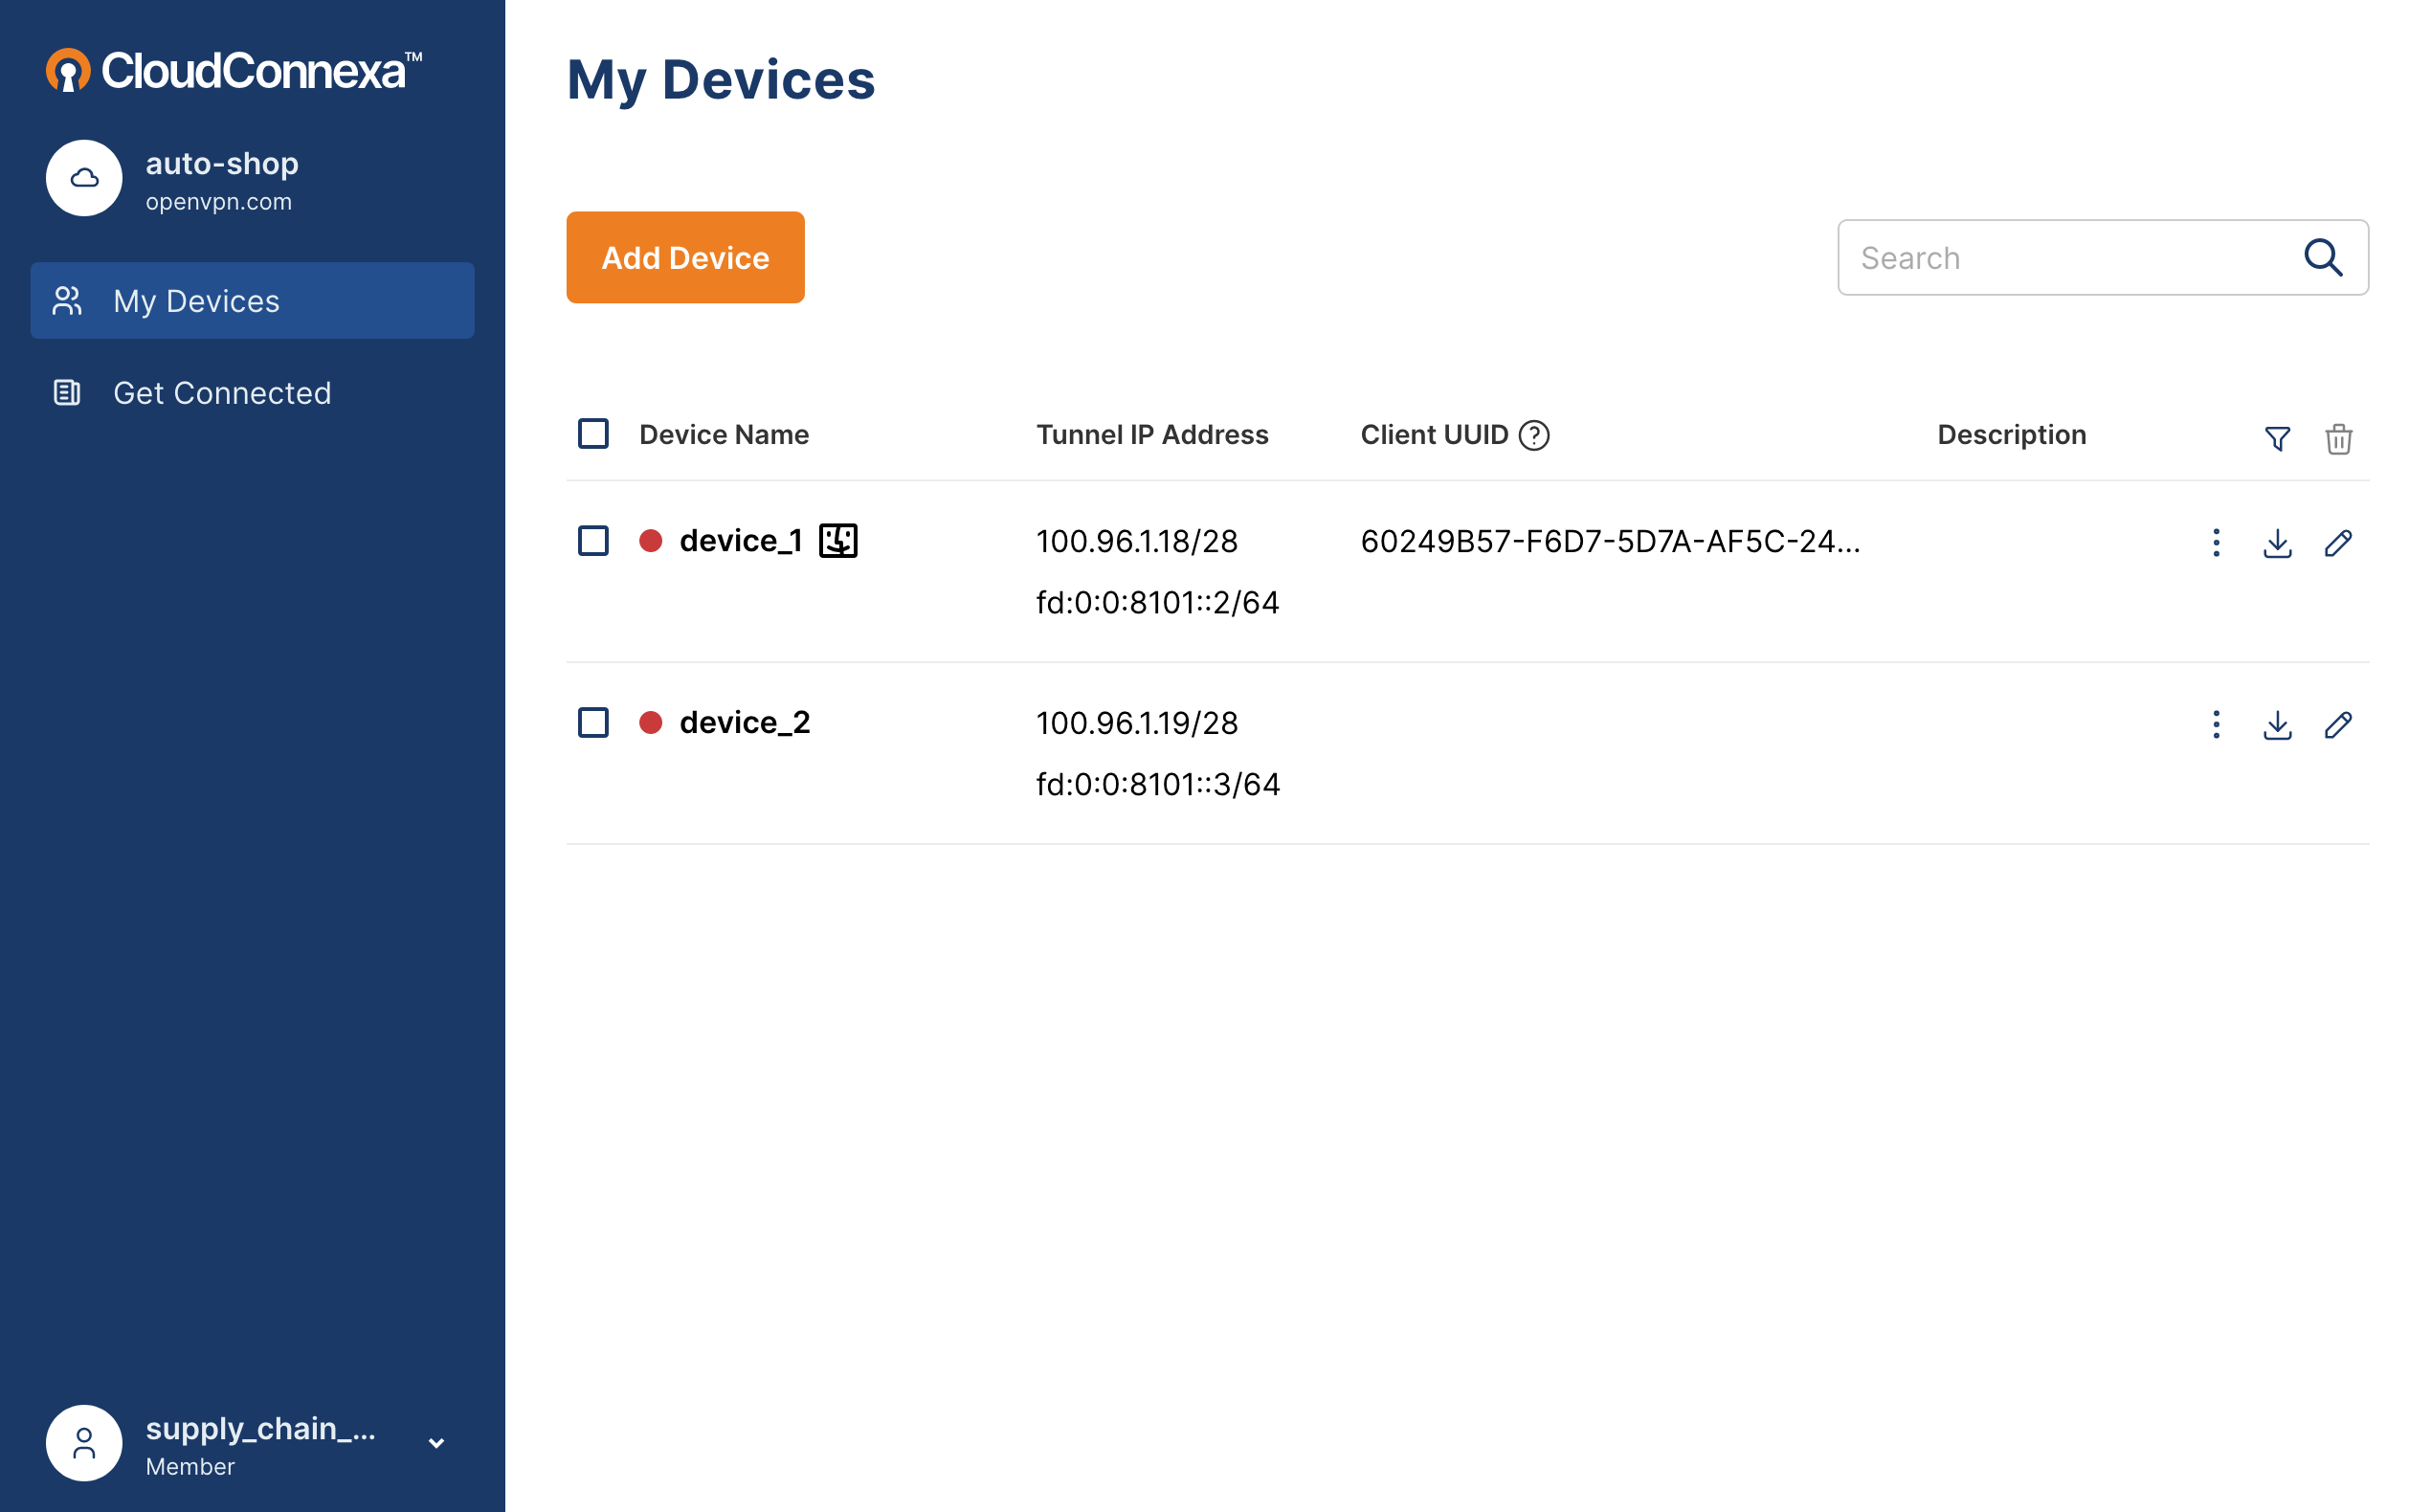
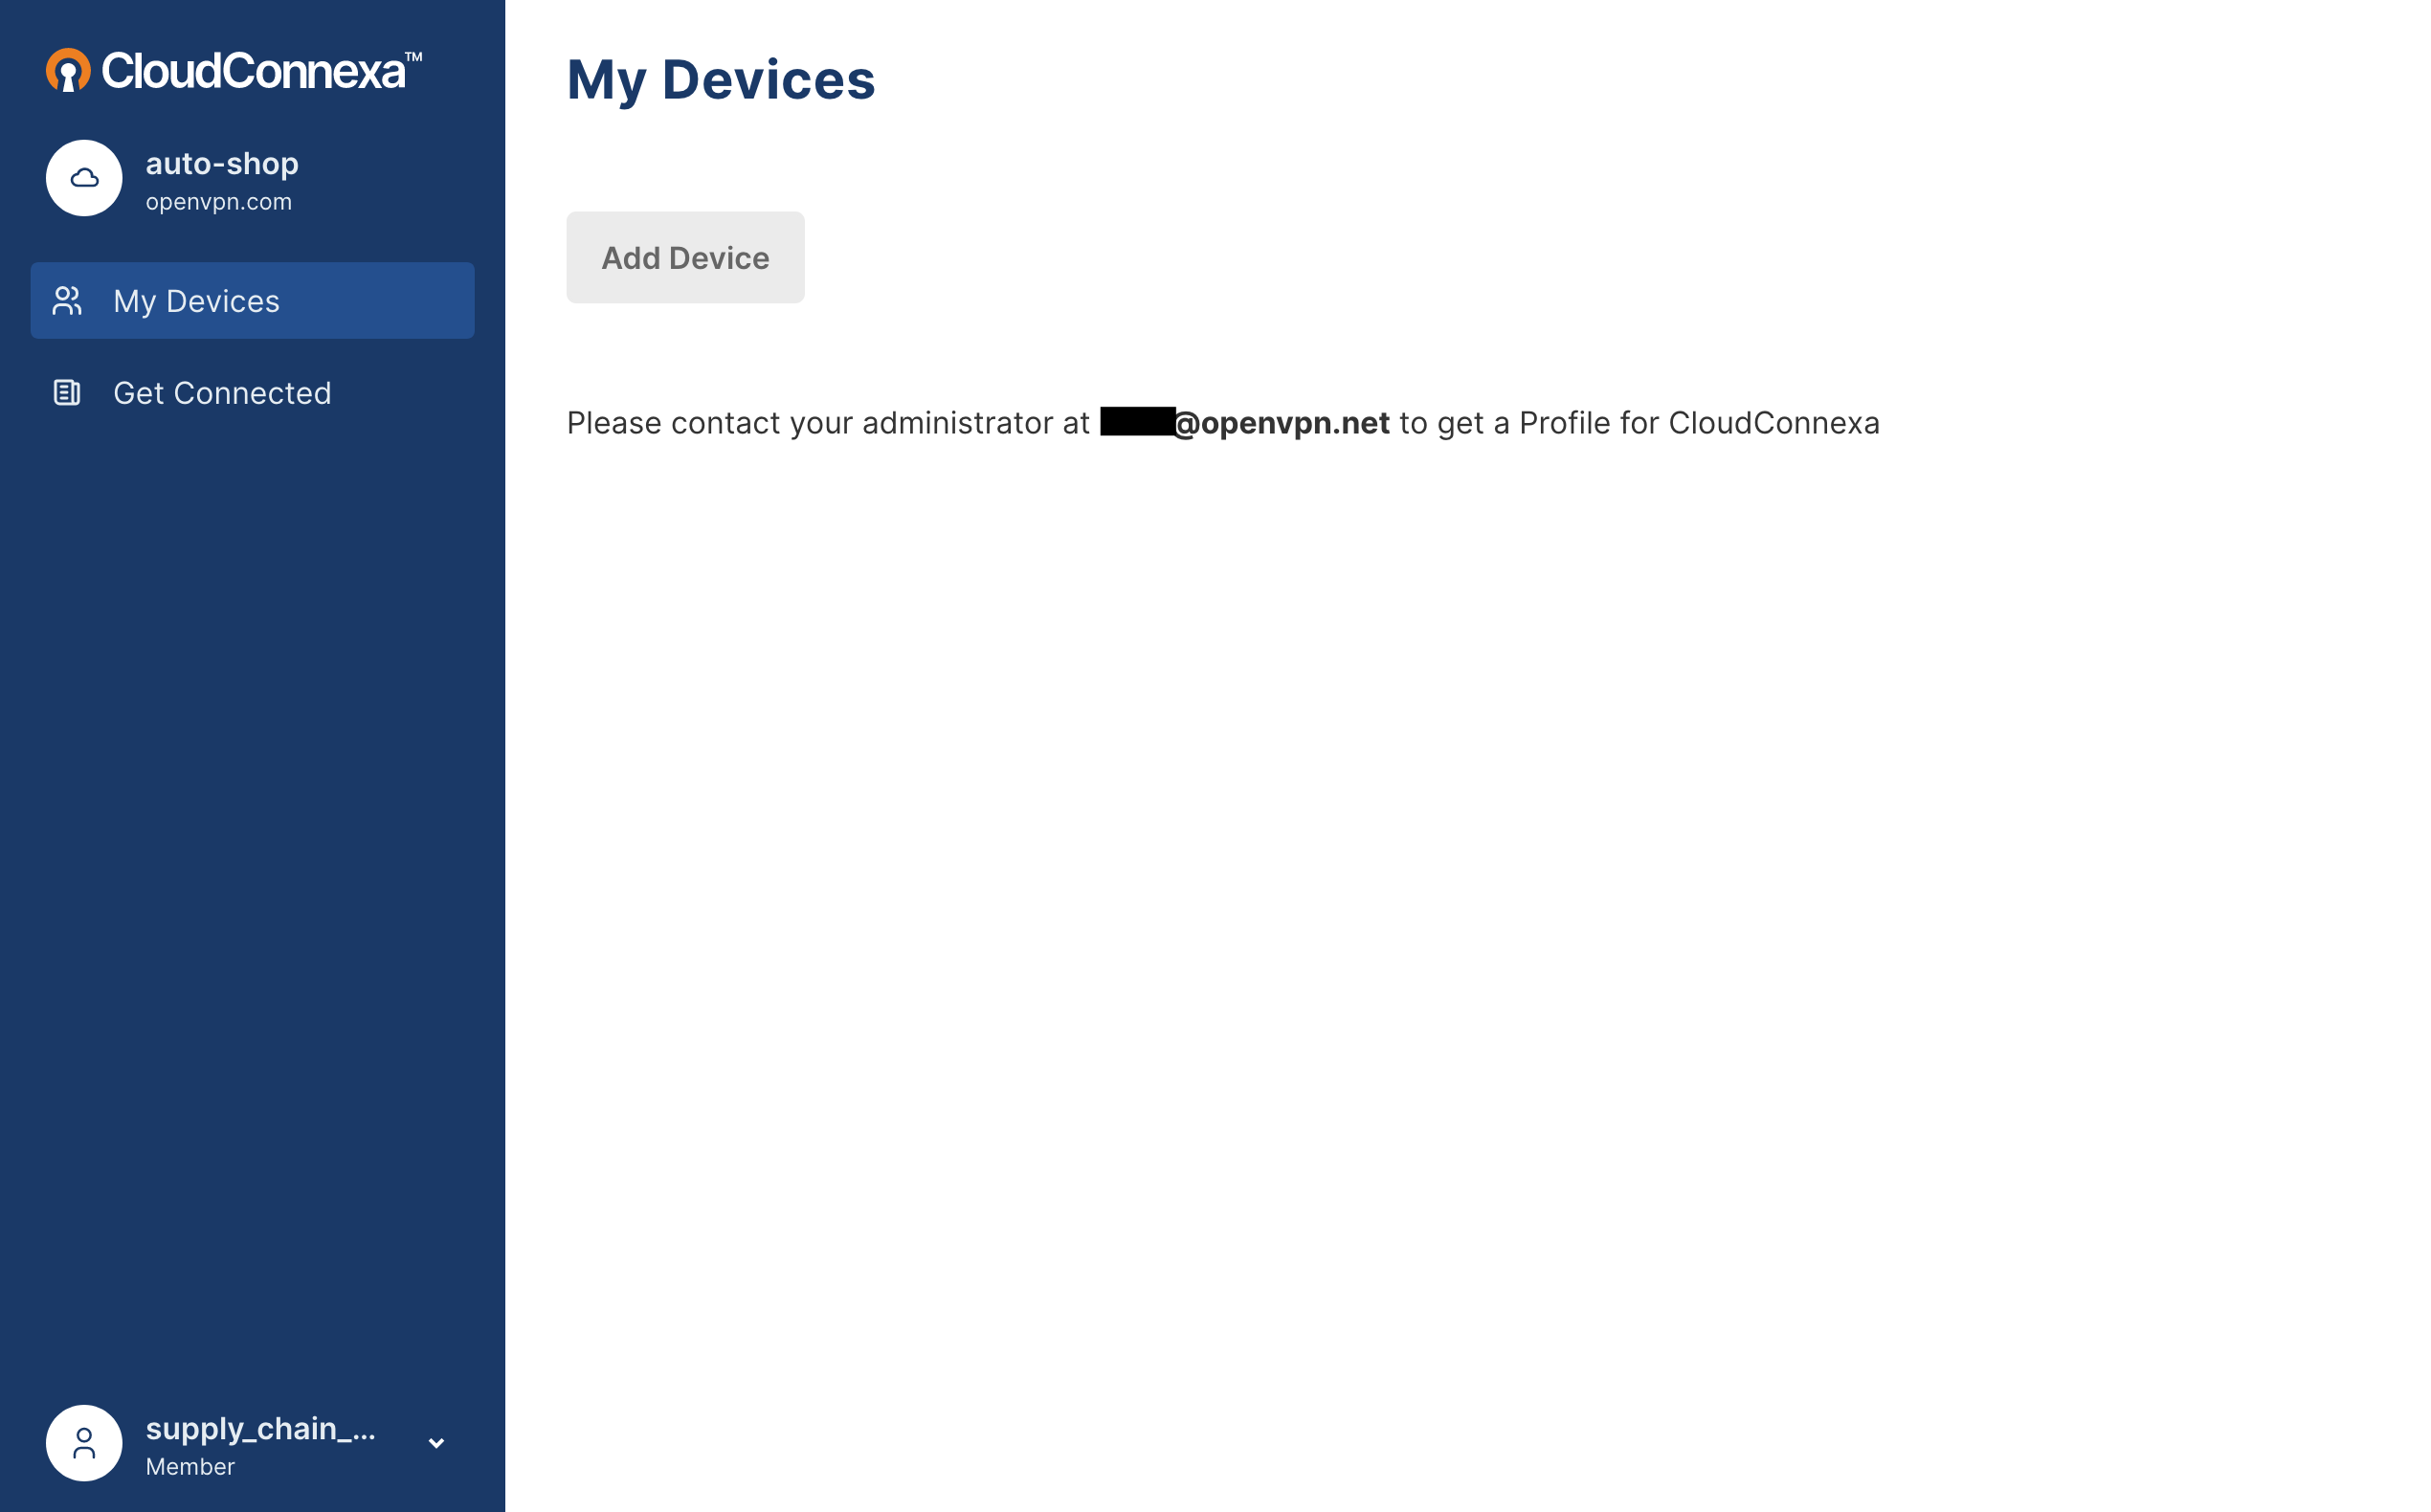
The My Devices portal page lists devices associated with your account. You can navigate to it from the left navigation menu. For all the device management actions that can be performed, refer to Manage Devices Using CloudConnexa User Portal
Note
Whether devices will be shown or not will depend on restrictions placed by your IT department. Refer to the two screenshots below:
Follow the steps below to change your CloudConnexa account password:
Expand the Account Widget shown at the bottom of the left navigation bar.
Click My Account from the choices shown.
Enter your existing password.
Enter and confirm your new password.
Click Update.
Follow the steps below to add Passkey to your CloudConnexa account:
Expand the Account Widget shown at the bottom of the left navigation bar.
Click My Account from the choices shown.
On the Security & Privacy tab, in the Passwordless Authentication section, click Set up.
Click Add Passkey.
Sign in with your password and, if set up, your 2FA code.
Follow the on-screen prompts and select an appropriate option to store your Passkey.
Store securely on a service that syncs the Passkey across multiple devices (e.g., iCloud).
Store Passkey on a dedicated external hardware key (e.g., YubiKey).
Verify your identity using your device's local unlock mechanism (fingerprint, face, or PIN) to confirm the creation of the PassKey.
Note
An option to set up a Passkey may be provided to you after login.
Follow the steps below to sign out of the User Portal.
Expand the Account Widget shown at the bottom of the left navigation bar.
Click Sign Out from the choices shown.