Tutorial: Authenticate Using SAML with Okta
This tutorial shows the steps to authenticate your Users using SAML. You can configure CloudConexa SAML authentication to use Okta as the Identity Provider.
Configuring CloudConnexa User authentication to use SAML
The Administrator can configure CloudConnexa to authenticate access to the User Portal, download of WPC Profile, and WPC connections using a SAML 2.0 compliant Identity Provider.
The Administrator needs to follow the steps below. The steps below use Okta as the Identity Provider. Basic configuration guides for some of the other popular Identity as a Service (IDaaS) providers are provided separately.
Sign in to the CloudConnexa Administration portal at
https://cloud.openvpn.com/.Navigate to Settings section and click on the User Authentication tab.
Click on the Edit button positioned on the top right
Click on the Configure button under the SAML option
The SAML Configuration web page opens in a new browser window/tab and shows the information needed to configure CloudConnexa as a Service Provider in your Identity Provider.
Login to the administration console of the Identity Provider to configure CloudConnexa as a SAML Service Provider. The steps for Okta are below:
Navigate to Applications tab, Add Application and click on the Create New App button.
Select Platform as Web and SAML 2.0 as Sign on method then click on the Create button.
Provide an Application Name and click on the Next button. In the General tab:
Enter the Issuer Name displayed in the SAML Configuration web page of CloudConnexa into the Audience URI (SP Entity ID) input field of Okta
Enter the SSO URL displayed in the SAML Configuration web page of CloudConnexa into the Single Sign On URL Validator and ACS (Consumer) URL input field of Okta
Checkmark the Use this for Recipient URL and Destination URL option
Select EmailAddress as the Name ID format
Click on the Next button
On the last page, select I'm an Okta customer adding an internal app, and click on the Finish button.
Click on the Sign On tab and click on the View set up Instructions button.
The
X.509 Certificateand the Identity Provider Single Sign-On URL will be needed later. Copy and paste this information for use later or keep this browser window open.Now that CloudConnexa has been set up as an application, you need to provide applicable Users access to CloudConnexa application. Click on the Assignment tab of the application and assign it to applicable Users or select the User and assign the application.
Okta will only provide the NameID value to the Service Provider by default which CloudConnexa will map to the username of the User. If you want CloudConnexa to have more information about the User and to use the value of a specific User attribute to map the User into a CloudConnexa User Group, you need to configure parameters to be sent from Okta to App See, https://help.okta.com/en/prod/Content/Topics/Users-groups-profiles/usgp-map-attributes.htm. In addition, refer to this support document.
Go back to the browser tab/window displaying the CloudConnexa and take the following actions:
Click on the Next button
Provide an IdP Name Select Manual Configuration, and do the following:
Click on the Next button
Provide an IdP Name, Select Manual Configuration, and do the following:
Paste the Identity Provider Single Sign-On URL value copied earlier in step ‘2.f’ into the IdP Authentication Endpoint
Paste the
X.509 Certificatecopied earlier in step ‘2.f’ into theIdP X.509 Public Certificate
If earlier in step ‘2.h you had set up additional parameters to map into CloudConnexa User information, do the following or else click on the Next button:
Expand the Advanced settings section
In the Attribute Mapping section provide the Identity Provider parameter names corresponding to the CloudConnexa User information fields that you want to be populated with information from the Identity Provider’s parameters (SAML attributes) and click on the Next button when done
Click on the Finish button after reviewing the SAML configuration
Now that the SAML configuration is done, we need to enable SAML as the User authentication method by clicking on the Edit button in the User Authentication tab
Select the SAML option
If earlier in step ‘2.h’ you had set up an additional parameter with the intention to map the value of that parameter to CloudConnexa User Group, do the following or else click on the Update Settings button:
Click on the Add Rule button
Enter in SAML IdP User Group(s) field one or more of the values that will present in the IDP provided parameter that you had mapped to the Group attribute in step ‘3.c.ii’and select the corresponding you want those values to map into. For example, the IdP User’s department value of ‘DEV’ could map to CloudConnexa User Group ‘Dev’ which has been configured to provide access to resources for developers. Repeat the step to add more rules as desired and click on the Update Settings button when done
Click the Confirm button on the confirmation dialog
SAML is now enabled
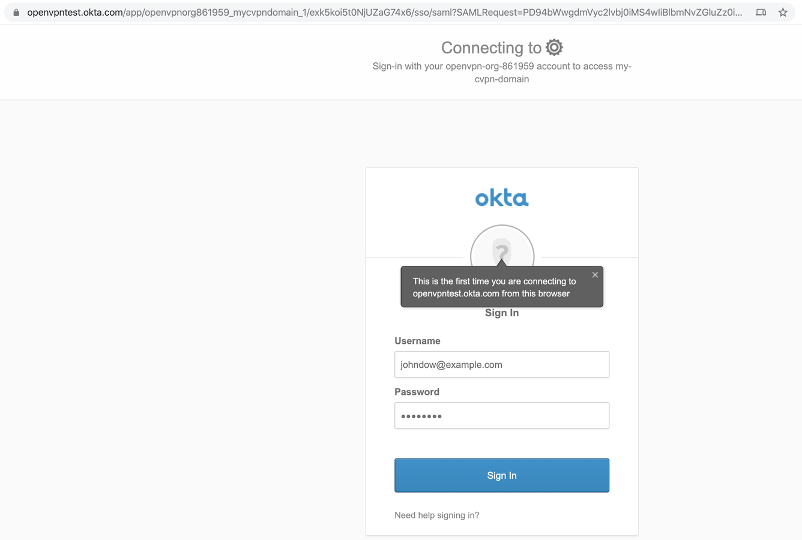
Login to User Portal
Now that SAML is enabled for the WPC when a User wants to sign in to the User Portal to download Connect Client or manage Devices etc., the User will sign in using SSO credentials. When the User visits the User Portal (for example, at https://test8.openvpn.com), the User will see the Identity Provider’s login screen
On successful first authentication, the Administrator will see the User details show up in the Administration portal.
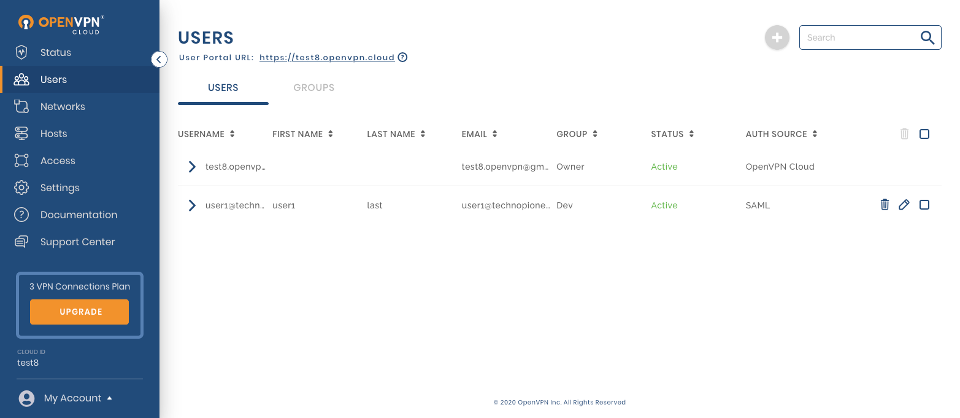
In the screenshot above, you can see that the user1 has been added after SAML authentication because the Auth Source is shown as SAML.