Tutorial: Authenticate Using SAML with Keycloak
This tutorial shows the steps to authenticate your Users using SAML. You can configure CloudConexa SAML authentication to use Keycloak as the Identity Provider.
Steps: Retrieve certificate value and IdP endpoint from Keycloak
Navigate to Keycloak and sign in with your Administrator account.
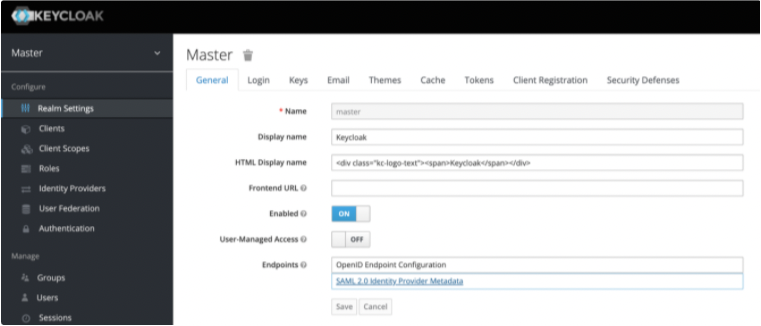
Access Realm Settings > Endpoints and click SAML 2.0 Identity Provider Metadatal.
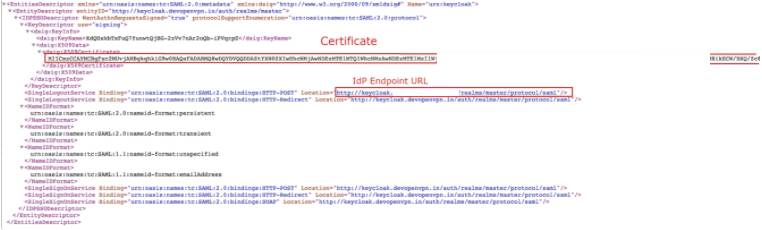
Copy the IdP X.509 Public Certificate and the IdP Authentication Endpoint URL, which are used later in the CloudConnexa set up process.
Steps: Configure and enable SAML in CloudConnexa
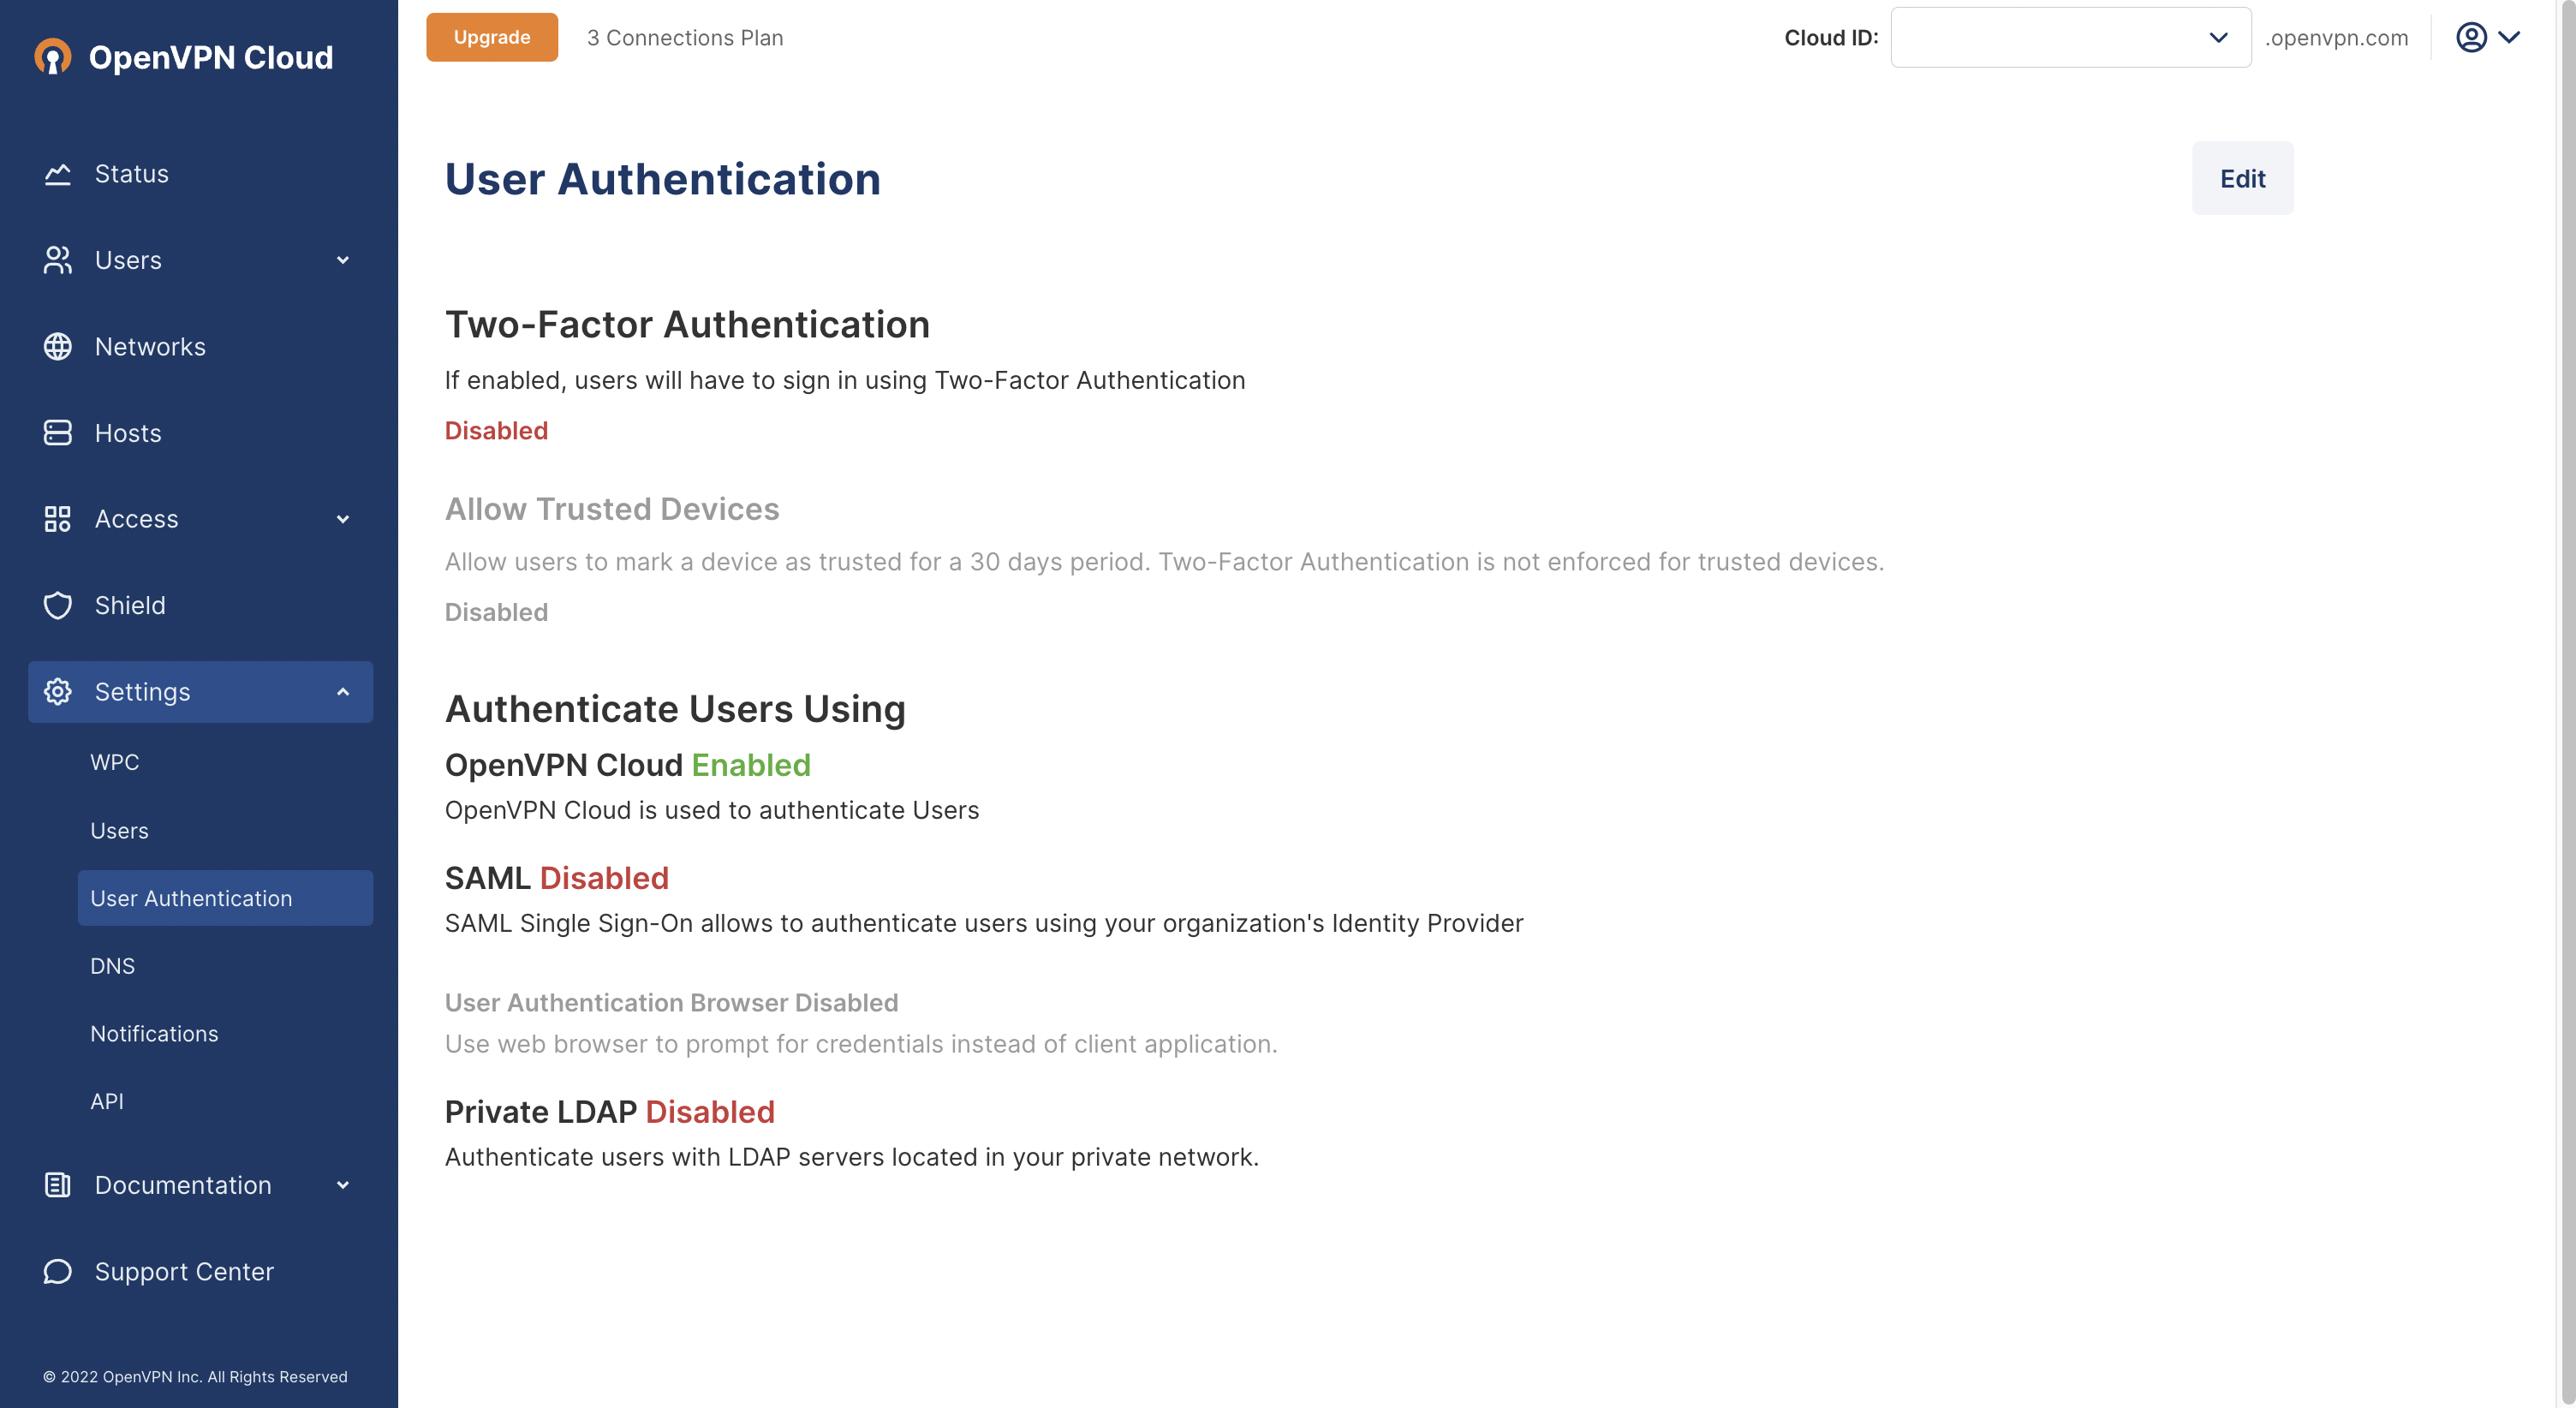
Sign in to the CloudConnexa
https://cloud.openvpn.com/Access Settings > User Authentication and click Edit.
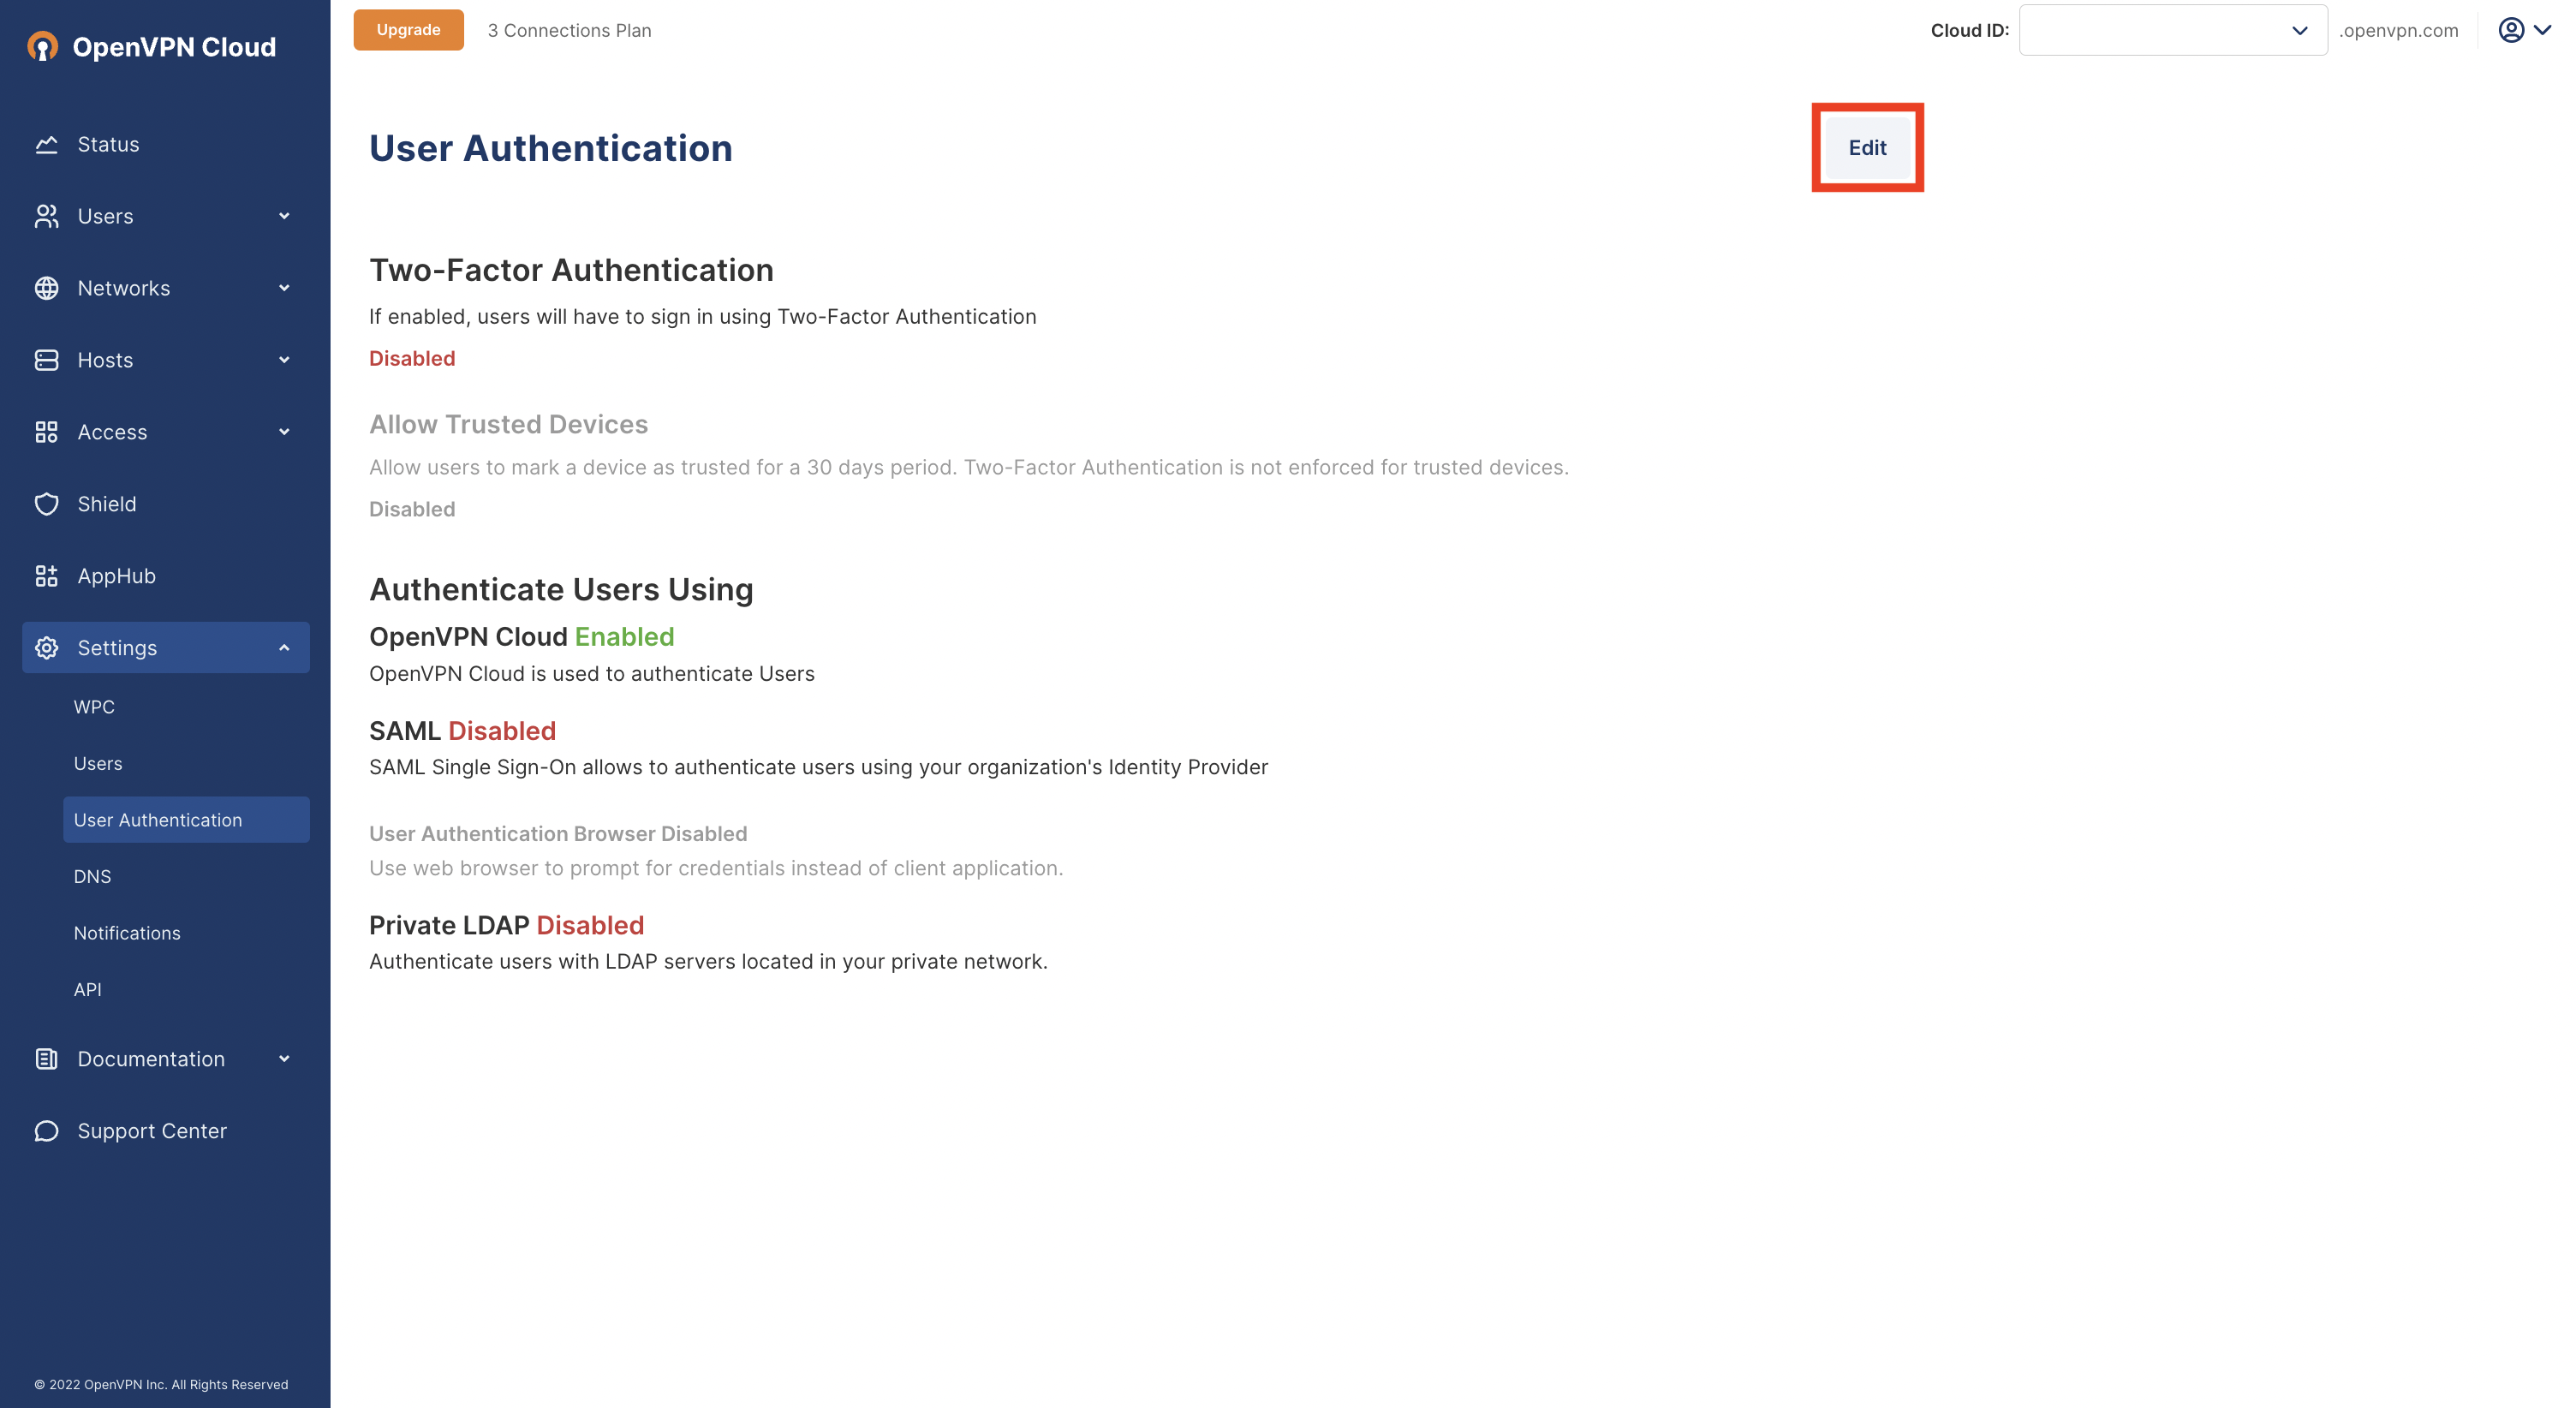
Click on Configure in the Authenticate Users Using > SAML section.
The SAML Configuration window opens. Click Next.

Add your IdP Name (optional), and then select Manual Configuration.
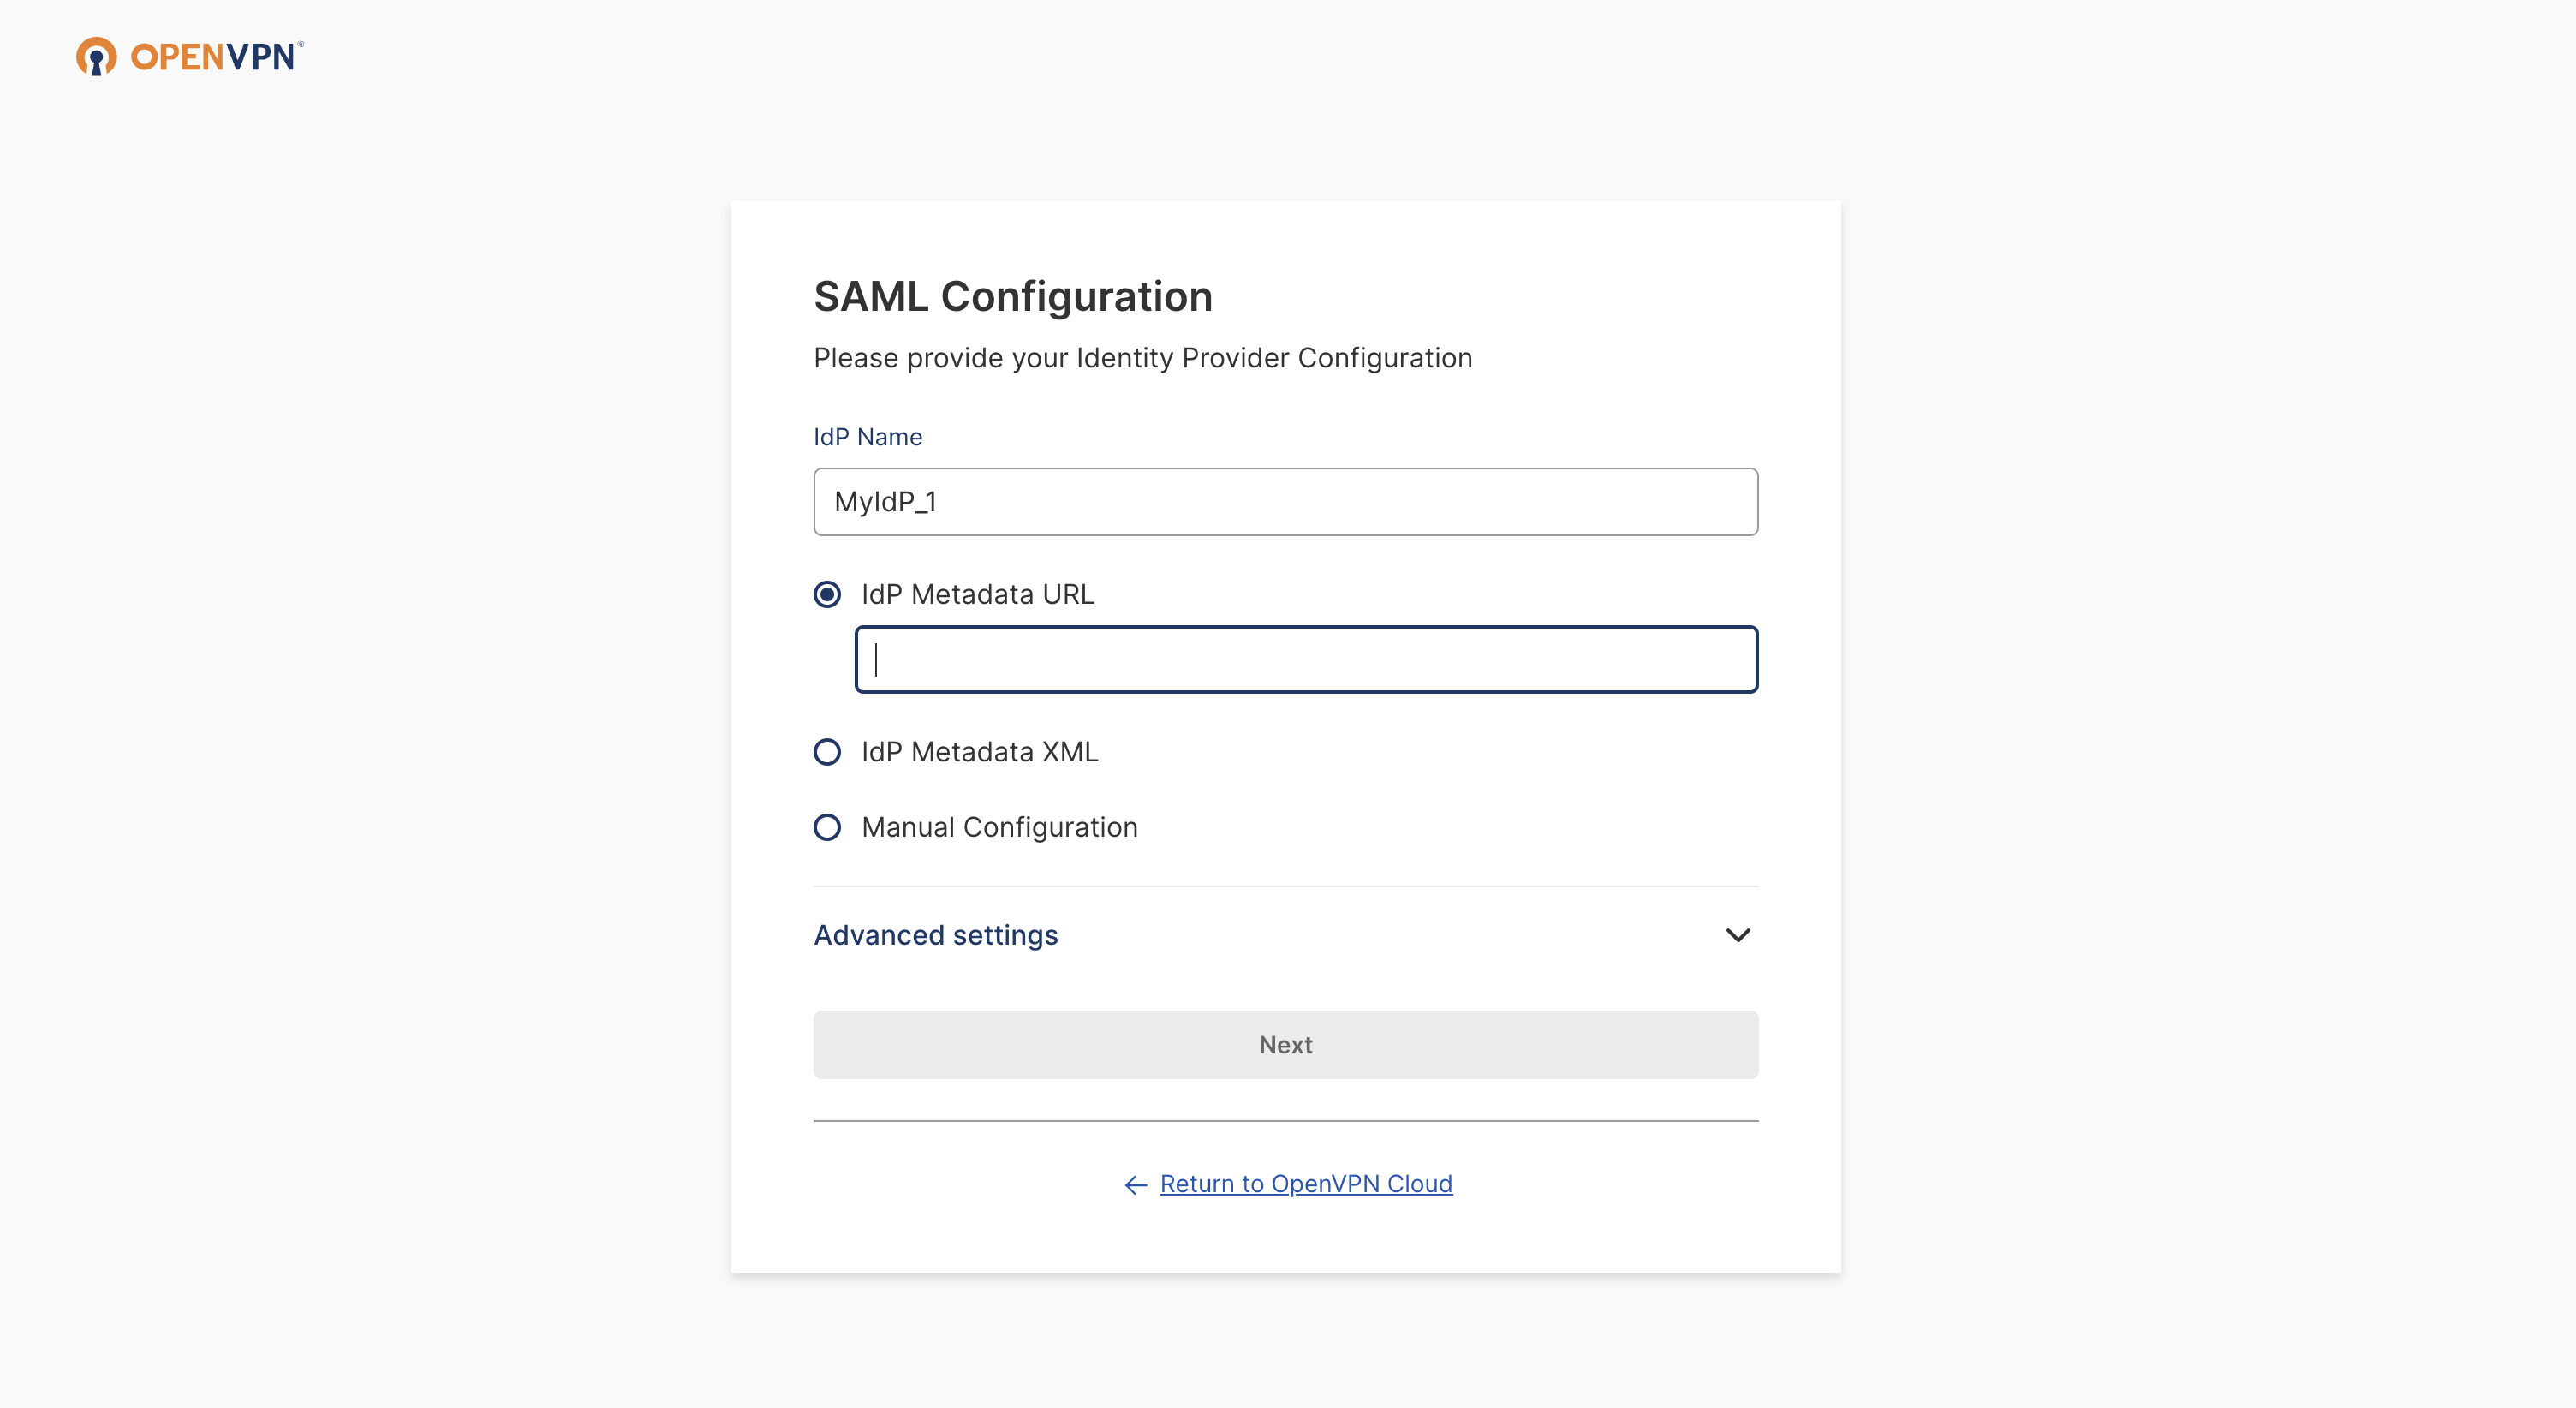
Paste the previously copied IdP Authentication Endpoint URL and the IdP X.509 Public Certificate.
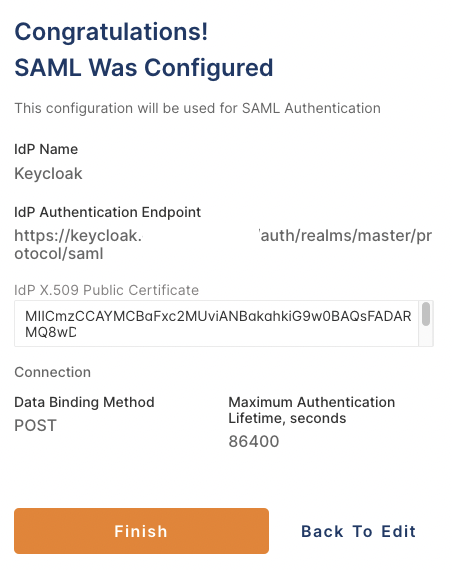
Click Next, review the displayed information, then click Finish.
You now have the option to use SAML to authenticate Users.
Steps: Create a new Keycloak client
Navigate to Keycloak and sign in as an Administrator.
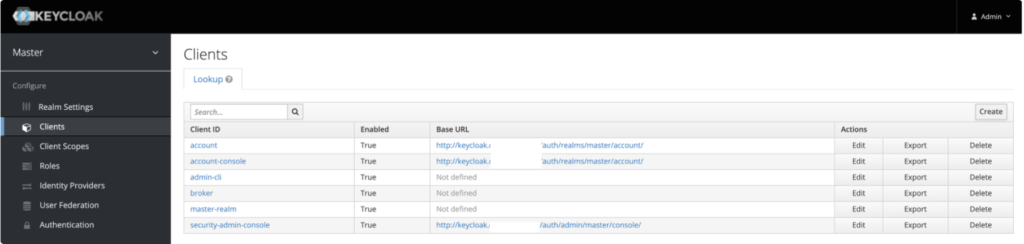
Access Clients and click Create.
Set the Client ID to be the same as the Issuer Name that was displayed in the SAML configuration on the CloudConnexa portal:

Select SAML as the Client Protocol.
Enter the SSO URL for the Client SAML Endpoint:
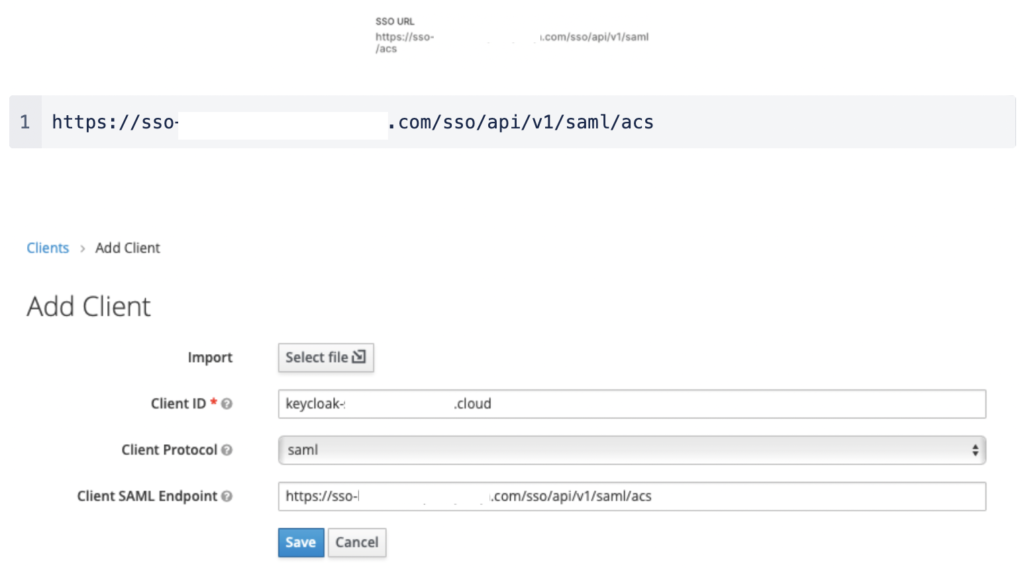
Click Save.
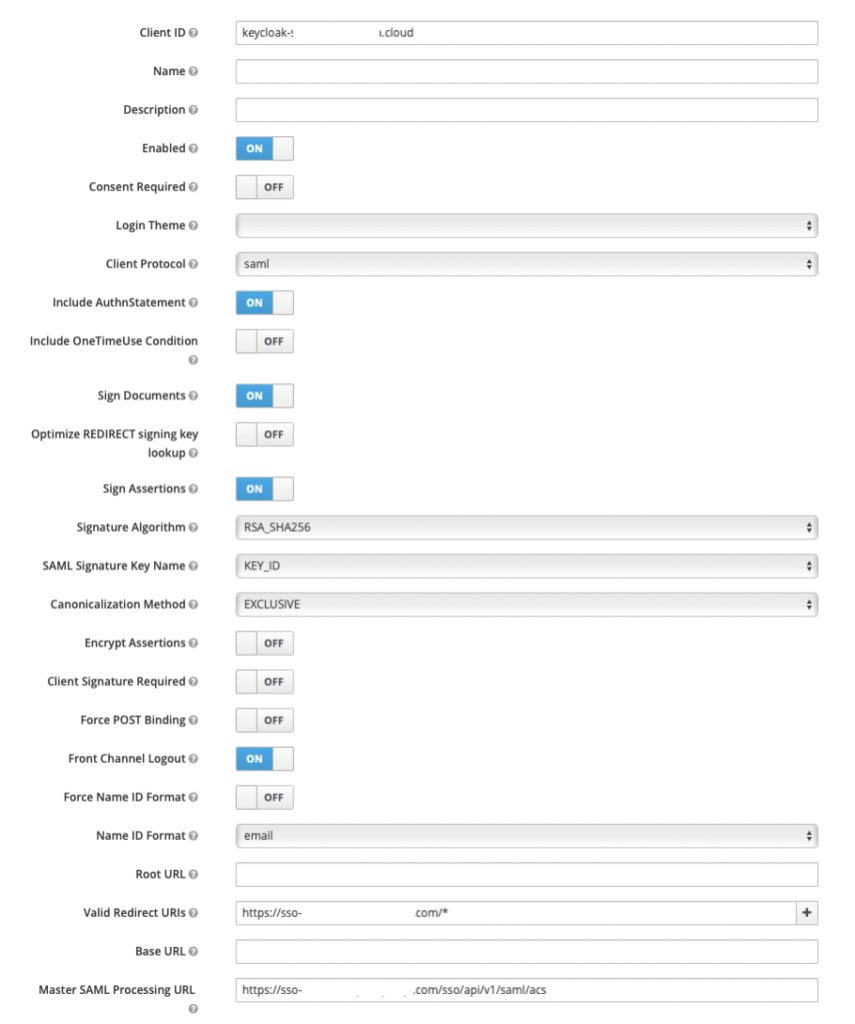
The settings tab displays the default values.
Enable Sign Assertions.
Disable Client Signature Required and Force POST Binding.
Set the Name ID format to email.
Enter this value in Valid Redirect URIs, which allows redirects to the ACS URL:

All other values are left as default.
Steps: Create a Keycloak User account
Navigate to Keycloak, access Users, and click Add User.
Fill out the form with your data.
Note
You can select Email Verified if you use a test email that doesn’t allow verification.
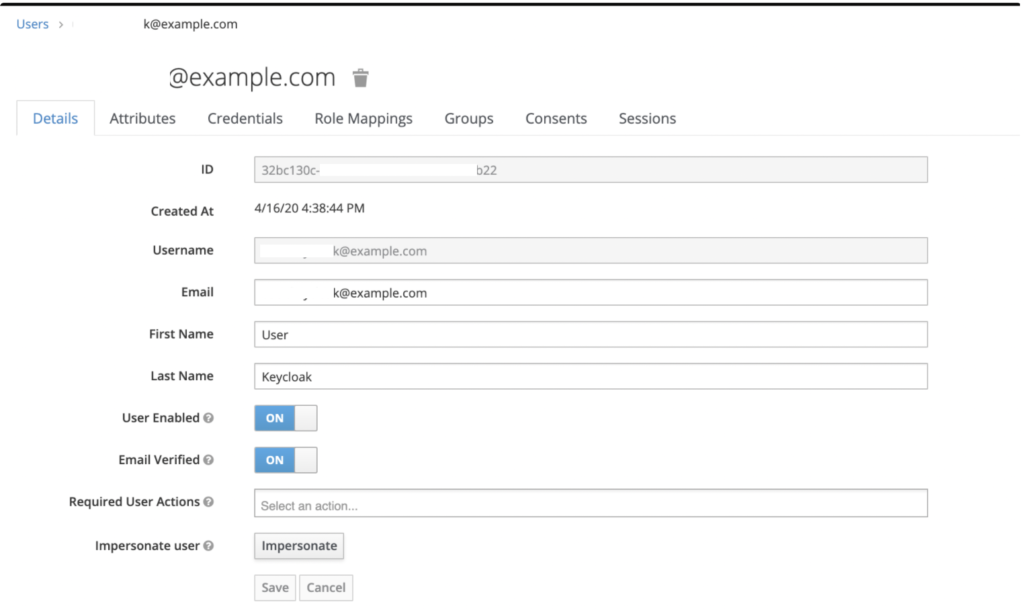
Open the Credentials tab and assign a password for the User account, and click Set Password.

Steps: Configure attributes and group mapping in Keycloak
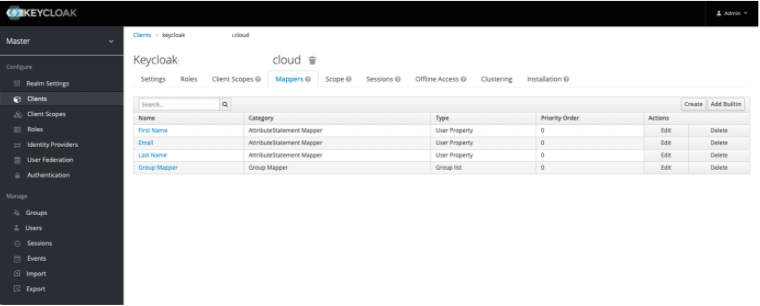
Navigate to Keycloak, access Clients, and click on your Client ID.
Click on the Mappers tab, which allows you to create SAML attributes.
Note
At the time of publication, CloudConnexa only supports First Name, Last Name, Email, and Groups for mapping attributes.
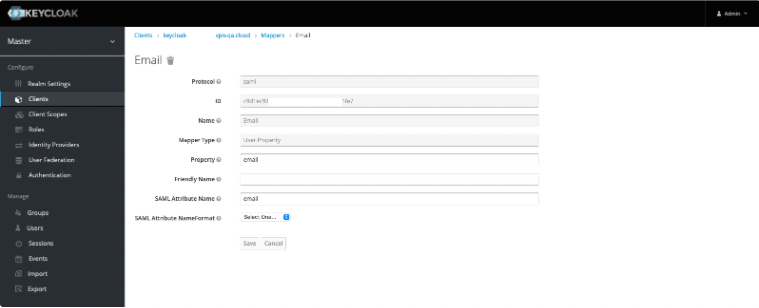
Click Create, and in Mapper Type select User Property.
Add a separate attribute entry for each of First Name, Last Name, and Email.
Note
You must use these defined Property name values in the Property field.
Attribute
Property
Purpose
Email
email
To pass the email value to the service provider.
First Name
firstName
To pass the first name value to the service provider.
Last Name
lastName
To pass the last name value to the service provider.
Set the SAML Attribute Name value to be the same as each corresponding Property name value.
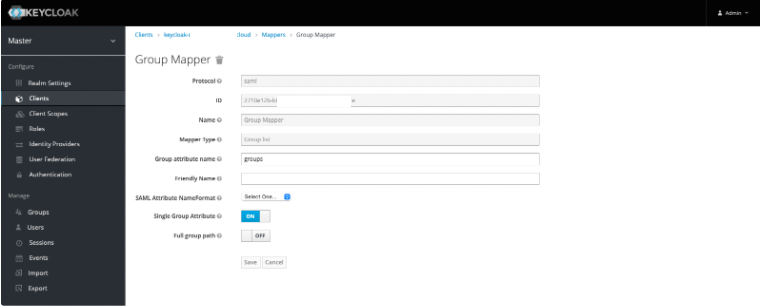
Click Create, and in Mapper Type select Group List to create a Group Mapper.
Note
You must use groups as the defined Group attribute name.
Attribute | Group attribute name | Purpose |
Group | groups | To pass the groups value to the service provider. |
Steps: Configure attribute mapping in CloudConnexa
To finalize your attribute mapping set up, you must ensure that the Property values and SAML Attribute values match the Attribute Mapping values in your SAML Configuration on CloudConnexa.
Access CloudConnexa > Settings > User Authentication > SAML > View Attirbute Mapping to check that those values match :

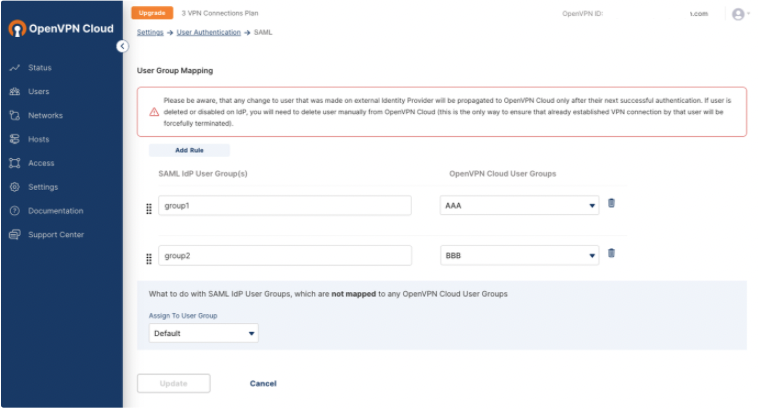
Steps: Set up group mapping in CloudConnexa
Access CloudConnexa Settings > User Authentication > SAML > View Group Mapping and click Add Rule.
Enter the name of the group(s) from your identity provider under SAML IdP User Group(s) and then select a group from the CloudConnexa User Groups that you want to map to your IdP group(s).
Steps: Sign in to User Portal with Keycloak
Navigate to the CloudConnexa account page at: https://myaccount.openvpn.com/product-select
Click Not an Owner? Sign In Here.
CloudConnexa recognizes that your domain uses SAML and displays the Single Sign On prompt.
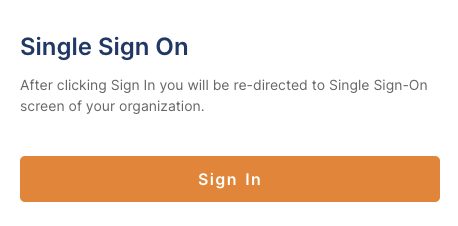
Click Sign In.
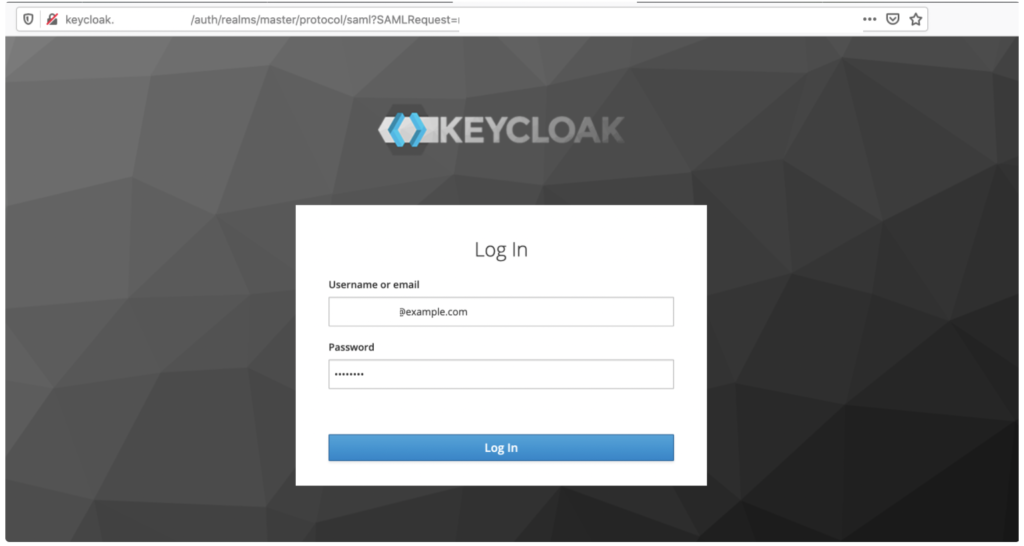
The Keycloak Log In page opens.
Enter the Keycloak test account email and password and click Log In.
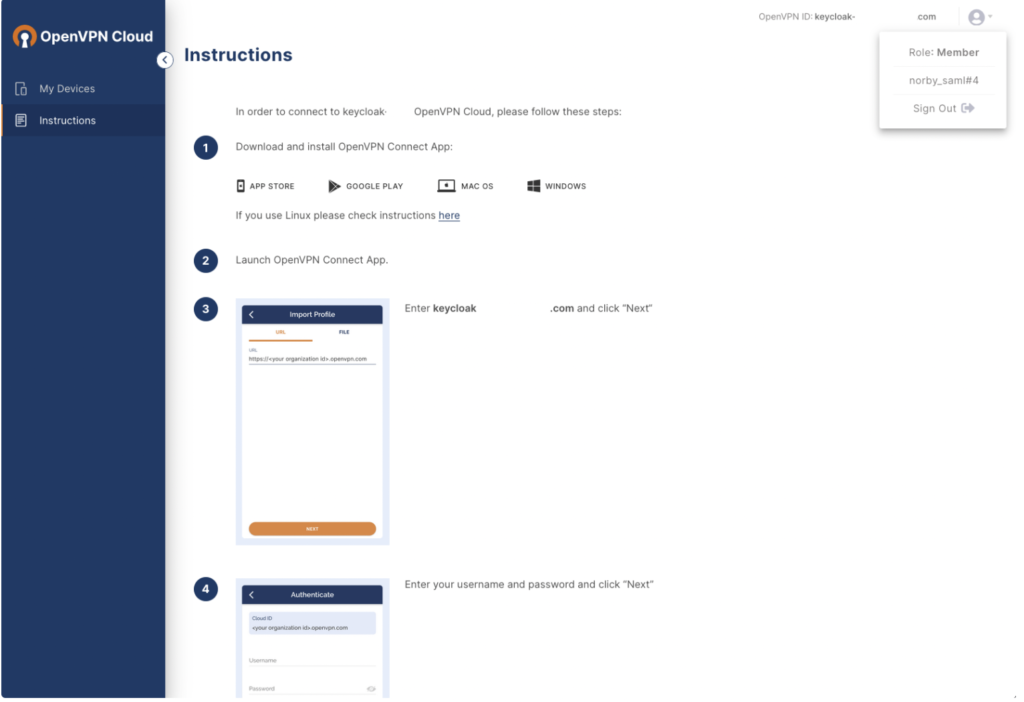
The CloudConnexa Get Connected page opens with app download and installation instructions.