Tutorial: Use CloudConnexa for Private Connectivity Between Multiple Sites (Site-to-Site Networking)
This tutorial shows how to use CloudConnexa for site-to-site networking by showing the steps used to network together private networks in two different AWS Regions.
Overview
Follow the steps in this guide to learn how to create a full-mesh private network between two private networks and enable remote access to those networks, ensuring full site-to-site private connectivity.
Owen has completed the signup process as shown here. During the signup process, Owen selects technop.openvpn.com as the web domain for the user portal. This domain uniquely identifies the WPC that will be set up by Owen and is used by Connect Client applications to identify the WPC that it needs to connect to.
This guide provides a high-level example of creating a full-mesh, site-to-site network across two private networks that are represented by AWS VPCs in separate AWS regions. In this example. the networks hosting private servers and resources are based in Northern California and in Oregon.
Illustration of WPC
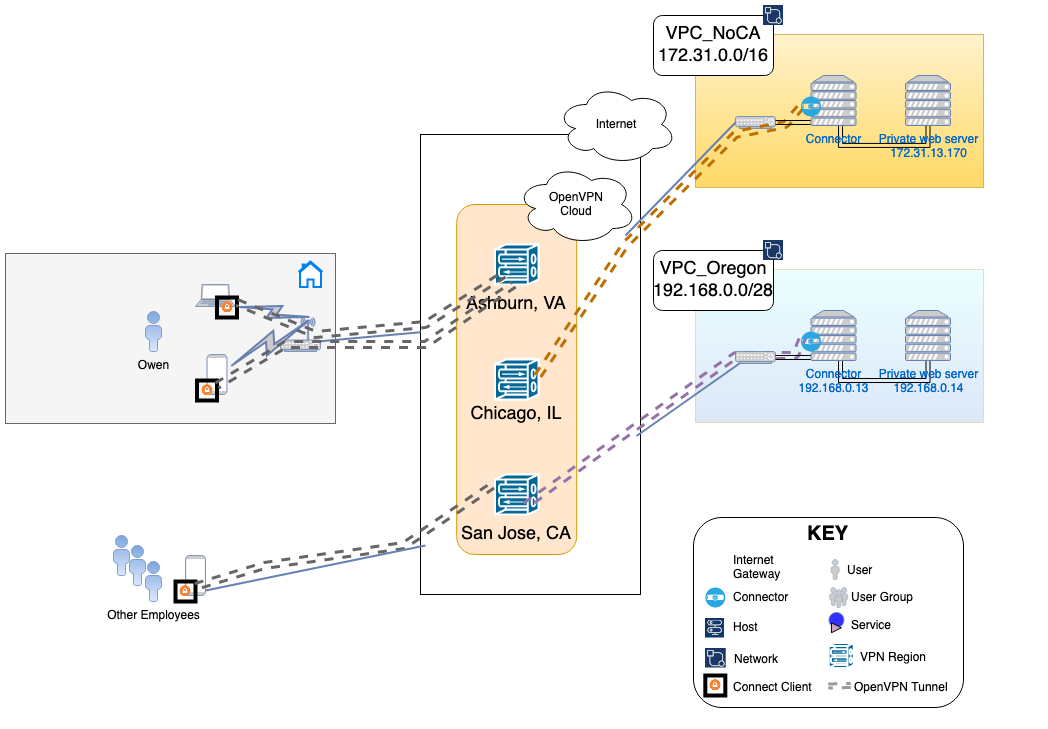
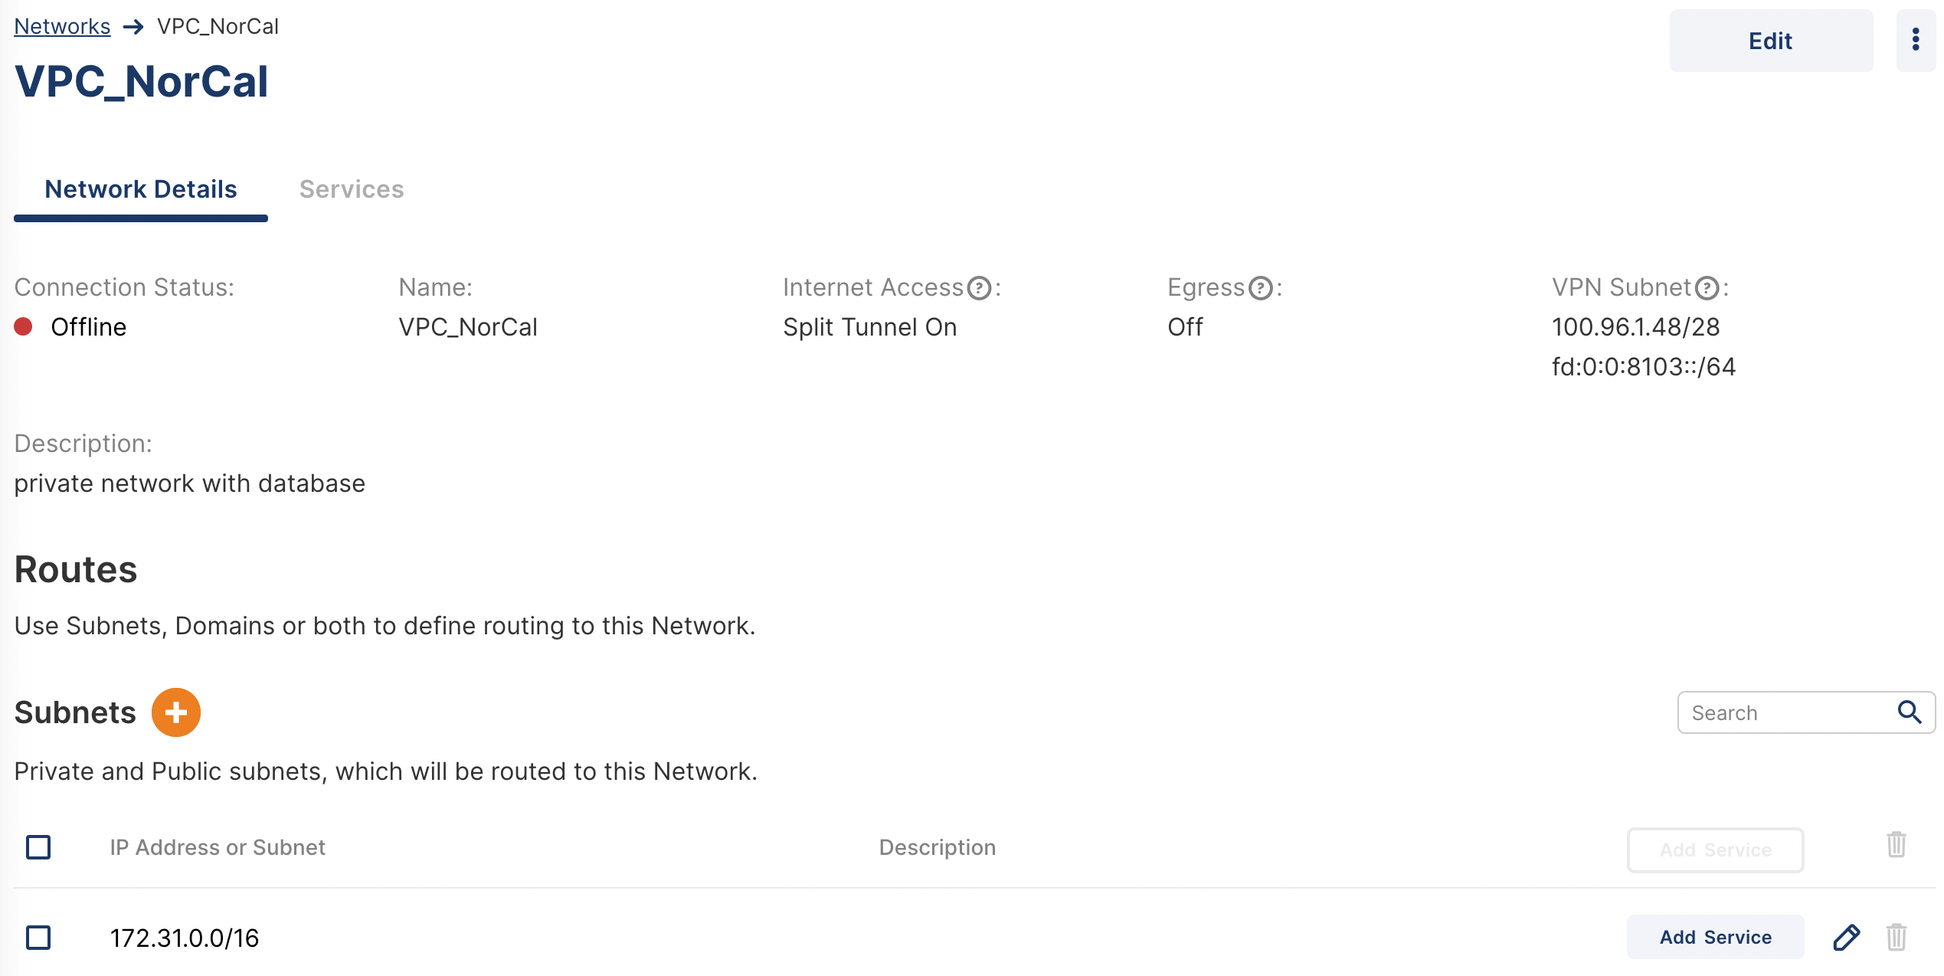
North California Network
North California network is using the 172.31.0.0/16 subnet. Owen needs to configure this as the Network subnet that needs to be available from CloudConnexa.

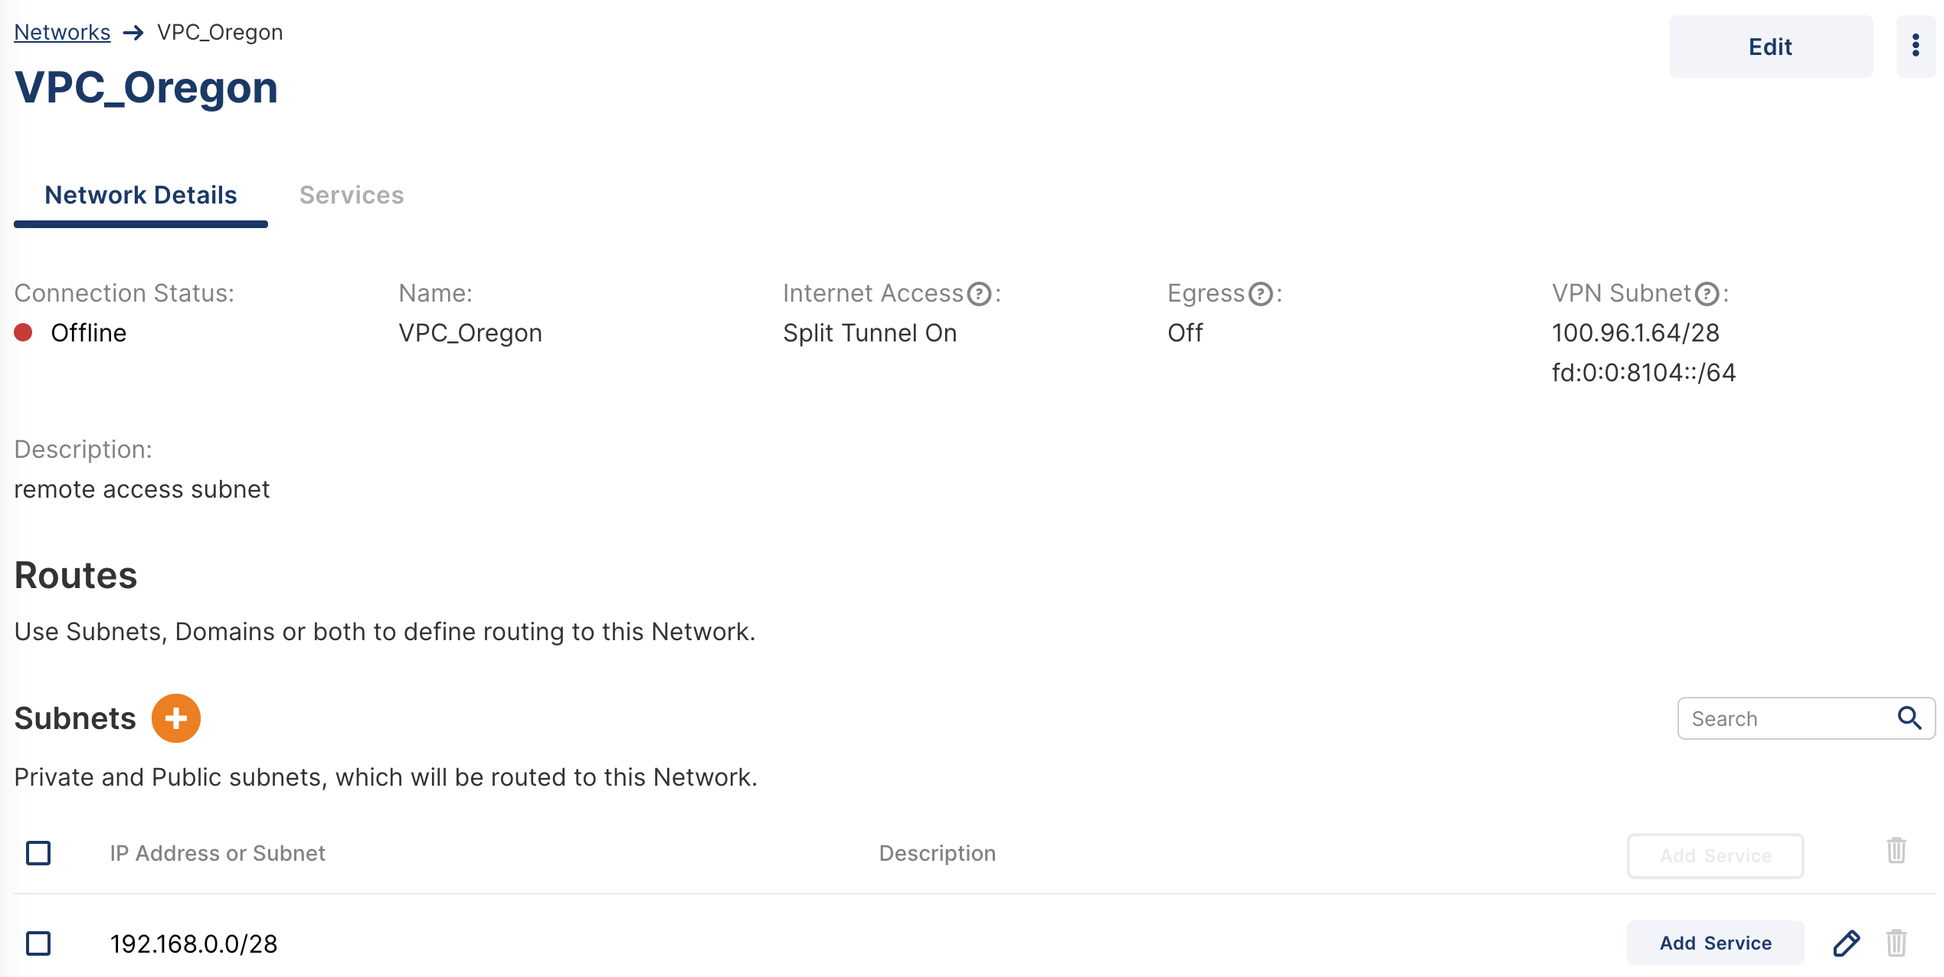
Oregon Network
The Oregon network uses the private 192.168.0.0/28 subnet. Owen needs to configure this as the Network subnet that needs to be available from CloudConnexa.
Configure Networks
Owen configures both networks using the Admin portal as shown below. See, Adding A Network.


Install Connector in North California Network
Owen installs Connector on one of the instances in the network and uses the respective Connector profile to get the instance connected to CloudConnexa. See, Installing Network Connector – Linux.

Add routes in North California Network
Before adding routes, Owen disables ‘Source/Destination’ Check on the Network interface of the instance running the Connector.
The Connector already has NAT and IP forwarding (routing) enabled.
Next, he adds routes in the route table associated with the VPC, for the Oregon Network and the CloudConnexa WPC subnets using the instance running the Connector as the next-hop Target.
Note
If the Connector was deployed using the AWS CloudFormation template and you allowed CloudFormation to create RouteManagerRole IAM::Role resources or to update routes automatically, then routes in the VPC Route table will use the Connector as next-hop Target automatically and update the route table as new Networks are added to the WPC. You do not need to add routes manually.
Install Connector in Oregon Network
Owen installs a Connector on one of the instances in the Network and uses the respective Connector Profile to get the instance connected to CloudConnexa. See, Installing Network Connector – Linux.
Add Routes in Oregon Network
Prior to adding routes, Owen disables Source/Destination Check on the Network interface of the instance running the Connector.
The Connector already has NAT and IP forwarding (routing) enabled.
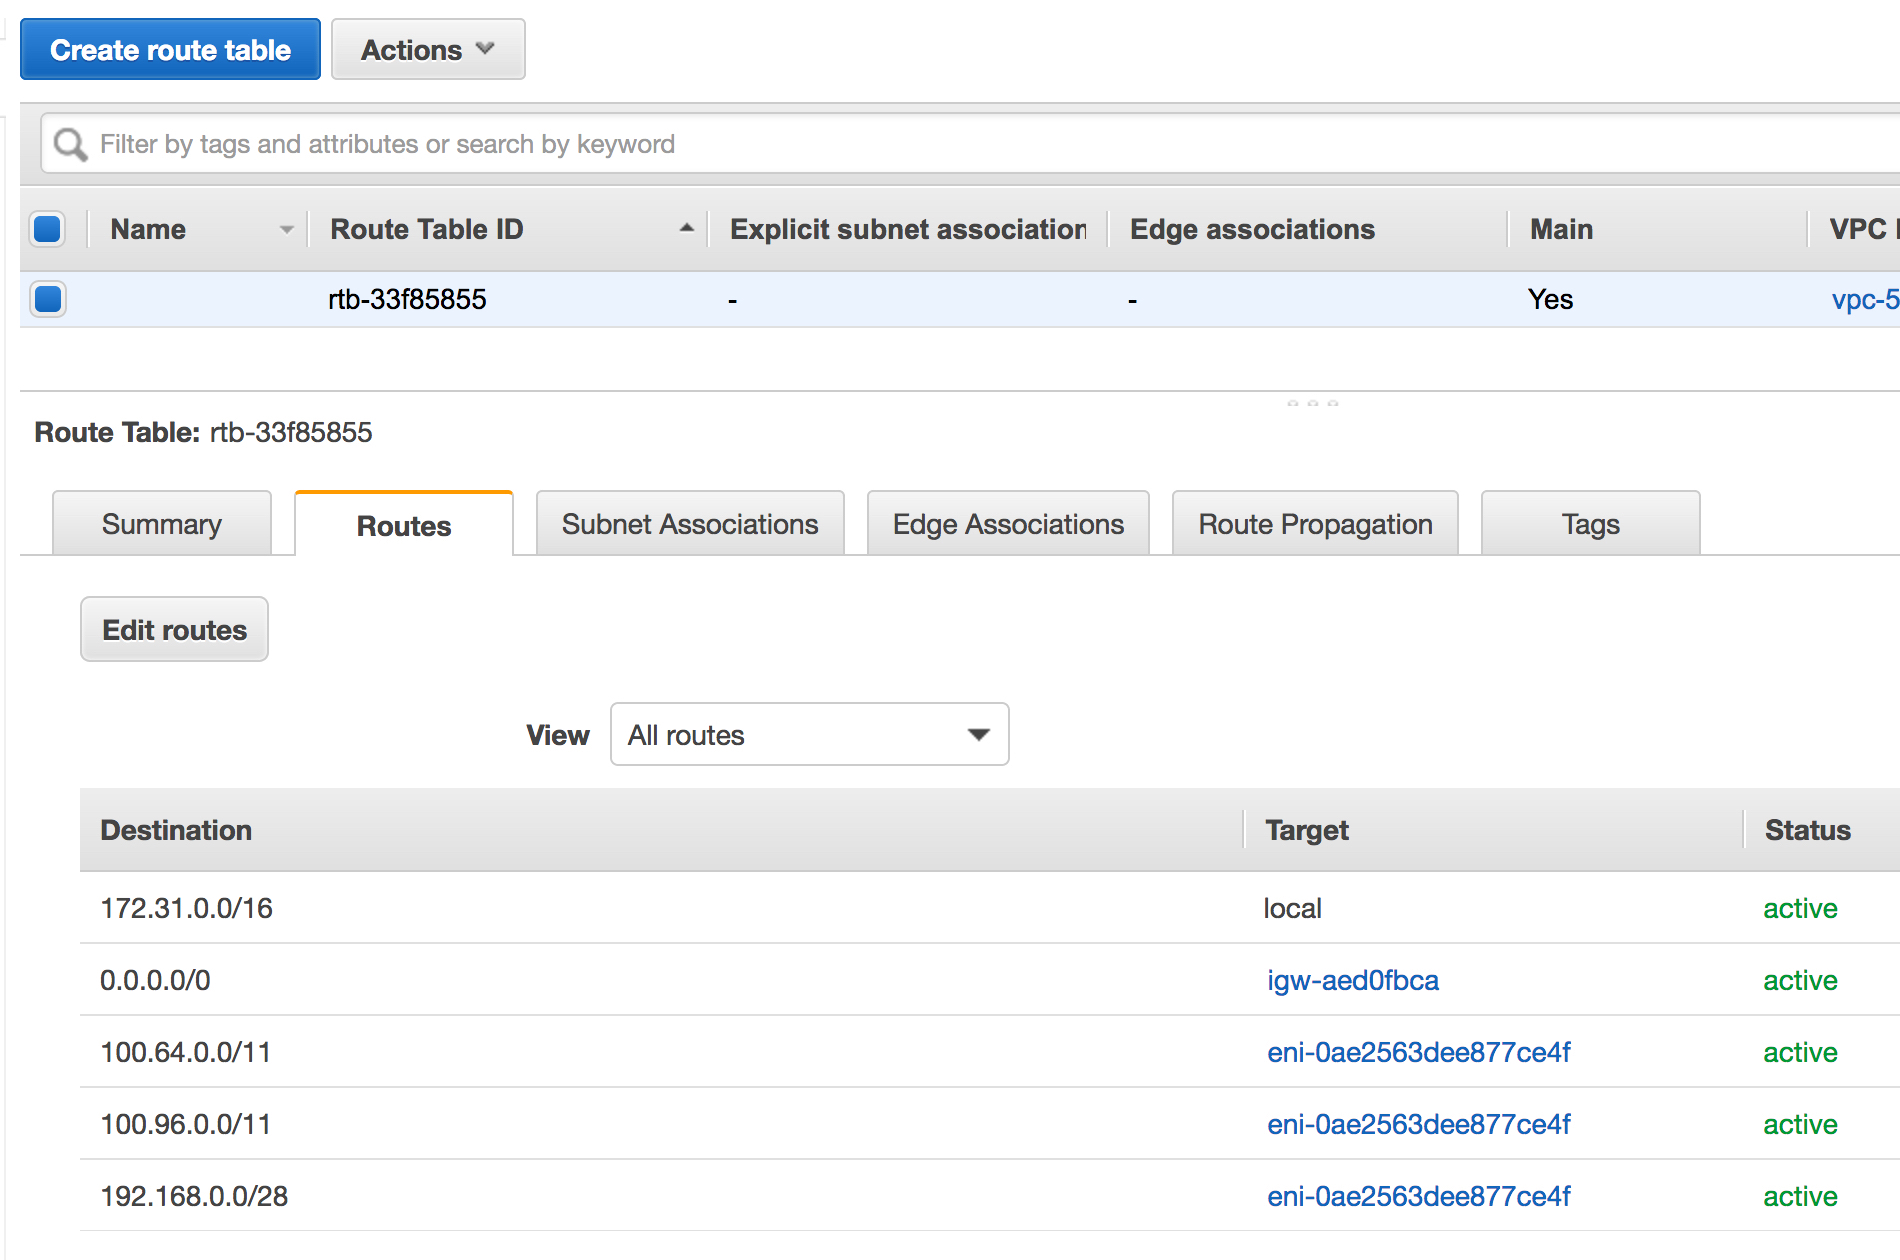
Next, he adds routes in the route table associated with the VPC, for the Oregon Network and the CloudConnexa WPC subnets using the instance running the Connector as the next-hop Target.
Note
If the Connector was deployed using the AWS CloudFormation template and you allowed CloudFormation to create RouteManagerRole IAM::Role resources or to update routes automatically, then routes in the VPC Route table will use the Connector as next-hop Target automatically and update the route table as new Networks are added to the WPC. You do not need to add routes manually.
Test Connectivity
Now, Owen can connect his laptop to CloudConnexa using the Connect Client (see importing Profile section, User Guide – Configuring a VPN for Secure Access to Internet), and reach any instance in both of the private Networks. As shown below, instances in private Networks can also reach each other.
