Tutorial: Configure a Ubiquiti (EdgeMAX) Router To Connect to CloudConnexa
This tutorial contains instructions on how to use a Ubiquiti (EdgeMAX) router and configure it to use a Connector profile to connect to CloudConnexa and make the network part of your WPC.
Introduction
You can configure a Ubiquiti compatible router for Network Connector deployment. You must use specific sections from the OpenVPN Connector Profile and apply them to the associated router settings.
Note
You must ensure that your router OS is EdgeRouter X v2.0 or newer.
Downloading the Connector profile
Sign in to the CloudConnexa Administration portal at https://cloud.openvpn.com.
Navigate to Networks and open your router Network.
Click the name of the router Network.
Click the Connectors tab.
Click the Deploy drop-down menu of the Connector you wish to modify.
Select Deploy Connector.
Click Provider Type drop-down menu.
Select Ubiquiti.
Click Download OVPN Profile and save it on your local computer.
Alternatively, you may download the profile by clicking the Network name, and the edit icon for the Network.
Or from the Connectors menu.
Configuring the Ubiquiti (EdgeMAX) router
Copy the
.ovpnProfile to the router using secure copy protocol (SCP) between your local computer and the router.Access terminal and execute this command:
scp <path to Profile/Profile_name.ovpn> <username>@<Router_external_IP_Address>:/config/auth,where<path to Profile/Profile_name.ovpn>is the absolute path for the.ovpnProfile, and the username is the to login on your router using SSH andRouterexternalIPAddressas the IP address of the router.Connect to the router via SSH.
Enter config mode and create a new interface, and commit and save your changes. Use these commands:
configureset interfaces
openvpn vtun0 config-file /config/auth/Profile.ovpnNote
OpenVPN tunnel interface must be name
vtun<num>commitsaveexitConnect to the router through HTTPS.
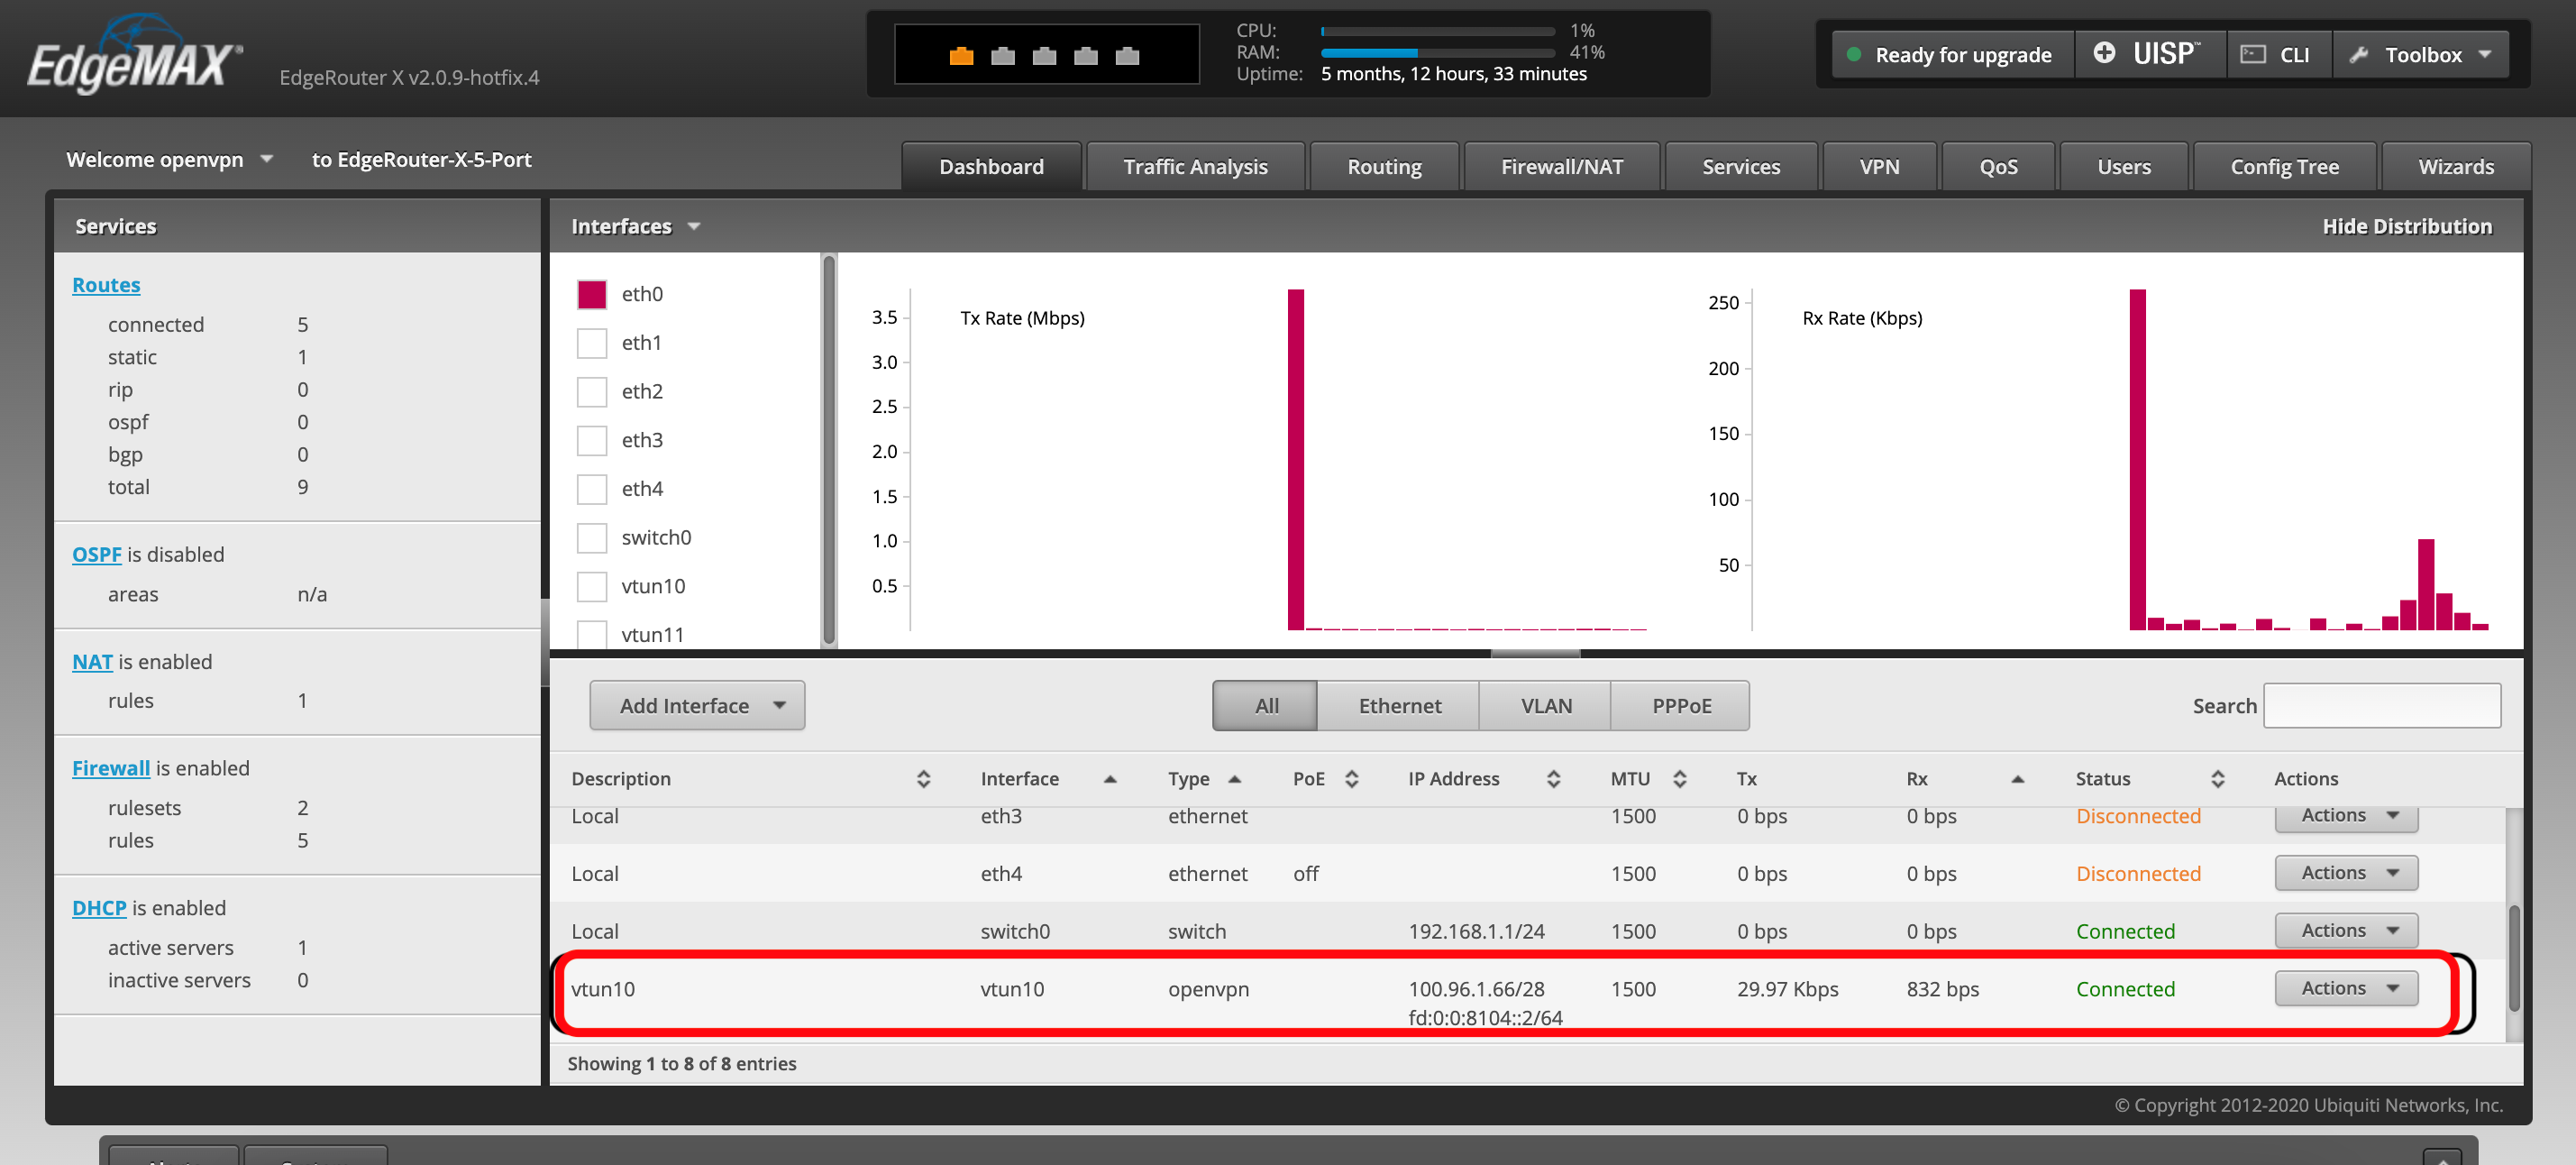
Navigate to the Dashboard tab.
Check that your newly created interface <interface_name> exists with an interface type of openvpn, a Connected status, and an assigned IP address.