Tutorial: Login to User Portal From SAML Identity Provider
You can have your users to sign in to the CloudConnexa User Portal directly from your SAML IdP application dashboard.
If you want your Users to sign in to the CloudConnexa User Portal directly from your Identity Provider’s application dashboard, please follow the steps below:
Note
Sign in from the Identity Provider’s dashboard will not result in a WPC connection. Users will still need to establish a WPC connection using OpenVPN Connect client.
First, carry out the steps below to find the value of the Relay State used during the SAML authentication:
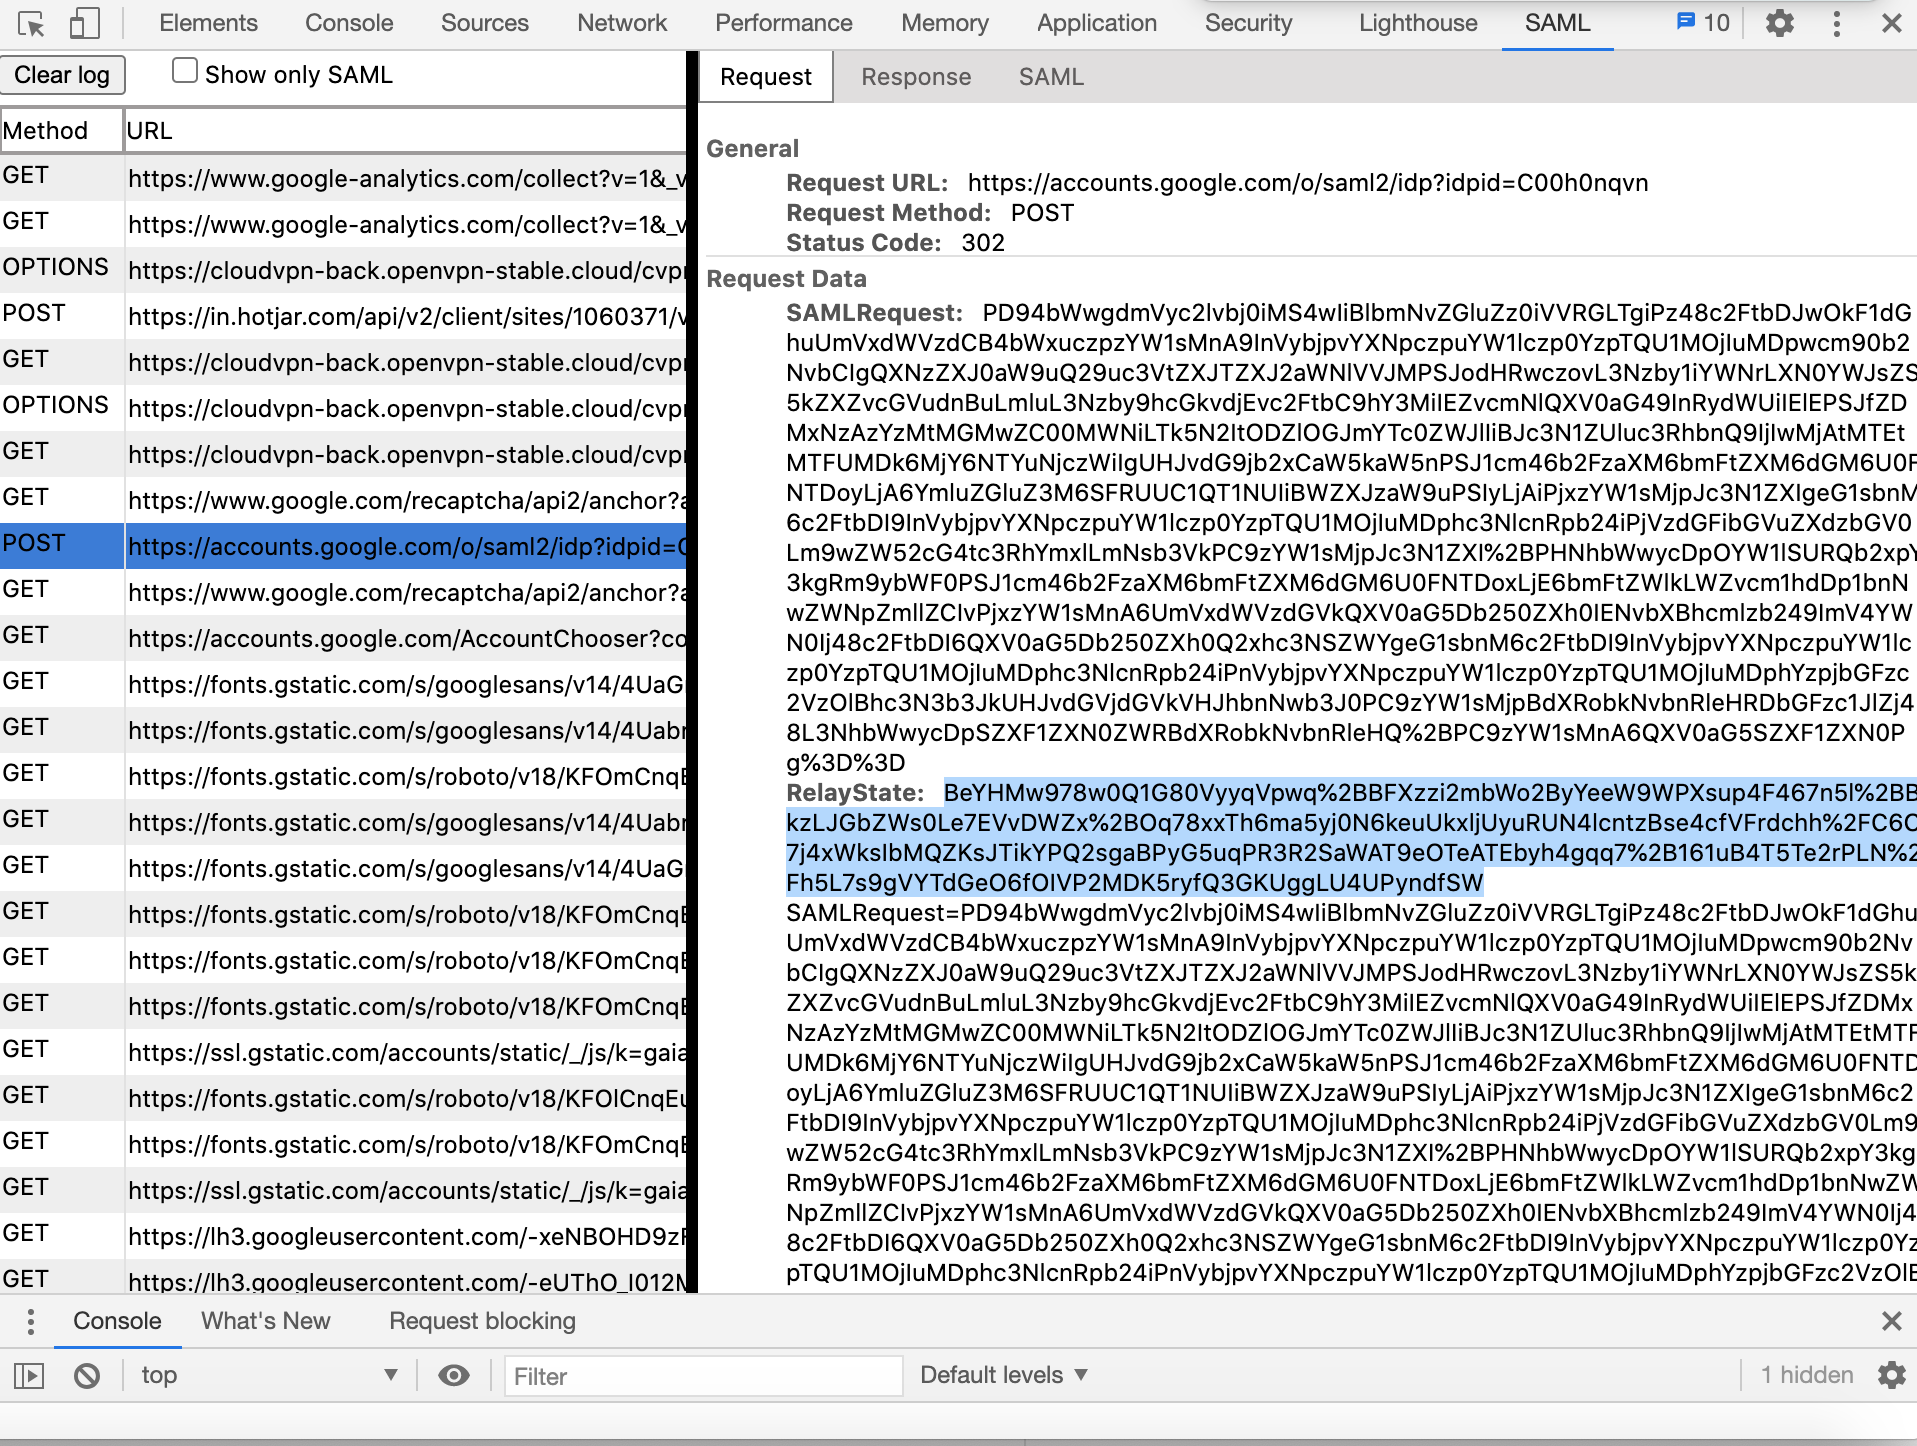
Install and open SAML extension (https://chrome.google.com/webstore/detail/saml-devtools-extension/jndllhgbinhiiddokbeoeepbppdnhhio?hl=en-US) using Chrome web browser
Login to CloudConnexa as a User by opening
https://[cloud-id].openvpn.comusing the Chrome web browserFind and click on the resulting SAML response/request in the opened SAML extension
Find and copy the value for Relay State (see the screenshot below)
Paste the copied value into https://www.urldecoder.org/ and decode
Log into the Identity Provider’s Administration portal and carry out these steps:
Open the settings for the application configured to represent CloudConnexa
Copy decoded value from step 1.e and paste it in the Relay State or equivalent field
After some time, changes will take effect on IdP side and Users will be able to login to the CloudConnexa User Portal from the Identity Provider’s application dashboard.