Tutorial: Enable routing and NAT on Windows Server 2016
This configuration tutorial provides the steps to enable routing and NAT on a Windows Server 2016.
This configuration tutorial provides the steps to enable routing and NAT on a Windows Server 2016.
You must first deploy the Routing and Remote Access Service on Windows Server.
We strongly recommend that you refer to the specific documentation for the Windows Server version that you are using.
This document provides information on deploying Routing and Remote Access Service for Windows Server 2016. You can refer to Microsoft’s own documentation here: https://docs.microsoft.com/en-us/windows-server/remote/remote-access/ras/remote-access-server-role-documentation
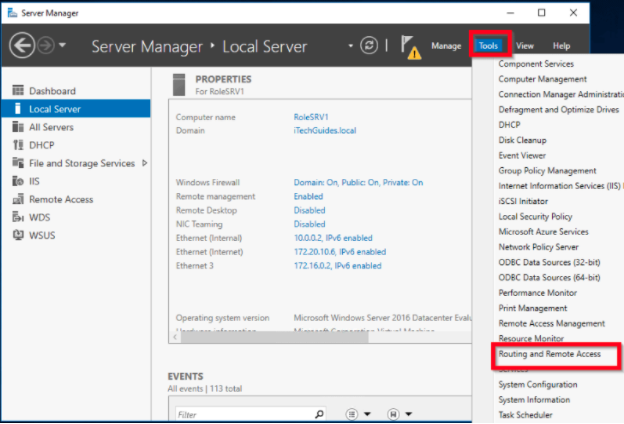
Open Server Manager, click Tools and select Routing and Remote Access.
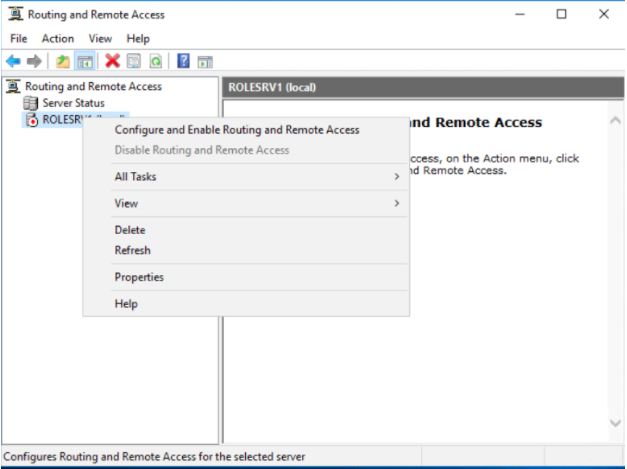
Right-click the server, and select Configure and Enable Routing and Remote Access.
When the setup wizard opens, click Next.
If Routing is needed:
Select Custom configuration and click Next
Select LAN routing
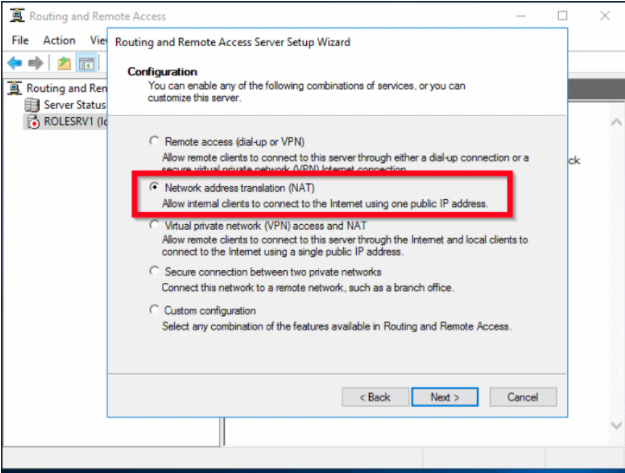
If NAT is needed:
Select Custom configuration and click Next.
Select Lan routing.
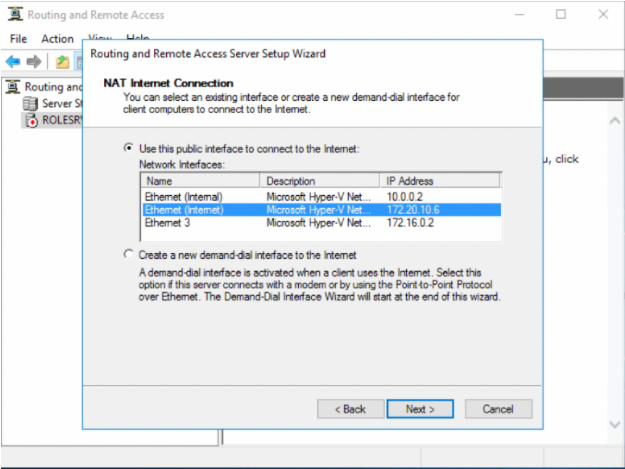
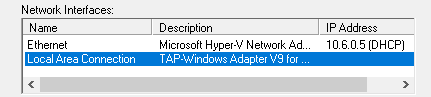
Select the network adapter that shares the internet connection (in this case Local Area Connection - TAPv9 adapter), and then click Next.
On the summary page, click Finish.
The wizard initializes and starts the RRAS service. Once the initialization completes, the server status icon changes to green.
Re-start the service/server.