Tutorial: Test the New Web API (OpenAPI) in Access Server 3.0
How to test the new Web API (OpenAPI) introduced in Access Server 3.0 to control functionalities remotely through endpoints.
Overview
This tutorial explains how to test the new Web API (OpenAPI) introduced in Access Server 3.0, which lets you control Access Server functionalities remotely through REST API endpoints.
Prerequisites
An installed Access Server running 3.0.x.
Console access and the ability to get root privileges.
A remote device where you can run the API calls.
You can view the API specification in two ways:
Option 1: Enable API documentation in Access Server
Connect to the console and get root privileges.
Run the following commands to enable the API documentation:
sacli --key "openapi.web_access" --value 1 ConfigPut
sacli start
Open the following URL in your browser:
https://203.0.113.5:943/api/docs
Replace
203.0.113.5with your Access Server IP address.
Important
This enables the browser-based documentation view and is an optional step. The API is active by default in Access Server 3.0.
Option 2: Review the API documentation
For details on the Access Server API schema and endpoints, see the Access Server API documentation.
For the purposes of this tutorial, we'll demonstrate how to create a new user using the /users/create endpoint.
Method 1: Run API calls with cURL
Tip
You can run these API calls directly on your Access Server or from a remote machine.
Generate an authentication token for an admin user:
sacli --user openvpn1 GenerateAuthToken
Where
openvpnis a user with admin privileges. We need a user with admin privileges to generate the needed Authentication Token for this method.This outputs an authentication token, for example:
root@openvpnas:~# sacli --user openvpn GenerateAuthToken
{'expirytime': 1761002715,
 'maxsessiontime': 1761016515,
 'token': 'SESS_TOKEN_t5RT2/S18pEU9PFKBWoXL40NNZring0ntjmSa6hbI6d9SFDxxFF8OEII+qizKaY+J4ub4qT+jDHFuPQ9zHgI+mvRzLu0hsuB+/0BEXFcYeZCHGzg+TE75Fvkn+NV'}
Alternate first step:
You can also generate an authentication token for an admin user using cURL.
Run the following command where
openvpnis an admin user andpass4openvpnis the user password:curl -X 'POST' 'https://203.0.113.5:943/api/auth/login/userpassword' -H 'accept: */*' -H 'Content-Type: application/json' -d '{"request_admin": true, "username": "openvpn","password": "pass4openvpn"}' -kEnsure the user has admin privileges to generate the necessary authentication token for this alternate method.
This outputs an authentication token. Example output:
root@openvpnas:~# curl -X 'POST' 'https://203.0.113.5:943/api/auth/login/userpassword' -H 'accept: */*' -H 'Content-Type: application/json' -d '{"request_admin": true, "username": "openvpn","password": "pass4openvpn"}' -k
{"auth_token":"SESS_TOKEN_9EtCbf/qQbfmox6k6NvAGomUMCR+x3wLAGdzIK/uG+mm00MZD9mxQ4aMjttoebzKRpmAt1ShH4XEgh9pujVgxns2Bbda3SF84vuSeqmZnOkJ1VSiPreCznjQ","expires_after":"2025-10-23T21:00:23.000000Z","renewable_until":"2025-10-24T00:50:23.000000Z","user_properties":{"requires_mfa_enrollment":false,"user_type":"admin","allowed_profiles":["userlogin"],"enforce_strong_passwords":true,"username":"openvpn","allow_password_change":true}}
Use the token to create a new user:
curl -k --location 'https://203.0.113.51:943/api/users/create' \
--header 'X-OpenVPN-As-AuthToken: <Authentication Token here>2' \
--header 'Content-Type: application/json' \
--data '{
    "name": "brandonqa3"
}'
Verify that the user was created:
sacli --pfilt brandonqa UserPropGet
Example output:
{
  "brandonqa": {
    "type": "user_connect"
  }
}
Method 2: Run API calls using 'apicall'
Tip
You can also use sacli's built-in apicall function to perform API requests directly from Access Server.
Run the following command:
sacli --method POST --url 'api/users/create' --value '{"name": "brandonqa1"}' apicallReplace
brandonqawith the username you want to create.Example output:
HTTP-Status: 201
Verify that the user was created:
sacli --pfilt brandonqa UserPropGet
Example output:
{
  "brandonqa": {
    "type": "user_connect"
  }
}
Method 3: Run API calls using the embedded Swagger UI from Access Server
Sign in to the API with an auth token
Enable the API documentation for your Access Server.
Open the API docs in your browser:
https://203.0.113.51:943/api/docs
Replace
203.0.113.5with your Access Server IP address.In the auth section, click to expand
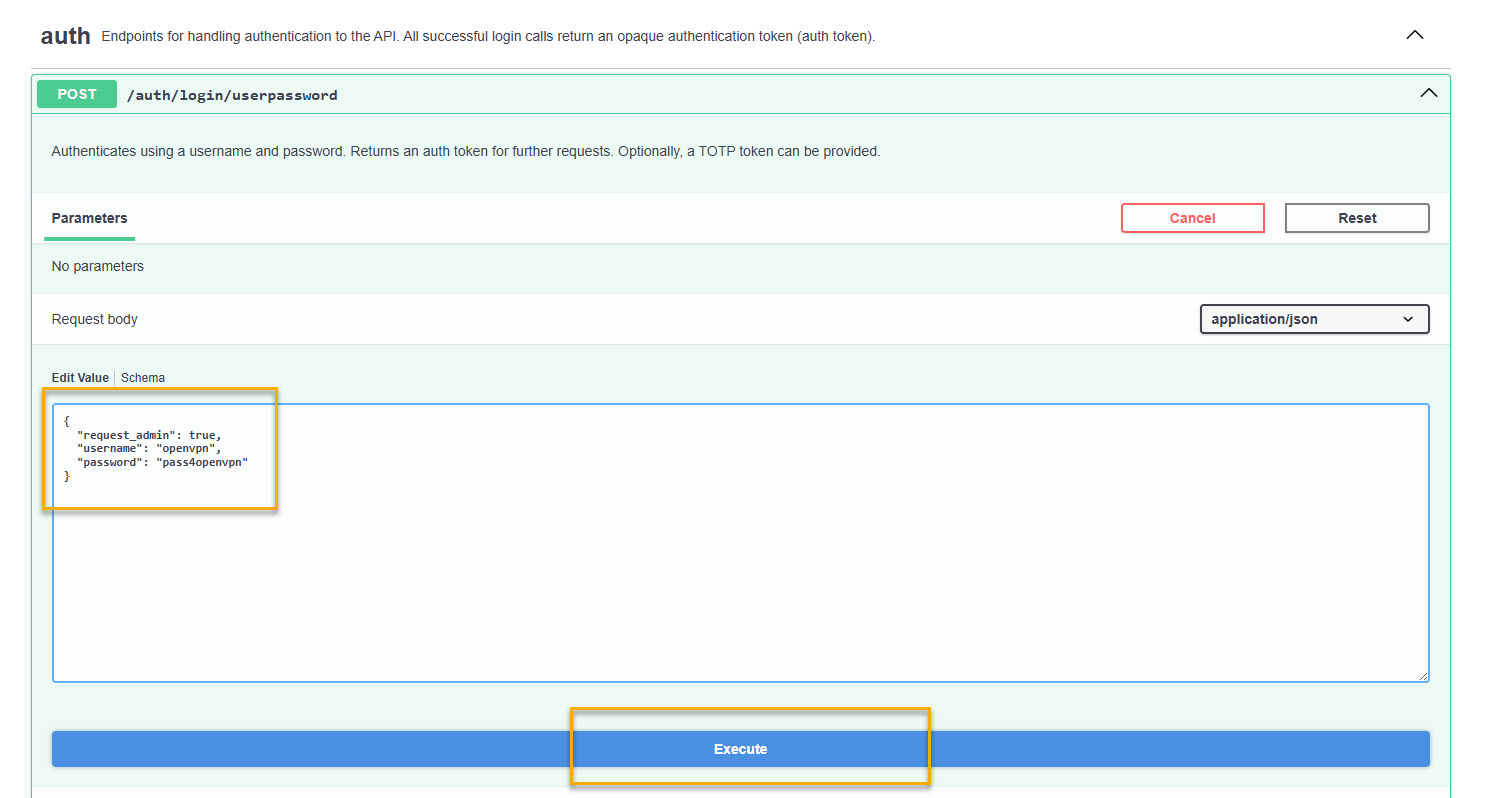
/auth/login/userpassword.Click Try it out.
The Edit Value box displays.
Replace the schema values with these, where
openvpnis an admin user andpass4openvpnis the user password:{ "request_admin": true, "username": "openvpn", "password": "pass4openvpn" }Click Execute.
The response displays with the auth_token in the Response body:
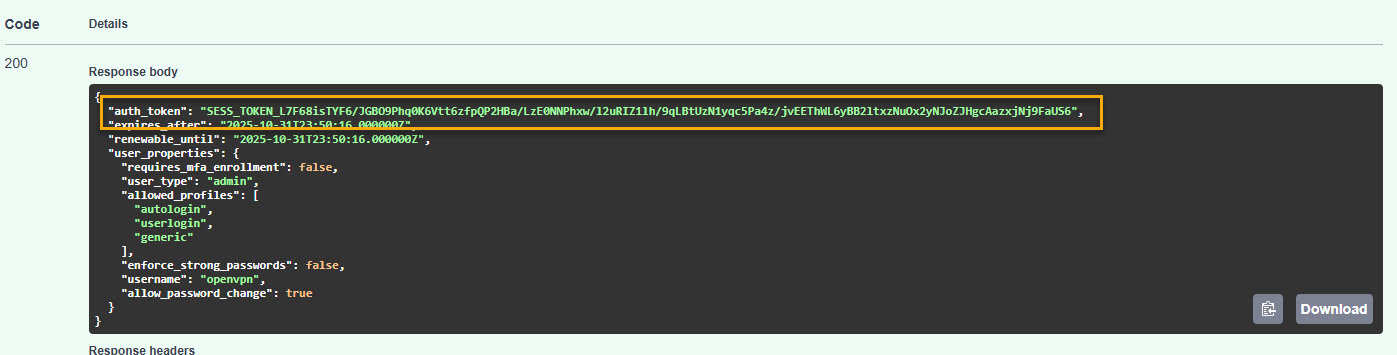
Copy the auth_token value.
Scroll back up and click Authorize.
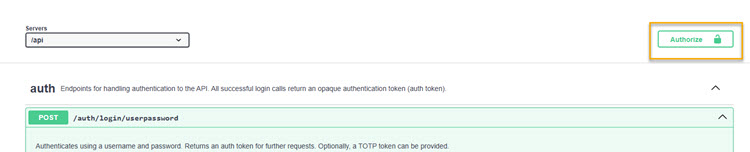
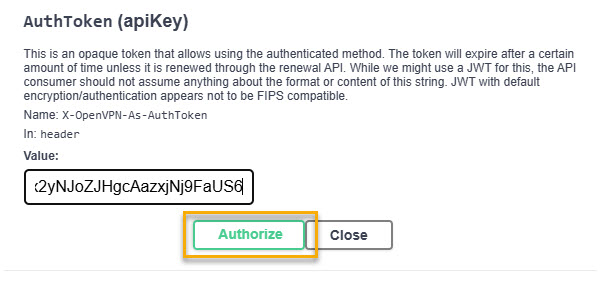
The Available authorizations modal displays.
Under AuthToken (apiKey), paste the authentication token in the Value text box.
Click Authorize.
You can now run API calls.
Run API calls
Scroll down to the API endpoint
/users/create.Click Try it out.
The Edit Value box displays.
Replace the schema values with the following, where you replace
brandonqawith the username you want to create.{ "name": "brandonqa" }Click Execute.
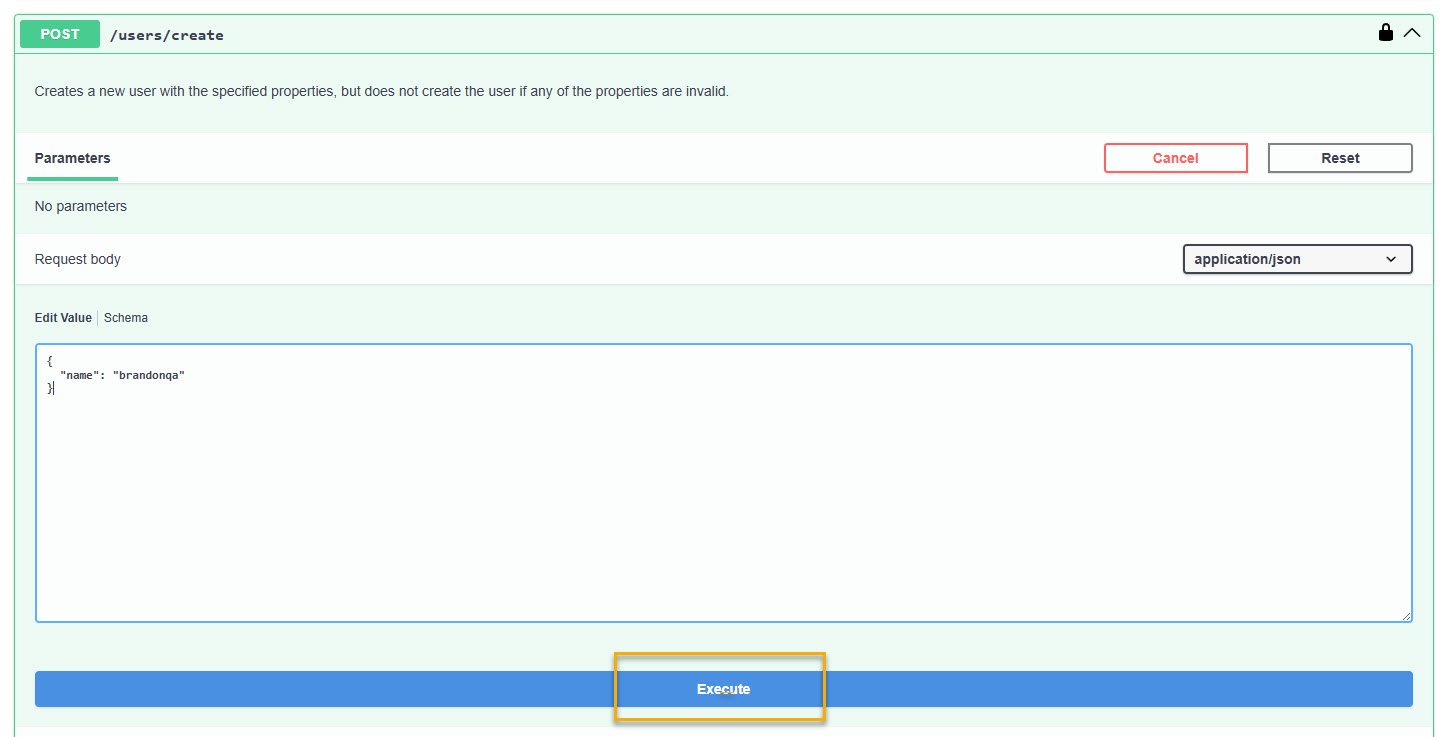
The response displays with code 201 — the user was created successfully.
Verify the user was created with the following command on the Access Server command line with root privileges:
sacli --pfilt brandonqa UserPropGet
Example output:
{
  "brandonqa": {
    "type": "user_connect"
  }
}