Tutorial: Integrate Okta with Access Server via RADIUS
RADIUS can be used to configure Access Server to authenticate against Okta. RADIUS supports MFA, which LDAP doesn't.
Overview
RADIUS can be used to configure Access Server to authenticate against Okta. RADIUS supports Multi-Factor Authentication (MFA), which is not supported by LDAP. That’s one of the benefits of a longer setup.
The following pieces will make up the RADIUS integration between Okta and Access Server:
Okta RADIUS app.
Okta RADIUS agent.
Access Server.
Okta directory.

Okta directory.
Installed Access Server.
You’ll need to add a RADIUS app to your Okta Admin Console. The RADIUS port and shared secret must pass through the Console to connect a RADIUS agent with the VPN.
Important
Okta RADIUS only supports PAP-based authentication, which Access Server supports.
From your Okta Admin Console, click on Applications > Applications.
Click on Browse App Catalog.
In the Search bar, search for RADIUS application, select it, then click Add Integration.
Under the Application label, enter a unique application name for your RADIUS app.
After creating the app, you need to configure it starting with the Sign on tab:
Authentication: Leave this as default.
UDP Port: 1812.
Secret Key: Enter the secret key that will be used to encrypt and decrypt the user password. It will be identical to what is configured in Access Server.
Application username format: Select from the drop-down how the RADIUS client sends the username.
The final step is to add users to the app. All Users or Groups here will have access to Access Server's Client Web UI using their Okta credentials.
Optional: You can require a message authenticator for incoming client requests. Refer to the optional next step.
To enhance security, you can enable verification of the "Message-Authenticator" attribute sent by the RADIUS client (Access Server):
Once the RADIUS app is created, go to the Sign On tab.
Scroll to the Authentication Protocol section and click Edit.
Enable the option Require Message-Authenticator for incoming client requests.
Click Save.
Important
Ensure your Okta agent is running version 2.24.0. Otherwise, Okta won't send the "Message-Authenticator" attribute in the RADIUS response. The RADIUS connection will fail if you have "Verify Message-Authenticator Attribute" configured on Access Server.
For more detailed information about how to check the Okta RADIUS agent, refer to Determine the RADIUS agent version.
Important
By default, Access Server sends the "Message-Authenticator" attribute in the RADIUS requests since version 2.14.0.
If you enable this check on the Okta side, ensure your Access Server runs version 2.14.0 or newer.
If you enable this check on the Access Server side, ensure your Okta agent runs version 2.24.0. If the Okta agent version is lower, upgrade it by installing a new version from Settings > Downloads under the Okta admin panel. For more info: Okta Help Center.
You can install the agent on a Windows Server or request the Linux agent from Okta, which is considered Early Access. The steps for the Windows Server are first followed by the Linux agent.
Install Okta RADIUS agent on a Windows server
From your Okta Administrator Dashboard, select Settings > Downloads, then scroll down to the Okta RADIUS Server Agent and click Download Latest.

Run the downloaded file to install the agent on your Windows Server.
Choose whether to define specifics or use a direct connection for the proxy information.
Enter your Okta org ID for the subdomain.
Sign on with Okta admin credentials.
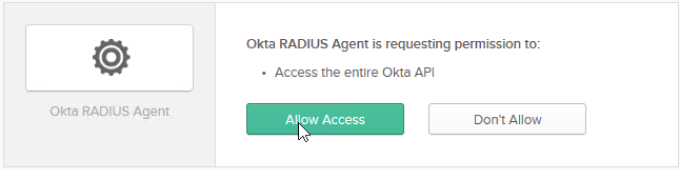
Click the Allow Access button.
The RADIUS agent completes the installation.
Click Finish to complete the RADIUS agent installation on Windows Server.
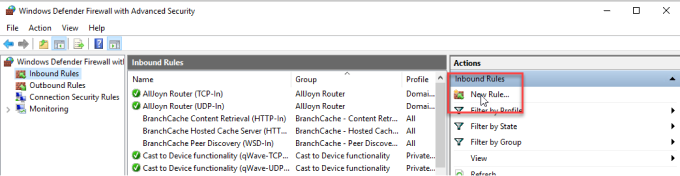
Next, open your Windows Defender Firewall with Advanced Security and click on New Rule.
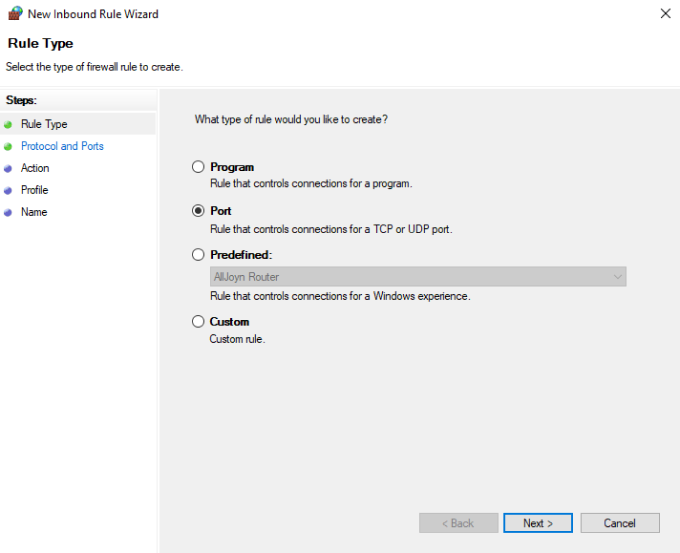
Select Port.
Select the UDP protocol, enter your port number, and click Next.
Select Allow the connection.
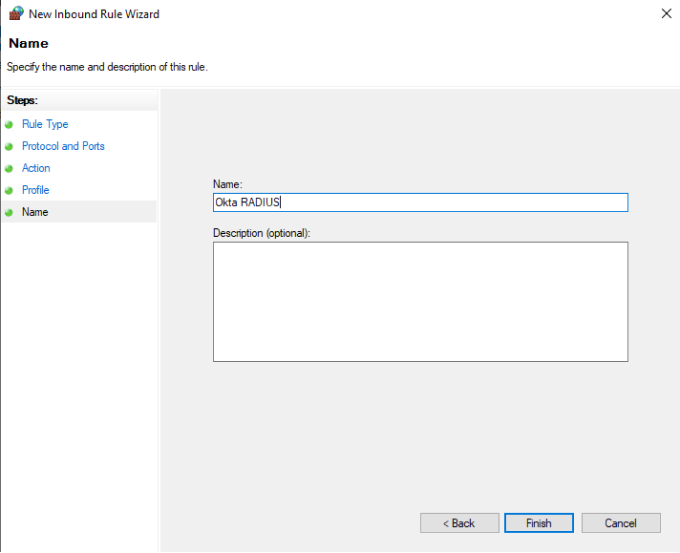
Set the Profile for your network needs, enter a name, and click Finish.
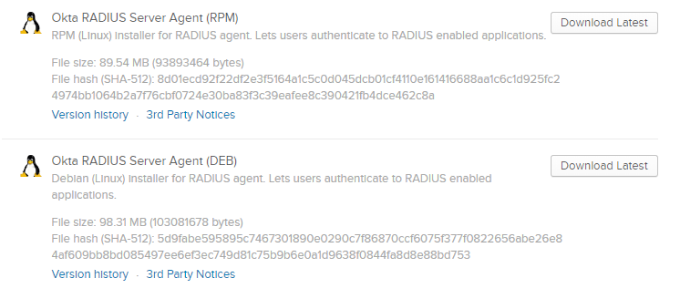
Install Okta RADIUS agent on Linux
Installing the Okta RADIUS agent on Linux requires contacting Okta Support. It’s considered an early access feature, so you’ll need to request that it be added to your downloads.
After Support has added the Linux agent for you, sign in to your Okta admin panel.
Click Settings > Downloads.
Select the link next to your Linux OS's Okta RADIUS Server Agent.
Upload the file to your Linux server.
Validate the download by entering the following command to generate the hash on your local machine. (Ensure you replace 'setup' with the file path to your downloaded file.)
sha512sum
Verify that the generated hash matches the hash in your Okta Admin Console on the Downloads page.
Install the agent using the appropriate command for your Linux OS. (Ensure you have root privileges.)
For RHEL:
rpm -Uvh OktaRadiusSetupRPM-{version#}.rpmFor Ubuntu/Debian:
apt install /${PATH_TO_FILE}/OktaRadiusAgentSetup-{version#}.deb
You'll be prompted to enter your base URL for Okta during installation. Example: https://yourbiz.okta.com.
After that, you’ll be prompted to authenticate with your Okta tenant. Copy the URL into a web browser.
In the browser, click Allow Access.
The Linux terminal will display a message that the installation is complete.

For more detailed information about the agent, refer to Okta’s Linux RADIUS agent documentation.
Now you’ll configure Access Server to use Okta for credentials via RADIUS.
Sign in to the Admin Web UI.
Click Authentication > RADIUS.
Enter your RADIUS authentication details.
RADIUS Setting
Details
Hostname or IP Address
Enter the hostname or IP address of your Okta RADIUS agent's server.
Shared Secret
Enter the shared secret from the Okta RADIUS app.
Authentication Port
Enter the port in the Okta RADIUS app (likely the default port, 1812).
Verify Message-Authenticator Attribute
(Optional) Set to Yes to enable this verification. This requires the Okta RADIUS agent version 2.24.0.
RADIUS Authentication Method
Set PAP to Yes.
Click Enable RADIUS Authentication under RADIUS Settings.
Access Server now uses Okta for authentication.
Your users can sign in to the Client Web UI using their Okta credentials. You can also include the MFA setup in the Okta admin panel.
The user goes to the Client Web UI in their browser, enters credentials, and clicks Sign In.
(Optional) The user may see an MFA prompt based on the Okta setup.
After successful authentication, the user can choose to download OpenVPN Connect or a connection profile.
MFA is not set up in Okta admin panel
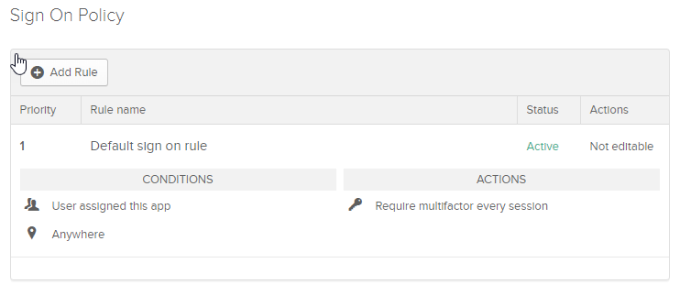
If you encounter an error message, Access denied, or invalid creds, it may be that you haven’t completed the multifactor configuration in the security section of your Okta admin panel. Also, if you check the logging in your RADIUS app, you’ll see the error message, “User does not have a valid factor enrolled.”
This is because the RADIUS app has a requirement to use multifactor through a default sign-on rule:
To resolve the error, you can either set up Multifactor for users or create a new sign-on rule with a higher priority.
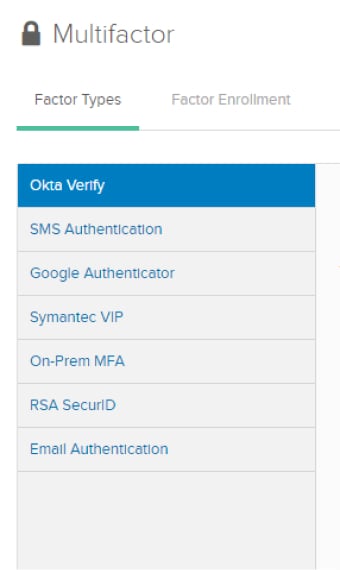
Set up Okta multifactor
In your Okta admin panel, go to Security > Multifactor.
Set up and configure the MFA factor of your choice.
Create a rule that doesn't require MFA to sign in
From your RADIUS application's Sign On tab, scroll to the bottom and click Add Rule.
Enter the new rule without the multifactor box checked and click Save.
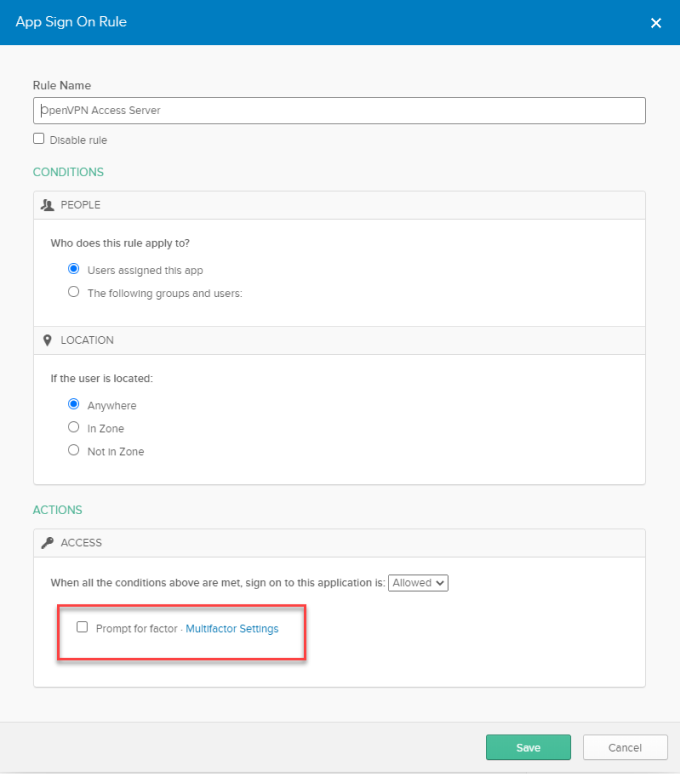
Ensure your new rule is a higher priority than the default rule, and your users will no longer be prompted for additional authorization.
MFA causes user lockout in Access Server
If your user receives a ‘LOCKOUT’ error message when attempting to sign in, it may be due to the steps it takes to enroll in MFA through their Client Web UI. This is caused by Access Server's lockout policy. Refer to Authentication failure lockout policy for the default values and how to adjust settings. The steps below show you the error as received by the user.
If the user hasn't enrolled in MFA yet, when they first sign in, they will be prompted:
After entering their credentials, they receive the MFA prompt.
After enrolling, they are asked for a phone number.
Once entering their phone number, they must then enter the code sent to their phone.
They then receive a LOCKOUT message.
This happens because the challenges are seen as login attempts from Access Server. If you review your logs in the Admin Web UI, you'll see those.

If the user waits 15 minutes, they can sign in again. They will then only go through the credentials authentication step and one MFA step.
Check if the "Message-Authenticator" attribute is supported
Issue: If you enable "Verify Message-Authenticator Attribute" on your Access Server version 2.14 and newer, but the Okta RADIUS Agent version is lower than 2.24.0, the RADIUS connection will fail with any of the below errors in Access Server logs:
RADIUS auth exception: The requirement for Message-Authenticator attribute is turned on for the RADIUS server replies (auth.radius.0.server.0.verify_reply_authenticator = true) but the server message does not include this attribute, or the attribute is not valid.: auth/authrad:343,auth/authrad:237,auth/authrad:225 (pyovpn.auth.authrad.AuthMessageMissingException)
VPN Auth Failed: 'The requirement for Message-Authenticator attribute is turned on for the RADIUS server replies (auth.radius.0.server.0.verify_reply_authenticator = true) but the server message does not include this attribute, or the attribute is not valid.' [None]
These mean that Access Server checks/expects the "Message-Authenticator" attribute in the RADIUS response from the Okta side, but it doesn’t contain that RADIUS Attribute.
Solution: Ensure your Okta RADIUS agent is 2.24.0. If not, upgrade it. For more information, refer to the Okta Help Center.
Issue: If you enable "Require Message-Authenticator for incoming client requests" on the Okta side but the Access Server version is lower than 2.14.0, the RADIUS connection will fail with the following error in Access Server logs:
"RADIUS timeout on try #2 server=('10.136.201.182', 1812) (possible incorrect secret?)" [None]Solution: Ensure Access Server is version 2.14.0 or newer. If not, upgrade it.