Tutorial: Configure External PKI with SecureW2
How to set up the Access Server External PKI (Public Key Infrastructure) feature using SecureW2.
Overview
The Access Server external public key infrastructure (PKI) feature integrates Access Server with third-party tools for X509 PKI management instead of using the built-in certificate management capabilities.
When configured for external PKI usage, Access Server doesn't manage client certificates directly; instead, the customer's third-party PKI software generates and distributes client certificate/key pairs to client machines and a server certificate/key pair to the OpenVPN server.
This tutorial shows you how to set up external PKI using SecureW2.
At a high level, these are the steps for your configuration:
Modify as.conf to set Access Server in external PKI mode.
Create the server and intermediate using SecureW2
Create certificate templates for the server and clients via SecureW2.
Generate the server certificate and key via SecureW2.
Generate the client certificate and key via SecureW2.
Create the TLS_auth key.
Generate Diffie-Hellman parameters.
Import the necessary certificate and key files to Access Server.
Provide certificate/key pairs in a P12/PFX file to the VPN client.
Generate and download a server-locked profile for the client.
Prerequisites
An installed Access Server.
A SecureW2 account and access to the Management Portal.
Console access and the ability to get root access.
An OpenVPN client that supports the macOS Keychain and Windows certificate store.
Connect to the Access Server console and get root privileges.
Edit as.conf for external PKI usage:
nano /usr/local/openvpn_as/etc/as.conf
Comment out certs_db:
# certificates database
# certs_db=sqlite:///~/db/certs.db
Save and exit the file — Ctrl-X, Y, then Enter.
Access Server no longer uses the certificate database. Instead, an external system must handle this.
To add a Root CA, follow these next steps:
Sign in to the JoinNow Management Portal.
Go to Dynamic PKI > Certificate Authorities.
Click Add Certificate Authority.
Under Basic:
From Generate CA For, select Device and User Authentication.
From Type, select Root CA.
In Common Name, enter the name for the root CA (for example, OpenVPN Root CA).
From Key Size, select 2048.
From Signature Algorithm, select SHA-256.
In Validity Period (years), enter how long the root CA certificate should remain valid.
Click Save.
Sign in to the JoinNow Management Portal.
Go to Dynamic PKI > Certificate Authorities.
Click Add Certificate Authority.
Under Basic:
From Generate CA For, select Device and User Authentication.
From Type, select Intermediate CA.
From Certificate Authority, select either an internal or an external CA.
In Common Name, enter the name for the intermediate CA (for example, OpenVPN Intermediate CA).
From Key Size, select 2048.
From Signature Algorithm, select SHA-256.
In Validity Period (years), enter how long the Intermediate CA should remain valid.
Under Notifications:
From Expiry Notification Frequency (days), select how often certificate expiry notifications are sent.
Select Notify user on successful Enrollment to send a notification after successful enrollment.
Under Revocation:
In Revoke Certificate if unused for, enter the number of days after which an unused certificate is revoked, and choose one of:
Since last usage — revoke if the certificate remains unused for that number of days.
Since certificate issuance — revoke that number of days after issuance.
From Reason Code, select a revocation reason: Certificate Hold, AA Compromise, Privilege Withdrawn, or Unspecified.
Click Save.
Go to Dynamic PKI > Certificate Authorities.
In the Certificate Templates section, click Add Certificate Template.
Under Basic:
In Name, enter a name for the server template (for example, OpenVPN Server Template).
In Validity Period, enter the validity duration in d m y format (for example,
0d 0m 1yfor one year).
Under Extended Key Usage, from Use Certificate For, select Server Authentication.
Click Save.
Go to Dynamic PKI > Certificate Authorities.
In the Certificate Templates section, click Add Certificate Template.
Under Basic:
In Name, enter a name for the server template (for example, OpenVPN Client Template).
In Validity Period, enter the validity duration in d m y format (for example,
0d 0m 1yfor one year).
(Optional, for deployments using auto-login profiles.) Under Certificate Extensions, in SAN > Other Name, replace the text in the box with
autologinrole.Under Extended Key Usage, from Use Certificate For, select Client Authentication.
Click Save.
Go to Dynamic PKI > Create Certificate.
Under Device Info, from Operating System, select Linux.
Under Certificate Signing Request:
Select Generate Keypair and CSR.
In Subject, enter the common name for the server certificate (for example, CN=server).
Under Certificate Issuance Policy:
From Certificate Authority, select the intermediate CA you created earlier.
From Use Certificate Template, select the server template you created earlier.
Select Include Entire Certificate Chain.
Under Distribution > Format, select PEM.
From Format, select PEM.
From Receive via, select Download.
Click Create.
When prompted, create a password for the server's private key.
A ZIP file downloads containing:
Server Certificate (server.crt)
Server Key (server.key)
CA Bundle (cacert.crt)
Go to Dynamic PKI > Create Certificate.
Under Device Info, from Operating System, select the VPN user's operating system (for example, Windows or macOS).
Under Certificate Signing Request:
Select Generate keypair and CSR.
In Subject, enter the common name for the client certificate (for example, CN=etest).
Under Certificate Issuance Policy:
From Certificate Authority, select the intermediate CA you created earlier.
From Use Certificate Template, select the client template you created earlier.
Under Distribution:
From Format, select PKCS12.
From Receive via, select Download.
Click Create.
When prompted, create a password for the client's private key.
A
.p12file is generated (for example,etest.p12.
Connect to the Access Server console and get root privileges.
Create a directory:
mkdir epki && cd epki
Place the CA bundle, server certificate, and key generated from SecureW2 via WinSCP or SCP in this new "epki" directory.
Remove the password from the server key:
openssl rsa -in server.key -out newserver.key
Important
When running this command, you'll be prompted for a password. Use the password you configured for the server key file earlier.
Create a tls_auth key for the OpenVPN server:
/usr/local/openvpn_as/scripts/certool --tls_auth
Generate Diffie Hellman parameters for the OpenVPN server:
openssl dhparam -out dh.pem 2048
Generate your auth token and add the generated file:
/usr/local/openvpn_as/scripts/certool --auth_token
Configure X509 explicit/extended key usage based on RFC3280 TLS rules:
/usr/local/openvpn_as/scripts/sacli --key "external_pki.remote_cert_usage" --value eku ConfigPut
Configure the use of the X509 “subjectAtlName” attribute for the declaration of auto-login permission:
/usr/local/openvpn_as/scripts/sacli --key "external_pki.autologin_x509_spec" --value "subjectAltName,,autologinrole" ConfigPut
Generate the tls-crypt-v2 key:
/usr/local/openvpn_as/scripts/certool --tls_crypt2_server
Load the newly generated files into the Access Server config database:
/usr/local/openvpn_as/scripts/sacli --key "external_pki.ta_key" --value_file ta.key ConfigPut
/usr/local/openvpn_as/scripts/sacli --key "external_pki.ca_crt" --value_file cacert.crt ConfigPut
/usr/local/openvpn_as/scripts/sacli --key "external_pki.server_crt" --value_file server.crt ConfigPut
/usr/local/openvpn_as/scripts/sacli --key "external_pki.server_key" --value_file newserver.key ConfigPut
/usr/local/openvpn_as/scripts/sacli --key "external_pki.dh_pem" --value_file dh.pem ConfigPut
/usr/local/openvpn_as/scripts/sacli --key "external_pki.auth_token_key" --value_file auth_token.key ConfigPut
/usr/local/openvpn_as/scripts/sacli --key "external_pki.tls_cryptv2_server" --value_file tls_crypt2.key ConfigPut
Start Access Server:
systemctl restart openvpnas
To test our example, we generate a test client, etest.
Sign in to the Admin Web UI.
Click Users.
Click Add New User.
Create the new user, etest, and click Save.
(Optional, for environments using auto-login profiles.) Under Permissions, set Allow Auto-login to Enabled, then Save.
Click Reset Password.
Enter a password and click Reset.
Click Restart.
Finally, generate a server-locked profile. The profile will be stored in etest.ovpn:
sacli GetGeneric >etest.ovpn
For generating an auto-login profile:
sacli --user etest GetAutologin >etest.ovpn
Copy these two files to the client machine:
Client P12 file (etest.p12)
Client profile (etest.ovpn)
Launch OpenVPN Connect v3.
Import the connection profile, etest.ovpn.
Select Menu → Certificate & Tokens.
Under PKCS#12, Select the Add icon.
Select your client P12 file (etest.p12).
Enter the password for this file that you previously configured, then select OK.
Go back to the Home.
Select Menu → My Profiles.
Select the Edit icon for the profile.
Under Certificates, use the Select button to add the external certificate to the profile.
Select the P12 file.
Select Save Changes.
Select Connect to start the profile's connection.
With the release of Access Server 2.14.2, we've made configuring client connection profiles for ePKI easier. Previously, creating these profiles required using the command line, as noted in the tutorial. However, in version 2.14.2 and later, you can now create and manage ePKI client connection profiles directly from Access Server's Client Web UI.
There are two types of ePKI profiles available:
Generic ePKI profile:
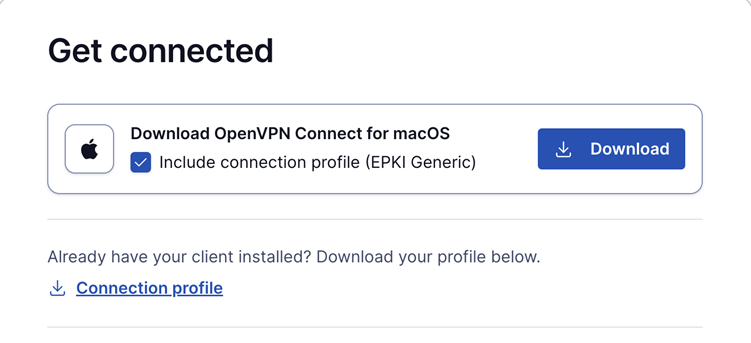
This profile requires the user to authenticate with a password when connecting.
Ideal for environments where a password-based security layer is needed in addition to certificate-based authentication.
Auto-login ePKI profile;
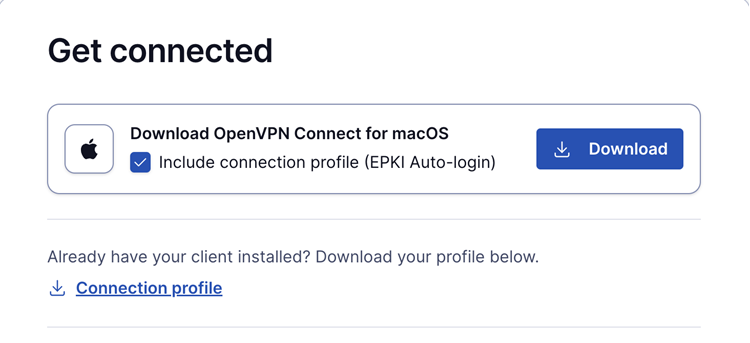
This profile automatically uses the certificate for authentication without requiring a password.
Suitable for unattended devices or systems where automatic, certificate-based login is needed.
In addition, the Import Profile from URL functionality in OpenVPN Connect allows users to import these connection profiles directly, making the configuration process faster and more seamless.
This update simplifies the ePKI setup, providing more flexibility and reducing the reliance on the command line.
A Certificate Revocation List (CRL) is a digitally-signed list maintained by a Certificate Authority (CA). It contains the serial numbers of certificates revoked before their scheduled expiration date. CRLs are a critical security mechanism in any PKI deployment, allowing administrators to immediately invalidate compromised or untrusted certificates.
In Access Server, CRLs ensure that VPN clients using revoked certificates can't authenticate. Even certificates that are otherwise valid can be immediately blocked when security circumstances change.
Configuration and usage
A CRL allows administrators to deny access to specific client certificate serial numbers.
If a client attempts to connect using a certificate listed in the CRL, access is denied.
Any client already connected whose certificate appears in the CRL at the time it's loaded is immediately disconnected.
The CRL field is specified via the
vpn.server.crlkey and initially loaded using:sacli start
Once loaded, the CRL file may be updated at any time. The Access Server automatically reloads it within a few seconds.
Reload timing is controlled by the
vpn.server.crl_resamplekey (integer, in seconds, default = 10).The CRL file must be in PEM format.
Add a CRL to Access Server
Follow these steps to retrieve and enable a CRL in ePKI mode.
1. Obtain the CRL from SecureW2
Sign in to the JoinNow Management Portal.
Go to Dynamic PKI > Certificate Authorities.
Select your Intermediate CA.
Click the view icon under Functions.
Under CRL > Base, copy the CRL URL.
Example:
http://crl.securew2.com/crl/abcde12345/OpenVPN Intermediate CA.crl
Note
SecureW2's Base CRL updates on a default one-week interval. This means newly revoked certificates aren't reflected in the CRL until the next update cycle completes.
If your deployment requires more frequent updates, such as immediate revocation enforcement, contact SecureW2 Support to request a shorter CRL update interval.
2. Download and load the CRL
Connect to your Access Server console and get root privileges.
Download the CRL and save it in PEM format:
wget http://crl.securew2.com/crl/abcde12345/'OpenVPN Intermediate CA.crl' -O /root/crl.pem
Load the CRL into Access Server:
sacli --key "vpn.server.crl" --value "/root/crl.pem" ConfigPut
sacli start
3. Confirm CRL enforcement
Once the CRL is active:
Any client connecting with a revoked certificate is denied access.
Any already-connected client whose certificate appears in the CRL is disconnected automatically.
Future CRL updates are detected and applied automatically according to the resample interval (
vpn.server.crl_resample).